
Proper hand wrapping is the foundation of safe and effective Muay Thai training. Whether you are hitting the heavy bag, working pads with your trainer, or engaging in technical sparring, your hands require structured support to withstand the repetitive, high-impact forces of eight-limbed combat. A correct hand wrap does more than just shield your skin from friction burns inside your gloves; it structurally binds the small bones of your hands together, stabilizes your wrists, and cushions your knuckles.
In Muay Thai, hand wrapping requires a distinct balance compared to traditional western boxing. While boxers can afford a highly rigid, heavily padded wrap that locks the hand into a semi-permanent fist, Muay Thai practitioners must maintain enough hand flexibility to open their palms. This open-hand flexibility is essential for catching kicks, executing active blocks, and controlling opponents during clinch work. Therefore, your wrapping technique must deliver maximum joint protection without compromising your ability to grip and manipulate your training partner.
By mastering a reliable wrapping sequence, you protect yourself from common injuries such as wrist hyperextension, sprained thumbs, and bruised metacarpals. Investing a few minutes before every session to wrap your hands correctly ensures you can train consistently, maintain proper punching form, and prolong the lifespan of your boxing gloves by absorbing excess sweat.
Products mentioned in this guide
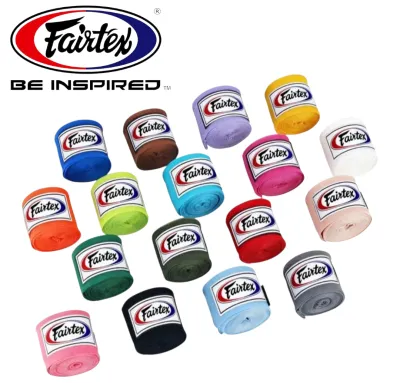
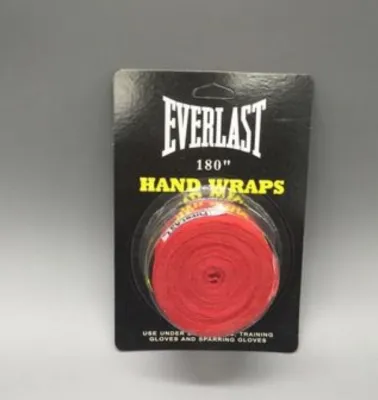
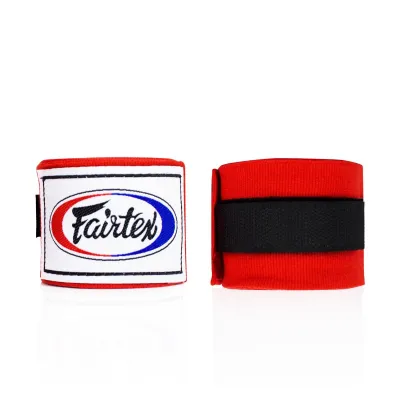
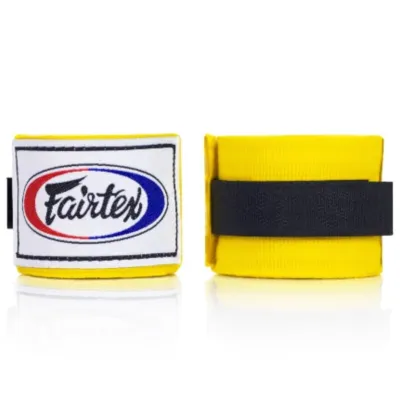
![[SG FREE ] 1Pair 1.5M/3M/5M Boxing Bandages Sports Sanda Muay Thai Training Self-Adhesive Micro Elastic Binding Hand Sp](https://img.lazcdn.com/g/p/2afe27758a20a73d23525f0abd1ee35e.jpg_400x400q80.jpg_.webp)
Prices are valid at publication and may change. Please refer to the product page for the latest price.
Preparing Your Hands and Equipment
Before you begin wrapping, you must select the right equipment for your hand size and training goals. For adult Muay Thai practitioners, the standard recommended wrap length is 180 inches (approximately 4.5 meters). While shorter 120-inch wraps are available, they rarely provide enough material to adequately protect both the wrists and the knuckles of an adult hand, often forcing you to compromise on support in one area. The 180-inch length ensures you have sufficient fabric to weave between your fingers, build a substantial knuckle pad, and secure your wrists with multiple locking layers.
The material of your wraps also plays a critical role in your comfort and protection. Traditional hand wraps are made of 100% non-elastic cotton. While highly durable and machine-washable, cotton wraps do not stretch, which can make it difficult to achieve a contoured fit without creating bulky folds that cause pressure points inside your gloves. Most modern practitioners prefer semi-elastic wraps, often referred to as “Mexican-style” wraps. Made from a blend of cotton and spandex, these wraps offer a slight stretch that conforms naturally to the unique curves of your hand and wrist, providing a snug, secure fit that moves with you during training.
Proper preparation of your hands is equally important for maintaining a hygienic and stable wrap. Always ensure your hands are clean, completely dry, and free of any lotions, body oils, or moisturizers before you start wrapping. Any residual moisture or oil on your skin will cause the wrap to slip and slide as you train, leading to friction blisters, bunched fabric, and a rapid loss of joint support during heavy bag work. In Singapore’s tropical climate, starting with dry hands is especially critical to prevent the early buildup of bacteria and moisture inside your gear.
Step-by-Step Muay Thai Hand Wrapping Technique
Applying your wraps systematically ensures consistent tension and targeted protection. This step-by-step sequence is designed specifically for the unique demands of Muay Thai, offering robust joint reinforcement while keeping your palms functional for clinching.

Anchoring the Thumb and Wrist Base
The foundation of a secure wrap begins at your wrist, which acts as the anchor for the entire structure.
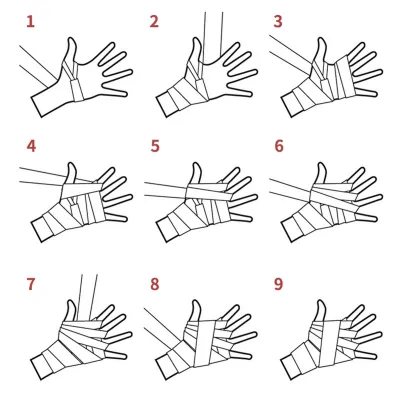
Unravel your hand wrap and locate the thumb loop. Most wraps feature a small tag indicating “this side down” or “this side facing skin.” Place the loop over your thumb so that the remaining fabric runs across the back of your hand, rather than across your palm. Running the wrap over the back of the hand ensures that when you make a fist, the wrap naturally tightens around your wrist and knuckles, preventing it from slipping loose during impact.
Once the loop is secured, bring the wrap down to your wrist and wrap it around 2 to 3 times. Keep your fingers spread wide and your hand in a natural, open position throughout this process to prevent wrapping too tightly. The wrist wraps should overlap each other by about half the width of the fabric to create a clean, uniform band of support.
As you wrap, maintain a consistent, moderate tension. The wrap should feel like a supportive, firm glove rather than a tight tourniquet. Your wrist must feel stabilized and restricted from extreme bending, but you should not experience any squeezing, throbbing, or loss of circulation in your fingers.
Building the Knuckle Pad and Palm Support
With your wrist anchored, you can now transition to protecting your knuckles and the delicate metacarpal bones of your hand.
From the wrist, pull the wrap diagonally across the back of your hand to the outer edge of your pinky finger. Wrap the fabric around your knuckles 3 to 4 times, creating a thick, cushioned pad directly over your striking surface. Ensure the wrap sits flat across the knuckles and does not bunch up or slide down toward your fingers. This pad absorbs the primary shock of your punches, protecting your joints from bruising and long-term wear.
Next, you must secure this knuckle pad by weaving the wrap between your fingers. Bring the wrap diagonally down to the inside of your wrist, loop it around once, and then bring it up between your pinky and ring finger. Run the fabric through, pull it flat, and bring it diagonally back down to the opposite side of your wrist to create an “X” shape across the back of your hand. Repeat this process for the gap between your ring and middle fingers, and finally between your middle and index fingers, anchoring the wrap at the wrist after each pass.
As you perform these finger passes, ensure the fabric lies completely flat against your palm. Avoid letting the material bunch up into a thick rope inside your hand. A flat palm area allows you to close your fist naturally and, crucially for Muay Thai, permits your hand to open fully so you can secure a strong, flat-handed grip during clinch work.
Securing the Thumb and Locking the Wrist
The final phase of the wrapping process focuses on protecting your thumb and securing the entire wrap so it does not shift during training.
The thumb is highly susceptible to hyperextension and sprains when catching kicks, blocking elbows, or landing hooks at odd angles. To protect this joint, bring the wrap from your wrist up and around the base of your thumb, wrapping it once in a clean loop. Pull the wrap gently to provide lateral stability, then bring it back down to your wrist to lock the thumb support in place.
Use the remaining length of your wrap to add extra locking layers. If you have a history of wrist weakness, focus the remaining fabric around your wrist joint. If you are using smaller sparring gloves, you may want to run the remaining wrap back over your knuckles for extra cushioning.
Finish by wrapping the Velcro tab securely around your wrist. Ensure the Velcro tab fastens on the outside or top (dorsal side) of your wrist. Never allow the Velcro to sit on the inside of your wrist; during active clinch work, the abrasive surface of the Velcro can easily scratch your training partner’s neck or face, causing painful skin irritation and distracting from your training.
Verifying Fit, Tension, and Safety
Before you slide your hands into your Muay Thai gloves, you must verify that your wraps are applied correctly and safely. A poorly fitted wrap can cause discomfort, restrict your movement, or even lead to injury.
- The Fist Test: Open your hand completely, then slowly close it into a tight fist. When your hand is open, the wrap should feel comfortable and slightly relaxed, allowing your fingers to stretch. When you close your fist, the wrap should tighten instantly, binding your knuckles and wrist into a solid, reinforced striking surface. If the wrap feels loose when you make a fist, or if it feels painfully tight when your hand is open, you need to rewrap.
- Circulation Check: Pay close attention to the physical sensations in your fingers. If you notice any numbness, tingling, coldness, or if your fingertips begin to change color (turning pale or blue), your wrap is too tight and is cutting off your blood circulation. Remove the wrap immediately to restore blood flow.
- Wrist Alignment: Your wrist should feel firmly supported in a neutral, straight position. The wrap should resist any sudden or extreme bending backward or forward, mimicking the natural alignment required for safe punching. However, it should not feel so rigid that it forces your hand into an unnatural angle or prevents you from rotating your wrist comfortably.
- Safety Boundary: Never attempt to "tough it out" with an uncomfortable or painful wrap. If you feel pinching, localized pain, or a loss of sensation at any point during your warm-up or training session, stop immediately, take off your gloves, and rewrap your hands. Training with compromised circulation or improper support increases your risk of acute joint strain and nerve compression.
Common Wrapping Mistakes and How to Fix Them
Perfecting your hand wrapping technique takes practice. Recognizing common mistakes and knowing how to correct them will save you from training interruptions and unnecessary discomfort.
- Wrapping Too Tightly: Many beginners believe that tighter wraps offer better protection. In reality, wrapping too tightly restricts blood flow, leading to rapid hand fatigue, severe cramping, and a loss of grip strength.
- The Fix: Keep your fingers spread wide throughout the entire wrapping process. Focus on keeping the wrap snug and flat against your skin rather than pulling the fabric with maximum force.
- Leaving Gaps Over the Knuckles: If your wraps are unevenly spaced, gaps can form over your knuckles, leaving the delicate joints exposed to direct impact.
- The Fix: Ensure that each turn around your knuckles overlaps the previous layer by at least half the width of the wrap. Smooth out the fabric as you go to maintain an even, continuous barrier of protection.
- Bunching the Material: Folds, twists, or bunched fabric inside your glove create highly concentrated pressure points. Under the force of heavy impact, these pressure points can cause painful bruises, blisters, and skin abrasions.
- The Fix: Take your time when wrapping. Use your free hand to smooth out the fabric after every single pass, ensuring the wrap lies completely flat against your skin before moving to the next step.
- Incorrect Velcro Placement: Fastening your wrap so that the Velcro tab sits on the inner wrist. This exposed Velcro acts like sandpaper during clinch drills, scratching your training partners.
- The Fix: If you find the Velcro ending on your inner wrist, adjust your starting point slightly or add an extra half-turn around your wrist at the end of the sequence to ensure the fastener lands safely on the outer or top side of your wrist.
Frequently Asked Questions (FAQ)
How often should I wash my Muay Thai hand wraps?
In Singapore’s hot and humid tropical climate, hand wraps accumulate sweat, dirt, and bacteria incredibly fast. To maintain proper hygiene and prevent your gear from developing foul odors, you should wash your hand wraps after every single intense training session. At a minimum, never go more than two sessions without washing them.
To clean your wraps safely, place them inside a mesh laundry bag before putting them into the washing machine. This prevents them from tangling into a giant knot or wrapping around the machine’s agitator, which can stretch and ruin the fabric. Use a gentle cycle with cold or warm water and a mild detergent. Alternatively, you can hand wash them in a sink with warm soapy water.
Always air dry your hand wraps by hanging them up or laying them flat in a well-ventilated area. Avoid using a high-heat tumble dryer, as the intense heat will degrade the elastic spandex fibers in semi-elastic wraps, cause the fabric to shrink excessively, and warp the Velcro tabs, reducing their lifespan and effectiveness.
Community discussion
Share your experience or ask a question. Comments are reviewed before publication.