
Proper hand wrapping is a non-negotiable ritual for anyone stepping up to a heavy bag, focus mitts, or a sparring partner. Whether you are practicing classic Western boxing or the “art of eight limbs” in Muay Thai, your hands require structured support before they ever slide into a pair of gloves. Wrapping your hands correctly secures the delicate bones of your hand, stabilizes your wrist, and cushions your knuckles against repetitive, high-impact forces.
Why Proper Hand Wrapping Prevents Injuries
A boxing glove’s primary job is to distribute the impact across a larger surface area to protect your opponent or training partner, not necessarily to lock your hand’s internal structure in place. The human hand contains 27 small bones and a complex network of ligaments and tendons. When you land a punch, the force travels directly back through these small structures. Without hand wraps, the joints can collapse, the metacarpals can fracture (often called a “boxer’s fracture”), and the wrist can hyperextend or hyperflex.
Wraps act as an external skeleton, binding the bones together so that the entire hand functions as a single, solid unit. This alignment ensures that the impact force is safely transferred up through the forearm bones rather than being absorbed by the fragile joints of the hand. Additionally, wraps fill the empty space inside your gloves, preventing your hand from sliding around, which reduces friction, blisters, and skin tears.
Products mentioned in this guide
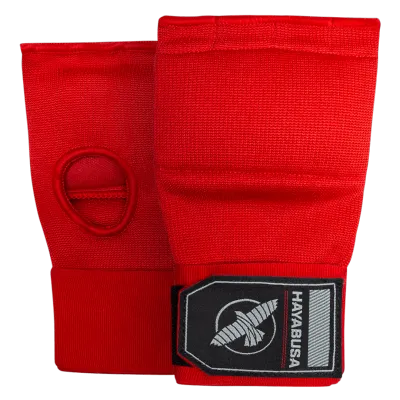
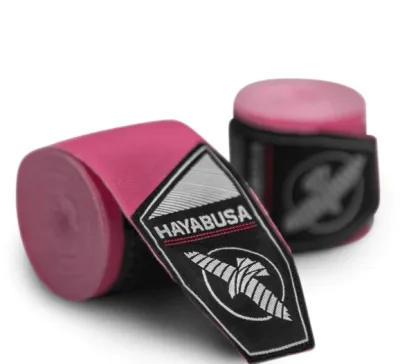
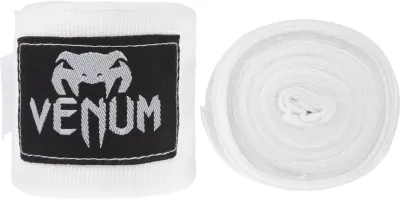
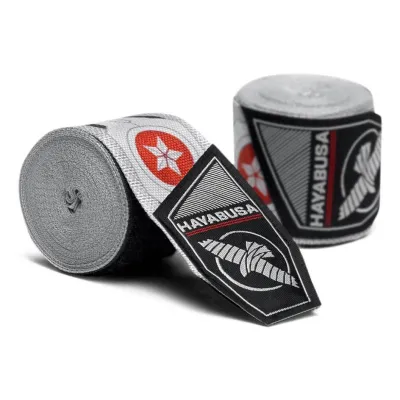
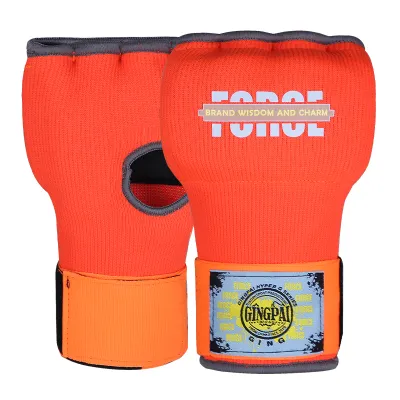
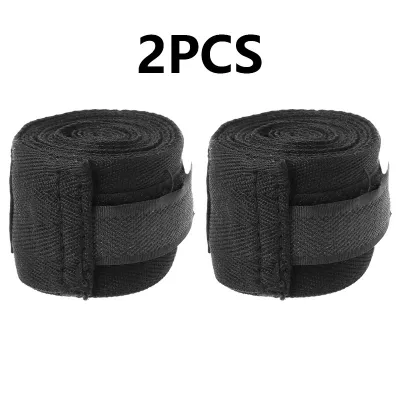
Prices are valid at publication and may change. Please refer to the product page for the latest price.
What You Need: Choosing the Right Hand Wraps
Before you begin wrapping, you must select the correct equipment for your training style, hand size, and sport.

Wrap Length: For most adults, the standard recommended length is 180 inches (approximately 4.5 meters). Shorter wraps, such as 120-inch versions, are generally designed for children or individuals with exceptionally small hands. A 180-inch wrap provides enough material to make multiple supportive passes around the wrist, knuckles, thumb, and between the fingers. Attempting to use a shorter wrap often forces you to compromise on either wrist stability or knuckle padding, leaving you vulnerable to injury.
Material Composition: Hand wraps generally come in two primary materials:
- Traditional Cotton Wraps: Made of 100% non-elastic cotton. These are thick, highly durable, and offer rigid support. However, they have no stretch, meaning they require precise wrapping technique to avoid being too loose or cutting off circulation.
- Semi-Elastic (Mexican-Style) Wraps: Woven with a blend of cotton and spandex or polyester. These offer a slight stretch, allowing them to contour naturally to the shape of your hand and move with your fist. They are highly favored by both beginners and professionals because they provide a snug, custom fit that is less likely to loosen during long training sessions.
Closure and Features: Always look for wraps that feature a built-in thumb loop at the starting end and a secure hook-and-loop (Velcro) fastener at the finishing end. These features ensure the wrap stays anchored from the first turn to the final closure.
Step-by-Step Hand Wrapping Technique
To wrap your hands effectively, start with a relaxed hand. Spread your fingers slightly—about half of your maximum finger span. Keeping your hand completely flat or your fingers tightly closed during wrapping will result in a wrap that is either too tight to make a fist or too loose to offer protection when you close your hand. Maintain a consistent, moderate tension throughout the process. The wrap should feel like a supportive second skin, not a tourniquet.
Phase 1: Anchoring the Thumb and Wrist
Establishing a strong foundation at the wrist is critical, as this is the primary hinge joint vulnerable to bending under impact.
Step 1: Position the Loop: Place your thumb through the starter loop. Ensure that the fabric runs across the back of your hand, not across your palm. If the wrap runs across your palm first, it will pull against your thumb joint in an awkward direction when you tighten the wrap, which can cause discomfort or joint misalignment.
Step 2: Secure the Wrist: Pull the wrap down to your wrist and wrap around it three times. Move from the inside of your wrist toward the outside. This direction of wrapping pulls the wrist joint into a neutral, aligned position. Make sure the wraps cover the base of the hand where the wrist meets the palm, rather than just the lower forearm.
Step 3: Transition to the Hand: From the wrist, bring the wrap diagonally across the back of your hand toward the base of your pinky finger. This diagonal pass anchors the wrist wrap and prepares you to transition to the knuckles.
Phase 2: Padding the Knuckles and Palm
The knuckles are your primary striking surface and require a dense, flat cushion to absorb impact.
Step 4: Wrap the Knuckles: Bring the wrap across the front of your knuckles (from the pinky side to the index finger side) and wrap around them three to four times. Ensure the fabric is completely flat. Avoid overlapping folds, twists, or bunching, as these create hard pressure points that can bruise your knuckles or cause severe friction burns inside your boxing gloves.
Step 5: Anchor the Padding: After the final pass around the knuckles, bring the wrap diagonally down across your palm toward the opposite side of your wrist. Wrap around the wrist once to lock the knuckle padding in place.
Step 6: Support the Metacarpals: Run the wrap diagonally back up across the back of your hand to the knuckles, creating an “X” pattern. This cross-crossing structure binds the metacarpal bones together, preventing them from spreading or collapsing outward when you land a punch.
Phase 3: Locking the Thumb and Securing Fingers
The thumb is highly susceptible to sprains and joint damage, especially during Muay Thai clinching or when landing hooks.
Step 7: Lock the Thumb: Bring the wrap up from the wrist and loop it completely around the thumb joint once. Pull the fabric gently to secure the thumb close to the hand, then bring the wrap back down to the wrist and wrap around the wrist once to anchor it.
Step 8: Thread the Fingers (Optional): To keep the knuckle padding from sliding up during training, you can thread the wrap between your fingers. Bring the wrap up from the wrist and pass it between your pinky and ring finger, then run it out and down to the wrist. Repeat this process between the ring and middle fingers, and finally between the middle and index fingers. Each pass should be followed by a half-wrap around the wrist to anchor the vertical support lines.
Step 9: Clear the Palm: After completing the finger loops, make a diagonal pass across your palm and pull the remaining fabric back down to the wrist.
Phase 4: Stabilizing the Wrist and Finishing
The final phase ensures that all previous layers are locked down and the wrist joint is fully reinforced.
Step 10: Final Wrist Support: Use any remaining wrap material to make additional passes around your wrist. This adds extra layers of stability to the joint, which is especially important if you are hitting heavy bags or sparring.
Step 11: Secure the Closure: Fasten the hook-and-loop (Velcro) strap firmly around your wrist. Ideally, the Velcro should end on the flat, outer side of your wrist. If it ends on the inside or bottom, it may rub against your forearm or scratch your skin when you are holding a high guard or clinching in Muay Thai.
Safety Check: If you run out of wrap before completing these steps, or if you have a massive amount of excess fabric left over, your tension was incorrect or the wrap length is unsuitable. Do not attempt to tuck loose ends into the glove; unwrap the hand and start the process again.
The Fit Test: How to Verify Your Wraps Are Correct
Before you put on your boxing or Muay Thai gloves, you must verify that your hand wraps are applied correctly. A poorly wrapped hand can be just as dangerous as an unwrapped one. Perform these three simple checks:
The Fist Test: Keep your hand open and relaxed. The wraps should feel comfortable and relatively loose, allowing you to move your fingers freely. Now, close your hand into a tight fist. The wraps should instantly tighten, forming a solid, rigid structure around your knuckles and wrist. If the wrap feels loose when you make a fist, or if there is visible bunching of fabric in your palm, the wrap is too loose and will not protect you.
The Circulation Check: Keep your wraps on for two to three minutes while moving your fingers. Monitor your fingertips for any signs of restricted blood flow. If you experience numbness, a tingling “pins and needles” sensation, cold fingertips, or if your skin turns pale or blue, the wraps are too tight. Remove them immediately. Do not attempt to “tough it out” during a workout, as this can cause temporary nerve compression or localized tissue damage.
The Wrist Hinge Test: Extend your arm forward and attempt to bend your wrist up and down. The wrap should significantly restrict extreme bending, keeping your wrist in a mostly straight, neutral alignment. However, for Muay Thai practitioners, the wrap should still allow just enough micro-mobility to execute active hand blocks and establish a proper collar tie during clinching.
Common Wrapping Mistakes to Avoid
Even experienced martial artists occasionally fall into bad habits when wrapping their hands. Recognizing these common errors will keep your hands safe throughout your training journey.
Wrapping at Maximum Tension: Beginners often assume that tighter wraps equal better protection. In reality, wrapping at maximum tension acts as a tourniquet. As you train, your muscles and blood vessels expand due to increased blood flow. If your wraps are already at their limit, your hands will quickly cramp, lose sensation, and fatigue.
Ignoring the Thumb: Some quick-wrapping methods skip the thumb entirely to save time. Leaving the thumb loose makes it highly vulnerable to catching on an opponent’s glove during sparring, jamming on the heavy bag, or being bent backward during a poorly angled hook. Always take the time to run at least one anchoring loop around the thumb.
Allowing Fabric to Bunch or Twist: A flat wrap distributes pressure evenly. A twisted wrap creates a concentrated ridge of thick fabric. Under the pressure of a glove and the impact of a punch, these ridges can dig deep into your skin, leading to painful blisters, friction burns, or localized bruising that can sideline you from training.
Prioritizing Knuckles Over Wrists: While cushioning your knuckles feels important, wrist stability is actually your primary defense against debilitating injuries. Skimping on wrist passes to create a massive, pillow-like knuckle pad leaves your wrist joint weak and highly susceptible to sprains or fractures when landing high-impact shots.
Hygiene and Care: Washing Your Hand Wraps
In Singapore’s hot, humid tropical climate, proper hygiene for your training gear is essential. Hand wraps absorb a significant amount of sweat, dead skin cells, and oils during a workout. If left unwashed, they quickly become a breeding ground for bacteria, mold, and fungi, which can lead to unpleasant odors and skin infections like ringworm or staph.
Wash Regularly: Wash your hand wraps after every two to three training sessions at a minimum. If you participate in high-intensity sparring or train in a gym without air conditioning, wash them after every single use.
Use a Mesh Laundry Bag: Never throw loose hand wraps directly into a washing machine. They will inevitably tangle around the agitator or other clothing, creating a giant, stretched-out knot that can damage your wraps and your washing machine. Place them inside a zippered mesh laundry bag before running them through a gentle machine cycle with mild detergent.
Air Dry Only: Avoid putting your wraps in a high-heat tumble dryer. High heat degrades the elastic fibers in semi-elastic wraps, causing them to lose their stretch and shape, and can shrink 100% cotton wraps. Instead, hang them up to air dry in a well-ventilated space out of direct, intense sunlight.
Roll and Store: Once the wraps are completely dry, roll them up neatly starting from the Velcro end and finishing with the thumb loop. Keeping them rolled flat prevents them from creasing and ensures they are ready to be quickly and smoothly applied at your next training session.
Frequently Asked Questions (FAQ)
Can I use shorter wraps for boxing or Muay Thai?
Shorter wraps, such as 120-inch (3-meter) models, are generally insufficient for standard adult training. They do not provide enough fabric to secure the wrist, knuckles, and thumb simultaneously. For proper safety, adults training in boxing or Muay Thai should stick to 180-inch (4.5-meter) wraps, which offer the necessary length to build a structurally sound protective barrier.
Do I need to wear hand wraps under MMA gloves?
Standard MMA grappling gloves (usually 4 ounces) have a very tight fit and small hand cavities, making it difficult or impossible to fit a traditional 180-inch wrap underneath. For MMA sparring or grappling, athletes often use shorter wraps or specialized, low-profile quick-wrap gel gloves. However, when training MMA striking on heavy bags or pads, it is highly recommended to wear standard boxing gloves (12 to 16 ounces) over full 180-inch hand wraps to protect your hands during high-volume training.
How often should I wash my hand wraps?
You should wash your hand wraps after every heavy training session, or at least every two uses if they did not get heavily soaked. In Singapore’s humid climate, moisture lingers in fabrics, accelerating bacterial growth. Washing them frequently and ensuring they are 100% dry before rolling them prevents skin irritation, infections, and sour odors.
Community discussion
Share your experience or ask a question. Comments are reviewed before publication.