
Why Proper Hand Wrapping Matters for Boxers
Boxers subject their hands to immense impact forces with every punch thrown during training. A proper wrap is not just a pre-workout ritual; it is a fundamental safety measure that prepares your hand’s delicate anatomy for impact. When you land a punch, the force travels through your knuckles, down the small metacarpal bones, and into your wrist joint. Without adequate support, these structures are highly vulnerable to acute injuries and chronic wear.
Hand wrapping serves three primary protective functions: stabilizing the wrist joint, padding the knuckles, and securing the thumb to prevent hyperextension. By wrapping your hands, you compress the loose bones and joints into a single, cohesive unit. This structural unity ensures that the force of impact is distributed evenly across the entire hand and wrist, rather than concentrating on a single vulnerable point.
While boxing gloves provide external padding to cushion the blow, they cannot prevent the internal bones of your hand from shifting. Elastic or hybrid hand wraps, such as Acti Tape, complement your gloves by filling the empty space inside and locking your joints in place. This dual layer of defense is critical for both heavy bag work and sparring, significantly reducing the risk of micro-fractures, sprains, and soft tissue damage over time.
Products mentioned in this guide
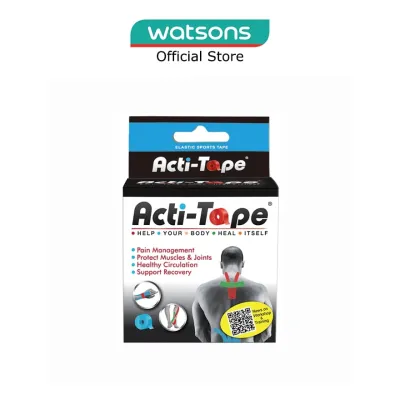
![[SG Stock] Acti-Tape / Acti Tape Elastic Sport Tape 5cmx5m Black/Beige/Red/Blue](https://img.lazcdn.com/g/ff/kf/S0959b3fae034492c9ffa9ee4240bdaabr.jpg_400x400q80.jpg_.webp)
Prices are valid at publication and may change. Please refer to the product page for the latest price.
What You Need Before You Start
Before you begin the wrapping process, gather your essential gear and prepare your hands. You will need a clean, dry pair of hands and your chosen hand wraps. Standard boxing wraps typically come in 120-inch or 180-inch lengths, depending on your hand size and the level of padding you require.

Inspect your wraps thoroughly before application. Check the elasticity of the fabric to ensure it still provides supportive tension, and verify that the Velcro fastener is clean and free of lint or debris. Frayed edges or worn-out sections can cause skin irritation or fail under pressure, so replace any wraps that show significant signs of structural degradation.
Proper hand hygiene is crucial to prevent skin infections, especially since your hands will sweat heavily inside your gloves. Wash and dry your hands completely before wrapping. Additionally, remove all jewelry, including rings and fitness trackers, as these items can pinch the skin, restrict blood circulation, or cause painful lacerations under the pressure of impact.
Step-by-Step Guide to Wrapping Your Hands with Acti Tape
Wrapping your hands is a skill that requires practice to master, as the ideal wrap must strike a balance between support and comfort. The general philosophy of a high-quality wrap is to achieve a snug fit with even tension throughout, without restricting your hand’s natural circulation. It should feel like a supportive second skin that reinforces your joints when you close your fist, yet remains comfortable when your hand is relaxed.
Keep in mind that the exact number of loops around your wrist, knuckles, and thumb will depend on the length of your wrap and the size of your hands. A standard 180-inch wrap allows for comprehensive coverage and extra knuckle padding, while a 120-inch wrap is ideal for smaller hands or a lighter profile. Adjust the steps below based on your specific equipment specifications and personal comfort.
Step 1: Securing the Thumb and Wrist Base
Begin by locating the thumb loop of your Acti Tape wrap. Place your thumb through the loop so that the material runs across the back of your hand, not the palm. This orientation is critical because it ensures that the wrap naturally tightens when you make a fist, rather than pulling loose or twisting during your workout.
Keep your wrist in a neutral, straight position as you begin. Avoid bending your wrist forward or backward, as wrapping a bent joint will lock it into an improper alignment, increasing your risk of injury. Spread your fingers slightly to establish a natural width for your hand.
Wrap the material around your wrist two to three times, maintaining consistent, moderate tension. This initial base stabilizes the wrist joint, limiting excessive backward bending when landing punches. Ensure each layer overlaps the previous one flatly, without wrinkles or twists that could create uncomfortable pressure points.
Step 2: Wrapping the Knuckles and Palm
Once the wrist base is secure, transition the wrap diagonally across the back of your hand toward the base of your pinky finger. From there, bring the wrap across your knuckles to the index finger, preparing to build the primary impact padding over your metacarpals.
Loop the material around your knuckles three to four times. Ensure the wrap covers the main striking surface evenly, extending from the base of your fingers down to the middle joint. Keep your fingers slightly spread during this phase; if you wrap your knuckles with a tightly clenched fist, the wrap will become painfully tight when you actually punch.
To lock this knuckle padding in place, use a figure-eight or “X” pattern. Bring the wrap diagonally down across the back of your hand to the opposite side of your wrist, run it under your wrist, and then bring it diagonally back up to the knuckles. This cross-weaving technique secures the wrap, preventing the layers from sliding or bunching up inside your boxing gloves.
Step 3: Locking the Thumb and Securing the Wrist
With your knuckles padded, you must now secure your thumb, which is highly susceptible to hyperextension and “boxer’s thumb” injuries. Bring the wrap down from the knuckles to the wrist, then loop it once completely around the base of your thumb.
After wrapping the thumb, pull the material across your palm and back down to the wrist. This motion “locks” the thumb in place, anchoring it securely against the side of your hand so it cannot be forced backward upon impact. Ensure the wrap lies flat against the web of your thumb without pinching the skin.
Use the remaining length of your Acti Tape to reinforce your wrist joint. Wrap the remaining material around your wrist, moving slightly up the forearm and back down to build a thick, supportive cuff. Maintain a consistent, moderate tension throughout this final phase; the wrap should feel supportive and secure, similar to a firm handshake, rather than a tight tourniquet that cuts off blood flow.
Step 4: Fastening and Final Adjustments
Position the end of the wrap so that the Velcro fastener finishes on the back of your hand or around your wrist. Avoid ending the wrap on your palm, as the hard Velcro strip can create painful pressure points when you grip your glove’s internal bar, leading to hand fatigue or skin irritation.
Press the Velcro fastener down firmly and smoothly, ensuring it lies completely flat against the underlying fabric. A flat fastener prevents the sharp edges of the Velcro from scratching your skin, damaging the inner lining of your boxing gloves, or scraping your sparring partner during close-range training sessions.
If you find that your wrap is slightly too long for your hand size, do not simply wrap the remaining material tightly around your wrist to use it up. Doing so can dangerously restrict your circulation. Instead, distribute the extra length evenly across your wrist and lower forearm, or tuck any safe, excess fabric neatly under the previous layers, keeping the overall tension moderate and comfortable.
Common Wrapping Mistakes and Safety Boundaries
Even experienced boxers occasionally make mistakes when wrapping their hands. Recognizing these errors early is essential for maintaining safety and performance during your training sessions.
One of the most common mistakes is wrapping the hands too tightly. While tight wraps feel highly secure initially, they restrict blood flow, leading to numbness, tingling, and a loss of motor control in your fingers. Establish a strict safety boundary: if your fingers turn pale or blue, feel cold, or begin to tingle, you must remove the wrap immediately and reapply it with less tension. Never ignore these signs, as prolonged restriction can cause temporary nerve damage.
Conversely, wrapping too loosely fails to provide the necessary joint stabilization. Loose wraps will shift and bunch up inside your gloves as you punch, causing painful friction blisters and leaving your wrist vulnerable to sudden hyperextension. If you feel your wraps slipping or sliding during your warm-up, stop and rewrap your hands before hitting the heavy bag.
Twisted material is another frequent issue that compromises protection. When the wrap twists, it creates thick, concentrated ridges that press deeply into your skin under the pressure of your glove. These ridges can cause severe bruising, skin tearing, and uneven impact distribution. Always take the time to smooth out the wrap as you apply it, keeping the fabric perfectly flat against your skin.
Finally, ignoring product specifications can lead to poor wrapping technique. Different materials, such as pure cotton traditional wraps versus elastic cohesive blends like Acti Tape, behave differently under tension. Elastic blends conform closely to the contours of your hand and require less pulling force to achieve a secure fit. Always refer to the manufacturer’s care and usage instructions to understand the unique characteristics of your specific wraps.
How to Check if Your Wrap is Correct
Before you slide your hands into your boxing gloves, perform three quick verification checks to ensure your wraps are safe, comfortable, and ready for impact.
First, perform the Fist Test. Clench your hand into a tight fist. The wrap should feel instantly snug and highly supportive, with the knuckle padding sitting directly over your main striking knuckles. When you relax your hand, the wrap should feel comfortable and non-restrictive, allowing your fingers to rest naturally.
Second, conduct the Wrist Mobility Test. Try to bend your wrist gently forward and backward. The wrap should significantly restrict extreme bending, providing a stiff, supportive sleeve that keeps the joint aligned. However, it should still allow for a very slight, natural range of motion so you can adjust your punches without feeling completely immobilized.
Third, perform the Circulation Check. Use your opposite hand to pinch one of your fingernails until it turns white, then release it. The natural pink color should return to your nail bed within two seconds. If it takes longer, or if you feel a throbbing sensation in your wrist, your wrap is too tight and must be loosened before you begin training.
Caring for Your Acti Tape and Hand Wraps
Proper maintenance of your hand wraps ensures they remain hygienic, retain their elasticity, and last for many training sessions. Because wraps absorb a significant amount of sweat, they can quickly become a breeding ground for bacteria and unpleasant odors if left uncared for.
Wash your wraps after every training session to maintain hygiene. To prevent them from tangling into a massive knot or damaging other clothing, place them inside a mesh laundry bag and use a gentle, cold machine wash. Avoid using harsh bleach or fabric softeners, as these chemicals can break down the elastic fibers and reduce the wrap’s supportive properties.
Always air dry your wraps completely before storing them. Hang them over a drying rack or clothesline away from direct, intense sunlight. Never put elastic wraps in a hot dryer, as the high heat can warp the synthetic fibers and destroy their elasticity. Storing damp wraps in your gym bag will lead to mold, mildew, and permanent material degradation.
Once fully dry, roll your wraps tightly starting from the Velcro end and finishing at the thumb loop. Rolling them neatly not only keeps your gym bag organized but also ensures that the thumb loop is ready to go first the next time you wrap your hands, saving you valuable preparation time at the gym.
Frequently Asked Questions (FAQ)
How long should my hand wraps be for boxing?
Hand wrap lengths typically range from 120 inches to 180 inches, and the right choice depends on your hand size and training needs. A 180-inch wrap (approximately 4.5 meters) is the standard recommendation for most adults, as it provides ample material to thoroughly pad the knuckles, secure the thumb, and reinforce the wrist. A 120-inch wrap is better suited for youth boxers, individuals with smaller hands, or for quick, minimal wrapping sessions. However, keep in mind that shorter wraps offer significantly less wrist reinforcement and knuckle padding, which may increase your risk of injury during heavy hitting.
Can I wrap my hands if I have a minor wrist sprain?
While hand wraps provide structural stabilization, they are designed for injury prevention in healthy hands, not as medical braces for existing injuries. If you have a minor wrist sprain, a hand wrap cannot replace professional medical treatment, proper rehabilitation, or rest. Wrapping a sprained wrist and continuing to punch can worsen the injury and delay healing. If you experience sharp pain, swelling, or instability during the wrapping process or when making a fist, stop training immediately. Remove the wrap and consult a qualified healthcare professional or physiotherapist to ensure it is safe to resume boxing.
Community discussion
Share your experience or ask a question. Comments are reviewed before publication.