
When you step up to a heavy bag or enter the ring, your hands are your primary tools, but they are also highly vulnerable to injury. Using a high-quality hayabusa hand wrap is one of the most effective ways to safeguard your joints, muscles, and skin during intense training sessions. Properly wrapping your hands is not just about covering them in fabric; it is a systematic process of creating an external skeleton that supports your wrists, knuckles, and thumbs under impact. By mastering this technique, you ensure that every punch you throw distributes force safely throughout your arm, reducing the risk of acute injuries and chronic strain.
To wrap your hands correctly, you must balance tension and coverage. The process begins with securing the wrist joint to keep it aligned, followed by building a thick protective pad over the knuckles, anchoring the thumb to prevent hyperextension, and finishing with a secure lock at the base of the hand. When executed properly, the wrap remains flat and snug, allowing your hand to transition smoothly from a relaxed open palm to a tight, solid fist. This guide provides a detailed, step-by-step breakdown of how to apply your wraps, check for a proper fit, and care for your gear to ensure long-lasting protection.
Why Proper Hand Wrapping Matters in Boxing
The human hand is a complex structure comprised of 27 small bones, numerous ligaments, and delicate joints. When you land a punch, the impact force travels directly through these small bones before reaching the larger bones of your forearm. Without adequate support, the metacarpal bones in your hand can easily compress, shift, or fracture under pressure—an injury commonly referred to as a “boxer’s fracture.” Hand wraps bind these loose bones and joints together, transforming your hand into a single, cohesive unit that can safely absorb and transfer impact.
Products mentioned in this guide
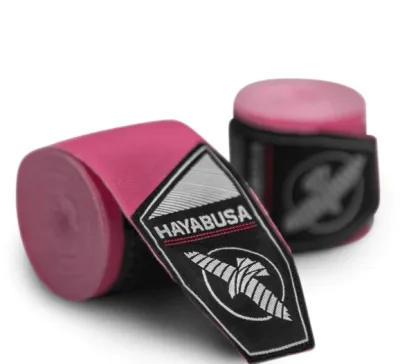
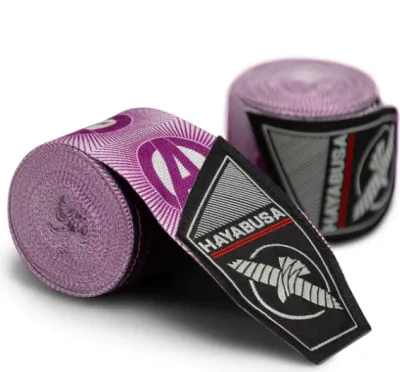
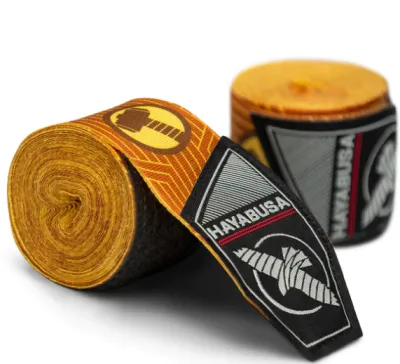
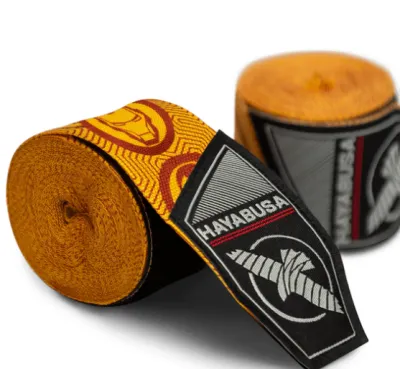
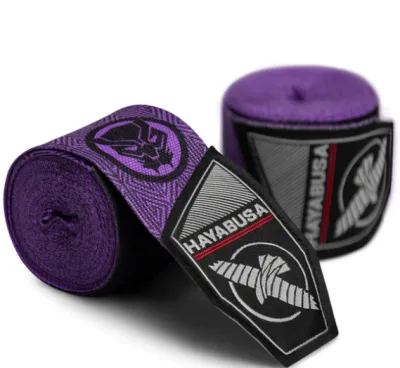
Prices are valid at publication and may change. Please refer to the product page for the latest price.
Beyond bone alignment, hand wraps play a vital role in stabilizing the wrist joint. A common cause of wrist sprains in boxing is the wrist bending or collapsing upon impact, especially when throwing hooks or landing off-center punches. Wrapping the wrist tightly in a neutral, straight position prevents the joint from flexing excessively, keeping your forearm and hand aligned. This structural reinforcement allows you to train with confidence, knowing your wrist is protected from sudden, painful hyperextension.
Additionally, wraps provide essential knuckle padding and prevent skin tears inside your boxing gloves. As your hand moves and sweat builds up during a workout, friction between your knuckles and the inner lining of the glove can cause painful blisters, scrapes, and tears. A properly applied wrap acts as a protective barrier, absorbing this friction and cushioning the knuckles. However, it is crucial to remember that hand wraps are a primary safety layer; they do not replace the need for proper punching technique or well-fitted boxing gloves. Equipment and wraps work together to support your training, but they cannot compensate for poor form or lack of control.
Preparation: Getting Ready to Wrap
Before you begin wrapping, you must prepare your equipment to ensure a smooth, tangle-free application. Start by unrolling your hand wrap completely. If you store your wraps in a loose, tangled pile, they will twist during the wrapping process, which creates uneven pressure points on your hand. Laying them out flat or pre-rolling them tightly from the Velcro end to the thumb loop makes the application process much easier and faster.

Next, identify the correct side of the wrap to face your skin. Hayabusa hand wraps typically feature a “This Side Down” label near the thumb loop. Paying attention to this indicator is critical; if you start wrapping with the wrong side facing down, the hook-and-loop (Velcro) closure at the very end of the wrap will face inward when you reach your wrist, forcing you to twist the wrap or start completely over. Ensuring the label faces your skin at the start guarantees that the Velcro aligns perfectly at the finish.
Finally, always begin the process with clean, dry hands. In warm, humid environments, starting with damp or sweaty hands can cause the semi-elastic material of the wrap to slip, bunch up, or stretch unevenly during your workout. Furthermore, wrapping damp hands traps moisture against your skin, which can lead to bacterial growth, unpleasant odors, and premature degradation of the wrap’s elastic fibers. Taking a moment to wash and thoroughly dry your hands before wrapping helps maintain hygiene and keeps your gear in top condition.
Step-by-Step Guide to Wrapping Your Hands
Applying your hand wraps correctly requires a systematic approach that balances support across your wrist, knuckles, and thumb. By following a consistent sequence, you can establish a reliable routine that ensures your hands are fully protected before every training session.
Step 1: Anchor the Wrist with the Thumb Loop
To begin, slide the thumb loop over your thumb, ensuring the loop sits comfortably at the base of the joint. Make sure the “This Side Down” label is facing your skin. Keep your palm facing down and your fingers spread slightly apart to prevent wrapping too tightly from the start.
Pull the wrap across the back of your hand toward your wrist. It is highly important to run the wrap over the back of the hand rather than the palm; wrapping across the back pulls the wrist into a naturally straight, aligned position, whereas wrapping across the palm can pull the wrist downward into a vulnerable, bent position.
Wrap the material around your wrist two to three times. Keep the wrist joint completely straight and neutral as you do this. The wraps should feel snug enough to hold the joint in place but not so tight that they pinch your skin or restrict blood flow. Ensure the material lies completely flat with each pass, as any folds or twists will concentrate pressure and cause discomfort once you put on your boxing gloves.
Step 2: Pad the Knuckles and Palm
Once your wrist is anchored, bring the wrap diagonally up from the inside of your wrist, across the back of your hand, to the outside of your pinky knuckle. This diagonal path positions the wrap to begin covering your primary impact zone.
Wrap the material across your knuckles three to four times. As you wrap, keep your fingers spread slightly. If you wrap your knuckles with a closed fist or tightly pressed fingers, the wrap will become painfully tight when you actually close your hand to punch. The goal is to create a thick, flat pad directly over the metacarpal joints.
After completing the passes over your knuckles, bring the wrap diagonally back down across your palm to the opposite side of your wrist. This movement creates an “X” pattern on the back of your hand, which locks the knuckle padding securely in place and prevents it from sliding up or shifting during training. The number of passes you make over the knuckles can be adjusted based on the total length of your wrap and how snugly your hands fit into your boxing gloves.
Step 3: Secure the Thumb and Cross the Hand
With the knuckles padded, the next step is to stabilize the thumb. Run the wrap from your wrist up to the base of your thumb. Loop the wrap completely around the thumb once, starting from the back and moving around to the front.
This single loop secures the thumb joint, preventing it from being pushed backward or jammed if you land an awkward punch. Keep the wrap snug but not restrictive; you must still be able to bring your thumb down comfortably to close your fist.
After looping the thumb, bring the wrap back down to your wrist to anchor it. From here, transition into a figure-eight pattern. Run the wrap diagonally across the back of your hand, through the spaces between your fingers, and back down to the wrist. This pattern binds the fingers, knuckles, and wrist together into a unified structure, preventing the wrap from bunching up and ensuring that the entire hand is reinforced against impact.
Step 4: Lock the Wrist and Fasten the Velcro
With your knuckles, thumb, and fingers fully secured, direct the remaining length of the wrap back down to your wrist. The wrist is the foundation of your hand support, and any extra material should be used to reinforce this joint.
Make final stabilizing passes around your wrist, gradually moving slightly upward toward the forearm to extend the area of support. Ensure each pass overlaps the previous one by about half the width of the wrap to create a consistent, layered sleeve of protection.
Fasten the wide Velcro closure firmly around your wrist. The Velcro should sit flat against the wrap without overlapping onto the back of your hand or your knuckles, as this can restrict your hand movement and reduce the effectiveness of the wrist support. If you find that the wrap is slightly too long for your hand size, distribute the excess length evenly by making an extra pass around your forearm or wrist before fastening, rather than bunching it up in one spot.
How to Verify the Perfect Fit
Once you have finished wrapping both hands, you must verify that the wraps fit correctly before putting on your boxing gloves. A poorly fitted wrap can lead to hand fatigue, restricted circulation, or joint injuries during your workout. Use the following three checks to ensure your wraps are applied perfectly:
- The Fist Test: Open your hand completely; the wrap should feel relatively relaxed and comfortable, allowing you to stretch your fingers. Now, close your hand into a tight fist. The wrap should instantly tighten, feeling highly supportive, firm, and snug across your knuckles and wrist, with no loose fabric or shifting layers.
- Circulation Check: Inspect your fingertips to ensure blood flow is unrestricted. Your fingers should not feel cold, look pale or blue, or experience any tingling or numbness. You can perform a quick capillary refill test by pressing firmly on one of your fingernails until it turns white, then releasing it; the natural pink color should return within two seconds.
- Mobility Check: Attempt to bend your wrist forward and backward. While you should still have enough mobility to form a proper fist and flex your wrist slightly, the wrap should provide strong resistance, preventing your wrist from folding completely under pressure.
If you experience any tingling, numbness, coldness, or if your hand feels painfully squeezed, do not attempt to train through the discomfort. Stop immediately, unwrap your hand, and redo the process with slightly less tension. Training with restricted circulation can cause nerve irritation and severe hand cramping.
Common Wrapping Mistakes to Avoid
Even experienced trainers can fall into bad habits when wrapping their hands. Recognizing and avoiding these common mistakes will help you maintain optimal hand safety and get the most out of your training gear.
One of the most frequent errors is wrapping the hands too tightly. It is easy to confuse tightness with support, but treating your hand wrap like a tourniquet will quickly cut off your circulation. This leads to rapid hand fatigue, severe cramping, and a loss of grip strength midway through your training session. The wrap should rely on its structured layers and the natural elasticity of the fabric to provide support, rather than extreme tension.
Another common mistake is allowing the material to twist. When the wrap twists, it reduces the surface area in contact with your skin and creates thick, hard ridges. These ridges concentrate pressure on specific areas of your hand, which can cause painful blisters, skin irritation, and uneven support. Always take the time to smooth out the wrap and keep it lying completely flat with every pass.
Skipping the thumb is another critical error. Because the thumb is highly mobile, it is particularly susceptible to hyperextension and joint damage when hitting heavy bags or pads. Failing to secure the thumb leaves it isolated and vulnerable to catching on your opponent’s guard or the edge of the glove. Always include at least one dedicated loop around the base of the thumb to anchor it to the wrist.
Lastly, ensure you avoid uneven knuckle padding. If you bunch the wrap too high above your knuckles or too low on your fingers, your metacarpals will be left exposed to direct impact. This uneven distribution can lead to bruised knuckles and joint soreness. Make sure the knuckle pad is centered directly over the prominent joints of your fist to provide maximum cushioning.
Maintaining and Washing Your Hayabusa Hand Wraps
Proper care and maintenance are essential to preserve the elasticity, hygiene, and overall lifespan of your hand wraps. Because wraps absorb a significant amount of sweat during training, neglecting to wash them regularly can cause them to become stiff, abrasive, and foul-smelling.
Always unroll your wraps completely before washing them. Leaving them bunched up prevents water and detergent from penetrating the inner layers, resulting in an incomplete clean. Once unrolled, place the wraps inside a mesh laundry bag before throwing them into the washing machine. This simple step is crucial; without a laundry bag, the long, loose straps will inevitably wrap around the washing machine agitator or tangle with other clothing, stretching out the fabric and ruining the Velcro closures.
Wash your wraps in cold or warm water using a mild laundry detergent. Avoid using harsh bleaches or fabric softeners, as these chemicals break down the synthetic elastic fibers over time, causing the wraps to lose their stretch and supportive qualities.
After washing, air dry the wraps by laying them flat or hanging them up in a well-ventilated area. In humid climates, hanging them near a window or fan ensures they dry quickly and thoroughly, preventing mold or mildew. Explicitly avoid using a high-heat tumble dryer, as extreme heat can melt, warp, or prematurely degrade the delicate elastic fibers and cause the Velcro tabs to curl and lose their grip. Once the wraps are completely dry, roll them up neatly starting from the Velcro end, leaving them flat, smooth, and ready for your next session.
Frequently Asked Questions (FAQ)
How long should Hayabusa hand wraps be for boxing?
Standard adult boxing hand wraps are typically 180 inches (approximately 4.5 meters) in length. This is the recommended size for most adults because it provides ample material to thoroughly cover the wrist, knuckles, thumb, and individual fingers, ensuring maximum protection. Shorter 120-inch wraps are generally reserved for youth boxers, individuals with exceptionally small hands, or for use under low-profile MMA gloves where space is highly limited.
Can I wear Hayabusa hand wraps under MMA gloves?
Yes, you can wear hand wraps under MMA gloves, but you must modify your wrapping technique to accommodate the smaller glove size. Because MMA gloves have a much tighter, more form-fitting hand compartment (typically 4oz to 7oz) compared to standard boxing gloves, a full 180-inch wrap applied with standard thickness will make it very difficult to slip your hand into the glove. To resolve this, use a thinner wrapping style with fewer passes over the knuckles, or switch to a shorter 120-inch wrap to maintain wrist stability without adding excessive bulk to your hand.
Community discussion
Share your experience or ask a question. Comments are reviewed before publication.