
Wrapping your hands with Hayabusa hand wraps is the most critical preparatory step before you slip on your boxing or MMA gloves. To do it correctly, you must anchor the wrap at your thumb, secure your wrist, cushion your knuckles, and lock your fingers to distribute impact forces evenly. This systematic method helps prevent common training injuries and maintains optimal hand health.
Hand wraps are not merely accessories designed for comfort or sweat absorption; they serve as an essential structural shield. Whether you are a beginner stepping into a local combat sports gym or an experienced martial artist preparing for sparring, mastering the wrapping technique ensures your hands remain protected through every round of heavy bag work, pad drills, or live training.
Why Proper Hand Wrapping Matters for Boxing and Martial Arts
The human hand is a highly complex structure consisting of 27 small bones, including the carpals, metacarpals, and phalanges. These delicate bones are supported by an intricate network of joints, tendons, and ligaments that are naturally vulnerable to repetitive, high-velocity impact. When you strike a heavy bag or focus mitts, the kinetic energy from your body travels down your arm and discharges directly through these small bones.
Products mentioned in this guide
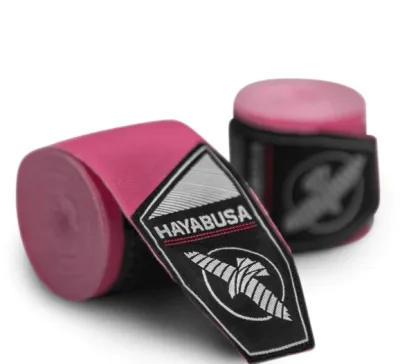
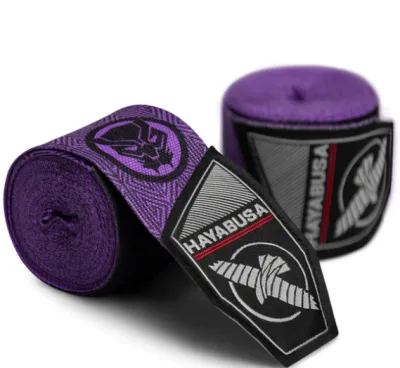
Prices are valid at publication and may change. Please refer to the product page for the latest price.
Without adequate support, the force of a punch can cause these bones to compress, shift, or fracture—an injury commonly referred to as a “boxer’s fracture.” Hand wraps act as a cohesive, protective cast that binds the metacarpals together, preventing them from spreading or collapsing upon impact. By securing the hand into a single, solid unit, wraps ensure that the shock of each strike is distributed evenly across the entire structure of the hand rather than concentrated on a single vulnerable joint.
In addition to protecting the hand itself, wraps play a vital role in stabilizing the wrist joint. The wrist is prone to hyperextension or hyperflexion if a punch lands at an awkward angle, such as an off-center hook or a slipping cross. Wraps lock the wrist in a straight, neutral alignment with the forearm, minimizing the risk of painful sprains. While modern boxing gloves offer external padding, they cannot prevent internal joint movement; that structural integrity must be established by high-quality hand wraps underneath.
Preparation: What You Need Before You Start
Before you begin the wrapping process, you must select the correct equipment for your training needs. Standard adult Hayabusa hand wraps typically measure 180 inches (approximately 4.5 meters) in length. This professional-grade length is highly recommended for adults because it provides sufficient fabric to thoroughly cover the wrist, knuckles, and individual fingers without forcing you to compromise on support in any single area.

Starting with clean, dry hands is essential for both hygiene and performance. In warm, humid training environments like Singapore, moisture on the skin can cause the fabric to slip during high-intensity sessions, leading to loose wraps and potential friction blisters. Wash and dry your hands thoroughly to ensure the wraps adhere securely to your skin and do not shift inside your gloves.
To make the wrapping process smooth and efficient, unroll your hand wraps completely on a flat surface before you start. Eliminate any twists, folds, or tangles in the fabric. This preparation prevents you from having to pause and untangle the wrap mid-process, allowing you to maintain consistent tension from start to finish.
Step-by-Step Guide to Wrapping Your Hands with Hayabusa Wraps
The primary philosophy behind hand wrapping is to achieve a snug, supportive fit that protects your joints without restricting your blood flow. When your hand is relaxed, the wrap should feel comfortable and non-restrictive; when you close your hand into a fist, the wrap should tighten naturally to form a hard, protective shield over your knuckles and a rigid brace around your wrist.
This step-by-step guide is designed for standard semi-elastic Hayabusa wraps, which utilize a high-quality cotton-synthetic blend. This material provides a slight stretch (often called “Mexican-style”), allowing the wrap to conform to the unique contours of your hand more effectively than rigid, non-elastic cotton wraps.
Step 1: Anchor the Thumb Loop and Secure the Wrist
Begin by spreading your fingers wide and keeping your wrist in a straight, neutral position. Locate the thumb loop at the end of the wrap and slip it over your thumb. Ensure the fabric runs across the back of your hand rather than down your palm; most Hayabusa wraps feature a “This Side Down” print near the loop to help you orient the fabric correctly so the Velcro aligns properly at the end.
Pull the wrap diagonally down to your wrist and wrap it firmly around the wrist joint two to three times. Keep the tension firm but comfortable, ensuring each layer overlaps the previous one by about half its width. This initial step establishes a stable foundation that prevents the wrap from sliding up your forearm during training.
Step 2: Build Wrist Support and Cross the Palm
Once the wrist anchor is secure, bring the wrap diagonally up across the back of your hand, starting from the pinky side of your wrist up to the space between your thumb and index finger. Pass the wrap across your palm and then back over the top of your hand to form an “X” pattern. This crossing motion locks the wrist joint firmly in place.
It is critical to keep your wrist completely straight and your fingers spread wide during this transition. If you bend your wrist while wrapping, the fabric will lose its supportive tension the moment you straighten your arm to punch, defeating the purpose of the wrist lock.
Step 3: Protect the Knuckles and Palm
From the back of your hand, bring the wrap around your knuckles, wrapping them three to four times. Ensure the fabric lies completely flat and smooth across the striking surface, extending from the base of your fingers down to the middle of your hand. This creates a thick, protective cushion that absorbs the raw impact of your strikes.
To secure this padding and prevent the wrap from shifting, weave the fabric between your fingers. Run the wrap from the wrist, up through the space between your pinky and ring finger, around the finger, and back down to the wrist. Repeat this process for the ring and middle finger, and finally the middle and index finger, making sure the wrap lies flat against the skin to avoid pinching.
Step 4: Lock the Thumb and Fasten the Velcro
After securing the fingers, bring the wrap down across the back of your hand to the base of your thumb. Wrap around the thumb once, pulling gently to secure the joint without pulling the thumb awkwardly inward. This step prevents the thumb from catching on the glove’s interior or hyperextending during impact.
Bring the remaining fabric back down to your wrist and wrap it around the wrist joint to use up the remaining length. Fasten the Velcro strap securely. The Velcro should sit flat against your wrist, away from the joint crease, to prevent it from scratching your skin or catching on the inner lining of your boxing gloves.
Common Wrapping Mistakes and How to Avoid Them
One of the most frequent errors athletes make is wrapping their hands too tightly. While a tight wrap feels incredibly secure at first, your muscles naturally pump and expand with blood during intense exercise. If the wrap has no give, this expansion can restrict circulation, leading to cold fingers, numbness, tingling, or cramping that will force you to stop training immediately to remove the wraps.
Conversely, wrapping too loosely or leaving gaps over the knuckles offers virtually no structural protection. Loose wraps will quickly unravel inside your boxing gloves as you punch, causing the fabric to bunch up in the palm. This bunching not only compromises your safety but also creates an uncomfortable fit that can ruin your focus during training.
Another common mistake is allowing the fabric to twist or fold during application. Twisted sections create thick, hard ridges that press into your skin under the pressure of your glove. These ridges can cause painful friction burns, hot spots, or minor bruising over the delicate bones of your hand, turning an otherwise productive training session into a painful experience.
How to Check if Your Hand Wraps Are Applied Correctly
Before you slip your hands into your boxing gloves, you must perform a quick three-step verification check to ensure your wraps are applied safely and effectively. First, make a tight fist. The wrap should tighten up instantly, creating a solid, hard shield over your knuckles, while your wrist feels completely locked and straight. When you open your hand, the wrap should feel relaxed and comfortable.
Second, check your circulation to ensure the wraps are not too tight. Press firmly on one of your fingernails for two seconds and then release it; the blood should return to the nail bed, turning it pink again, within two seconds. If your fingers feel cold, look pale, or turn slightly blue, your wrap is restricting blood flow and must be undone and reapplied with less tension.
Third, test your wrist mobility by attempting to bend your hand forward and backward. You should feel a firm resistance that prevents extreme flexion or extension, but you should still be able to move your hand slightly to adjust your grip. If your wrist can bend completely or if it feels painfully immobilized, adjust the wrist wraps accordingly before proceeding to your workout.
Caring for Your Hayabusa Hand Wraps to Ensure Longevity
Proper maintenance of your Hayabusa hand wraps is essential for hygiene and longevity, particularly in hot, humid climates where bacteria and mold can thrive in damp athletic gear. You should wash your wraps after every single training session to remove sweat, salt, and bacteria. Leaving dirty wraps in a closed gym bag is a recipe for unpleasant odors and degraded fabric.
Always wash your wraps in cold water and place them inside a mesh laundry bag. This simple step prevents the long, elastic straps from tangling around the washing machine’s agitator or wrapping around other clothing, and it protects the Velcro from snagging and damaging the wrap’s fabric. Avoid using bleach or fabric softeners, as these chemicals can break down the synthetic elastic fibers and reduce the wrap’s supportive qualities.
Air-drying your wraps is highly recommended to preserve their elasticity. Hang them up in a well-ventilated indoor area or in the shade, away from direct, harsh sunlight which can make the fibers brittle. Avoid using a high-heat clothes dryer, as excessive heat will shrink the cotton and warp the elastic components, significantly shortening the lifespan of your wraps.
Once your wraps are completely dry, roll them up tightly starting from the Velcro end, leaving the thumb loop on the outside. This keeps the fabric flat, smooth, and free of wrinkles, making your next wrapping session faster and more efficient. Taking a few minutes to care for your wraps ensures they will continue to protect your hands for many training sessions to come.
Community discussion
Share your experience or ask a question. Comments are reviewed before publication.