
Keeping a protein shake cold during a workout in Singapore’s intense tropical heat is a common challenge for fitness enthusiasts. When commuting to the gym or exercising in non-air-conditioned spaces, a lukewarm shake can quickly become unappealing and prone to rapid bacterial growth. While many brands claim to offer superior cooling performance, there is no single universal winner that fits every workout routine. Finding the right insulated protein bottle requires looking past marketing buzzwords and evaluating the physical construction, lid design, and thermal properties of the flask. By understanding how vacuum insulation works and how to verify manufacturer specifications, you can select a bottle that reliably maintains a refreshing temperature from your first set to your post-workout stretch.
Key Insulation Specifications to Check Before Buying
To ensure your protein bottle can withstand high ambient temperatures, you must look closely at its structural specifications. The gold standard for thermal retention is double-wall vacuum insulation. This construction features an inner and outer wall, typically made of food-grade 18/8 stainless steel, with the air evacuated from the space between them. Because a vacuum contains no air molecules, it virtually eliminates heat transfer via conduction and convection. When browsing options, verify that the product label explicitly states “vacuum insulated” rather than simply “double-walled,” as non-vacuum double-walled bottles contain air or foam, which conduct heat much faster.
Another critical feature to check is the presence of an internal reflective lining. High-performance insulated bottles often incorporate a thin copper or silver-colored foil layer wrapped around the inner stainless steel wall. This lining acts as a radiation barrier, reflecting thermal radiation away from your cold beverage and back toward the outside environment. While you cannot see this layer directly, reputable manufacturers will list copper plating or thermal radiation barriers in their official technical specifications.
Products mentioned in this guide
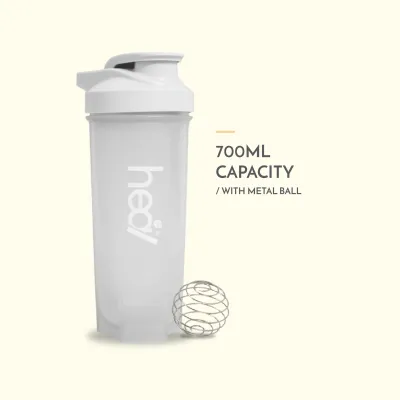
![[Japan] Kokubo Protein Shaker / 500 ml / Protein Shaker Bottle / Made In Japan](https://img.lazcdn.com/g/p/39d6b8481aef3b7befffe610dcb6a706.jpg_400x400q80.jpg_.webp)
![[Shopwithme99] 3 in 1 Shaker BPA Free Steel Mixing Ball Gym Protein Shaker Bottle With Pills and Powder Container](https://img.lazcdn.com/g/p/ddd41d5e1f5a6e5e91d2dfe4dedcafc7.png_400x400q80.png_.webp)
Prices are valid at publication and may change. Please refer to the product page for the latest price.
Finally, consider the physical volume of the bottle. Thermal mass plays a significant role in temperature retention; larger volumes of cold liquid naturally resist temperature changes longer than smaller volumes. If you plan to be away from a refrigerator for several hours, opting for a larger capacity bottle—such as 700 ml or 950 ml—will help maintain a lower temperature over time, even if you do not fill it to the brim with powder and water.
How Lid and Spout Designs Affect Shake Temperature
While the body of an insulated bottle prevents heat transfer through the sides, the lid is almost always the weakest link in the thermal barrier. Most lids are made of plastic, which does not insulate as effectively as vacuum-sealed stainless steel. Therefore, the design of the opening and how tightly it seals will directly impact how long your shake stays cold during a humid gym session.

When comparing lid styles, screw-top lids generally offer the most secure thermal seal because they provide a thick, continuous barrier with minimal air exposure. In contrast, flip-straws and chug caps offer quick, one-handed drinking convenience but introduce more points of potential heat entry. Every time you open a flip-top or straw lid, warm ambient air enters the bottle, accelerating the warming process. If maximum cooling is your priority, a simple, insulated screw-cap lid is highly effective, whereas a straw lid is better suited for shorter workouts where convenience outweighs long-term temperature retention.
Regardless of the lid style, you must inspect the quality of the sealing gaskets. High-quality silicone gaskets are essential not only for preventing messy leaks in your gym bag but also for creating an airtight thermal barrier. Look for thick, removable silicone rings that fit snugly inside the lid threads. These gaskets prevent warm air from seeping into the bottle through microscopic gaps, preserving the internal cold environment while you train.
How to Evaluate Brand Cooling Claims for Hot Climates
When shopping for a protein bottle, you will frequently encounter bold marketing claims, such as promises to keep drinks cold for 12, 24, or even 36 hours. In a hot and humid climate, these numbers can be highly misleading if taken at face value. To make an informed decision, you must learn to interpret these claims critically and look for the testing conditions behind them.
Most manufacturers test their cooling performance in temperature-controlled laboratories with an ambient temperature of around 20°C to 22°C, often filling the bottle entirely with solid ice before adding cold water. In reality, your gym bag might sit in a hot car, an outdoor locker, or a non-air-conditioned functional fitness zone where temperatures are significantly higher. Furthermore, you are unlikely to fill your protein shaker with 100% ice, as this would prevent the powder from mixing properly. To estimate real-world performance, assume that a bottle rated for “24 hours cold” under standard test conditions will likely keep your shake refreshingly cold for about 4 to 6 hours in high-heat environments when mixed with standard chilled water and a few ice cubes.
To verify these claims, look for independent user feedback and reviews from buyers living in tropical regions. Pay close attention to comments mentioning how well the bottle performs during outdoor sports or in high-humidity settings. Be cautious of red flags in product descriptions, such as vague terms like “thermal protection” or “insulated wall” without any mention of “vacuum” technology. If a brand does not explicitly state that the bottle uses double-wall vacuum-insulated 18/8 stainless steel, it is highly likely a basic plastic or single-walled metal bottle that will sweat and warm up within minutes.
Preventing Spoilage and Odors After Your Workout
Using an insulated bottle for protein shakes requires a higher level of hygiene and care than using it for plain water. Protein powders contain dairy, soy, or plant-based proteins that, when mixed with water, create an ideal breeding ground for bacteria, especially when exposed to warm temperatures. Even in an insulated bottle, a shake should not be left sitting for extended periods after your workout.
As a general rule, you should consume your mixed protein shake within two hours of preparation if it is not kept thoroughly chilled. If your insulated bottle successfully keeps the temperature below 4°C, you can safely extend this window, but once the shake begins to warm up, bacterial growth accelerates rapidly. Leaving a half-empty protein bottle in your gym bag or car for several hours in the heat will inevitably result in a sour, foul odor that can be incredibly difficult to remove from plastic lids and silicone gaskets.
To prevent permanent odors and staining, establish a strict cleaning routine immediately after your workout. Rinse the bottle with warm water as soon as you finish your shake. When you get home, disassemble the lid completely, removing the silicone gaskets and any mixing grids or shaker balls. Wash these components with mild dish soap and a soft bottle brush, paying close attention to the threads of the lid where protein residue tends to accumulate. For the interior of the bottle, look for brands that feature electropolished stainless steel interiors, as this smooth finish resists staining, prevents flavor retention, and makes it harder for bacteria to cling to the metal surface.
Decision Framework: Matching the Bottle to Your Routine
Choosing the right insulated protein bottle ultimately depends on your specific workout habits, preparation preferences, and how you plan to clean the flask. There is no single option that excels in every scenario, so you should match the bottle’s design to your daily routine.
If your training sessions are long, take place outdoors, or involve commuting in the heat, prioritize maximum thermal retention. In this case, choose a high-capacity, double-wall vacuum-insulated bottle with a narrow-mouth screw-top lid. This setup minimizes heat transfer and ensures your shake remains ice-cold for hours. However, keep in mind that narrow openings make it more challenging to pour in large scoops of protein powder without a funnel, so you may need to prep your shake at home before leaving.
If you prefer to mix your powder at the gym immediately before consuming it, a wide-mouth insulated shaker bottle is the more practical choice. These bottles allow you to easily dump in powder, add water from a water cooler, and drop in a metal shaker ball. While the wider mouth and plastic flip-cap lid may slightly reduce the overall hours of cold retention compared to a narrow-mouth flask, it provides the rapid mixing and quick drinking access needed between high-intensity sets.
Before making your final purchase, always verify the manufacturer’s cleaning instructions. Many vacuum-insulated bottles are not dishwasher safe because the intense heat and water pressure of a dishwasher cycle can damage the vacuum seal over time, rendering the insulation useless. If you prefer the convenience of a dishwasher, look specifically for models labeled as dishwasher-safe, or be prepared to hand-wash your bottle to preserve its cooling performance for years to come.
Frequently Asked Questions (FAQ)
Can I put ice cubes in a protein shaker bottle?
Yes, you can put ice cubes in an insulated protein shaker bottle, but you should check the internal clearance of your mixing mechanism first. If your bottle uses a free-floating wire whisk ball, ice cubes can sometimes get caught inside the whisk or block it from moving freely, which hinders powder dissolution. If your bottle features a fixed plastic mixing grid built into the lid, ensure the ice cubes are small enough to sit below the grid so they do not block the liquid flow when you drink. Adding a few ice cubes is highly recommended in hot climates, as it helps maintain a low temperature, but you should shake the bottle vigorously to ensure the powder dissolves completely around the ice.
Do insulated bottles stop protein powder from clumping?
No, insulation alone does not prevent protein powder from clumping. Clumping is resolved by mechanical agitation, which requires a mixing element like a wire blender ball, a built-in mixing grid, or a removable strainer. Because cold water actually makes some protein powders slightly harder to dissolve compared to room-temperature water, having a high-quality mixing mechanism is even more critical in an insulated bottle. To minimize clumps when using cold water, try adding your liquid to the bottle first before dumping the protein powder on top, then shake immediately to ensure the powder does not settle and stick to the bottom.
Community discussion
Share your experience or ask a question. Comments are reviewed before publication.