
No single brand holds an exclusive monopoly on keeping protein shakes cold. While marketing campaigns often highlight proprietary names for their cooling technologies, temperature retention is ultimately governed by the laws of thermodynamics rather than brand logos. The duration your post-workout shake remains chilled depends entirely on the specific engineering, materials, and insulation methods utilized in the bottle’s construction.
For those training in hot and humid climates like Singapore, where ambient temperatures frequently hover around 30°C and high humidity accelerates thermal transfer, the clear winner is double-wall vacuum-insulated stainless steel. This technology physically blocks heat from entering the bottle, keeping your liquids cold for several hours.
Alternative designs, such as gel-lined walls or removable ice cores, provide moderate cooling but require pre-freezing and lose their efficacy quickly in warm environments. Standard plastic shaker bottles offer virtually no thermal protection. To get the best performance, you must look past the brand name and evaluate the underlying insulation technology, lid design, and material specifications.
Products mentioned in this guide
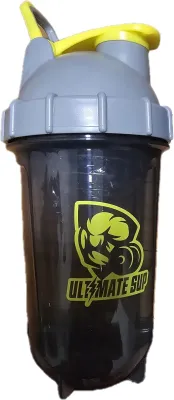
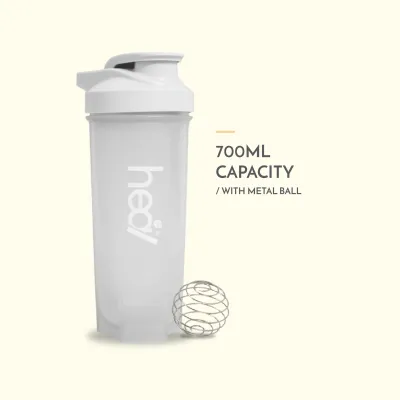
![[Cheapest] Baebear Protein Shaker Bottle with Blender Ball | BPA Free / Leak Free / Portable [Baebear.sg]](https://img.lazcdn.com/g/p/9091b2636306c01aeed087dcb0685462.jpg_400x400q80.jpg_.webp)
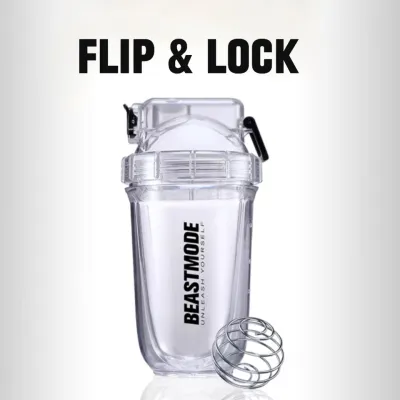
![[Shopwithme99] 3 in 1 Shaker BPA Free Steel Mixing Ball Gym Protein Shaker Bottle With Pills and Powder Container](https://img.lazcdn.com/g/p/a58a6a0e59db2408447ee221ec449737.jpg_400x400q80.jpg_.webp)
Prices are valid at publication and may change. Please refer to the product page for the latest price.
Insulation Technologies Compared: Stainless Steel vs. Gel vs. Plastic
Double-Wall Vacuum Insulated Stainless Steel
Double-wall vacuum insulation is the gold standard for maintaining cold temperatures over extended periods. This construction features an inner and an outer stainless steel vessel welded together, with the air evacuated from the space between them to create a vacuum. Because a vacuum contains virtually no air molecules, it eliminates conduction and convection—the two primary methods of heat transfer.
To understand why double-wall vacuum insulation works so well, it helps to look at the physics of thermal transfer. Heat moves from warmer areas to cooler areas through three methods: conduction, convection, and radiation. Conduction occurs when heat travels through a solid material, while convection involves the movement of heat through fluids or gases. By removing the air between the two stainless steel walls, a vacuum-insulated bottle eliminates the medium required for conduction and convection to take place. The only remaining pathway for heat transfer is radiation, which travels through electromagnetic waves. To combat this, many high-end brands apply a thin copper coating to the outer surface of the inner wall, reflecting radiation and keeping your cold drinks cold for even longer.
In a tropical environment like Singapore, where stepping out of an air-conditioned gym immediately exposes your gear to high ambient heat, a vacuum barrier is essential. It prevents the external heat from warming up your chilled water or milk-based protein shakes. This means you can mix your shake in the morning, commute to work, complete an evening workout at an outdoor fitness corner, and still enjoy a cold drink.
The primary trade-off with vacuum-insulated stainless steel is weight and bulk. These bottles are heavier than their plastic counterparts and cannot be squeezed. However, the thermal performance easily outweighs the extra weight for users who prioritize cold shakes. When shopping, always check the manufacturer’s specifications for the stated number of cold-retention hours. High-quality bottles typically promise anywhere from 12 to 24 hours of temperature maintenance, though actual performance will vary based on how often you open the lid and the initial temperature of your ingredients.
Gel-Lined and Ice-Core Designs
Gel-lined shaker bottles and containers with removable ice cores offer an active cooling alternative to vacuum insulation. Gel-lined bottles feature walls filled with a freezable gel, requiring you to place the entire bottle in the freezer before use. Ice-core designs utilize a central plastic tube filled with water or gel that you freeze separately and insert into the bottle’s center before mixing.
These designs work by absorbing heat directly from the liquid inside the bottle, rapidly lowering its temperature. However, they have several practical limitations for daily gym-goers. First, they require planning; if you forget to freeze the bottle or the core overnight, you lose all cooling benefits. Second, the gel or ice core adds significant bulk and reduces the usable volume inside the shaker, meaning you can carry less liquid overall.
More importantly, these active cooling elements have a limited thermal capacity. Once the frozen gel or ice core melts, it ceases to cool the liquid and can actually begin to transfer ambient heat back into your shake. In warm climates, a gel-lined bottle typically loses its cooling efficiency within two to three hours of leaving the freezer, making it less suitable for long commutes or extended outdoor activities.
Standard Single-Wall Plastic
Standard single-wall plastic shaker bottles are the most common and affordable options on the market, but they offer virtually no thermal insulation. Typically made from polypropylene or other BPA-free plastics, these bottles have thin walls that allow heat to pass freely between the environment and your beverage.
If you mix a cold protein shake in a standard plastic bottle, the liquid will quickly warm up to match the ambient temperature. In a humid climate, this rapid thermal exchange causes immediate condensation, or “sweating,” on the exterior of the bottle. This condensation can ruin items in your gym bag, make the bottle slippery to hold, and leave water rings on surfaces.
Plastic shakers are lightweight, inexpensive, and highly durable against drops, making them excellent for immediate consumption right after mixing. However, if your workout routine involves carrying your shake for more than thirty minutes before drinking it, standard plastic will fail to keep your beverage at an appealing, cold temperature.
Beyond Temperature: Critical Shaker Bottle Features for Workouts
Mixing Mechanisms and Clump Prevention
While keeping your shake cold is crucial, the primary function of any shaker bottle is to blend protein powder into a smooth, drinkable consistency. Different brands employ various mixing mechanisms to achieve this, and their effectiveness can vary significantly when paired with insulated designs.

The classic wire whisk ball, usually made from surgical-grade stainless steel, remains one of the most popular mixing tools. As you shake the bottle, the ball moves freely through the liquid, acting as a whisk to break up clumps of powder. Other brands use built-in stationary blades, mesh grates, or removable mixing grids situated near the top of the bottle. These grates work by forcing the liquid and powder through small openings to shear the particles apart.
The type of protein powder you use also plays a significant role in how easily it dissolves, especially in cold liquids. Whey protein isolate tends to mix relatively easily, whereas casein and plant-based proteins (such as pea or soy protein) are much denser and more hydrophobic, meaning they naturally resist blending with water. When you mix these powders with ice-cold liquids, the cold temperature can cause the proteins to clump together more aggressively. This makes a high-performance mixing mechanism absolutely essential. If your bottle relies solely on a weak plastic grid and you are mixing a dense plant-based protein in ice-cold water, you are likely to end up with a chalky, clumpy texture.
When using an opaque stainless steel insulated bottle, a rounded interior base is an incredibly valuable feature. Because you cannot see through the metal walls to check for unmixed powder, clumps can easily get trapped in the sharp bottom corners of a flat-bottomed bottle. A rounded base encourages a vortex flow during shaking, ensuring that all powder is directed into the path of the mixing mechanism. This prevents wasted supplement powder and makes the bottle much easier to clean afterwards.
Leak-Proof Seals and Pressure Management
A shaker bottle that keeps your drink ice-cold is of little use if it leaks inside your gym bag or sprays protein powder over your workout gear. Ensuring a secure, leak-proof seal requires a combination of high-quality materials and precise engineering.
Look for bottles that feature robust silicone O-rings or gaskets inside the lid threads. These gaskets compress when the lid is tightened, creating an airtight and watertight barrier. The lid itself should have a secure locking mechanism, such as a heavy-duty snap cap or a button-activated lock, to prevent accidental opening during transport. Carrying loops and handles integrated into the lid design should also be sturdy enough to support the heavier weight of a filled stainless steel bottle without flexing or straining the seal.
Shaking a protein mixture can build unexpected pressure inside a sealed container. When cold liquids are shaken vigorously, dissolved air is released, and the mechanical action can cause a slight temperature rise that expands the air inside. In an insulated container, this pressure has nowhere to go. When you flip open the drinking spout, the sudden release of pressure can cause the liquid to spray out. To mitigate this, some premium brands design their lids with integrated pressure-release vents or deep-threaded spouts that allow air to escape gradually as you open the bottle.
How to Verify Brand Insulation Claims Before Buying
Before purchasing an insulated shaker bottle, it is vital to look past flashy marketing terms like “all-day cold” or “polar insulation” and verify the actual specifications of the product. Manufacturers often test their bottles under idealized laboratory conditions that do not reflect real-world use, such as keeping the bottle sealed in a temperature-controlled room without opening it.
First, examine the material specifications. High-quality insulated bottles should be constructed from 18/8 (also known as Grade 304) food-grade stainless steel. This material is highly resistant to rust, does not leach chemicals, and provides the structural integrity required to maintain a vacuum seal over years of use. If a brand does not explicitly state that its bottle uses double-wall vacuum insulation, assume it is a single-wall or air-insulated design, which offers significantly lower thermal performance.
Second, pay close attention to the lid design. The lid is almost always the weakest link in any insulated bottle’s thermal defense. Because most lids are made of plastic to allow for complex drinking spouts and carrying loops, heat can easily enter through the top of the bottle. Look for brands that offer insulated lids, thicker plastic construction, or deep-set silicone gaskets that help block thermal transfer at the opening.
Third, read verified customer reviews with a focus on real-world performance in warm climates. Look for feedback from users who train in outdoor environments or non-air-conditioned gyms. Pay attention to comments regarding how long ice remains solid inside the bottle or whether the exterior of the bottle feels cold to the touch. If the exterior of a vacuum-insulated bottle feels cold or shows condensation, it indicates that the vacuum seal has failed, allowing heat to transfer freely.
Finally, a simple way to verify the integrity of your bottle’s vacuum seal at home is the ice cube test. Fill the bottle with ice cubes and cold water, seal the lid tightly, and let it sit on your counter at room temperature for 12 hours. Throughout this period, check the exterior of the bottle. The outer wall should remain completely dry and at room temperature. If you feel cold spots on the outside of the steel or notice condensation forming on the surface, it indicates that the vacuum seal has been compromised or was defective from the factory. In a properly functioning vacuum bottle, the thermal barrier is so complete that the exterior temperature remains entirely unaffected by the ice inside.
Decision Framework: Which Insulated Shaker Bottle Should You Choose?
Selecting the right insulated shaker bottle depends on your specific lifestyle, workout environment, and personal preferences. Use the following framework to guide your decision:
- Choose double-wall vacuum stainless steel if:
- You require your protein shakes or pre-workout drinks to stay ice-cold for four or more hours.
- You frequently train outdoors, commute long distances in hot weather, or leave your gym bag in a warm vehicle.
- You want a durable, long-lasting bottle that resists odors and does not produce exterior condensation.
- You do not mind carrying a slightly heavier and more rigid container.
- You are comfortable investing in a premium price band, with high-quality models in Singapore typically ranging from S$35 to S$60.
- Choose gel-lined or ice-core designs if:
- You prefer a lighter overall bottle weight and do not mind the reduced internal volume caused by the cooling core.
- You always have reliable access to a freezer before your workouts to prepare the bottle or core.
- Your workouts are relatively short, and you plan to consume your shake within two hours of leaving home.
- You prefer the active, rapid chilling effect that direct contact with ice or frozen gel provides.
- You are looking for a mid-range budget option, with these bottles usually priced between S$20 and S$35.
- Verify first if:
- The manufacturer fails to specify the exact grade of stainless steel or does not explicitly use the term "double-wall vacuum."
- The lid lacks a secondary lock or a robust silicone gasket, which increases the risk of leaks in your bag.
- The bottle has a flat interior bottom without a rounded base, which may lead to powder clumping in the corners.
- The mixing mechanism is made of low-grade plastic that could degrade or retain odors over time.
Frequently Asked Questions (FAQ)
Can I put hot liquids in an insulated shaker bottle?
You should exercise extreme caution before putting hot liquids into any shaker bottle, and always consult the manufacturer’s explicit safety guidelines first. Many insulated shaker bottles are designed strictly for cold or room-temperature liquids.
Shaking hot liquids inside a sealed, airtight container is highly dangerous. The heat causes the air inside the bottle to expand rapidly, while the shaking motion releases dissolved gases and steam. This combination builds intense pressure inside the vessel. When you attempt to open the flip cap or spout, the built-up pressure can cause the boiling liquid to spray out violently, posing a severe risk of burns to your face and hands.
If you must use your insulated bottle for warm beverages like coffee or tea, never shake the bottle with the lid fully sealed. Instead, stir the liquid gently to mix any additives, and leave the drinking spout open to allow steam and pressure to escape safely.
Do insulated stainless steel shaker bottles retain odors?
High-quality, food-grade stainless steel is naturally non-porous and highly resistant to absorbing odors compared to standard plastic. Plastic bottles can easily develop tiny scratches on their interior surfaces from mixing springs or abrasive cleaning brushes, creating microscopic breeding grounds for bacteria and trapped protein residues that cause sour smells.
However, stainless steel is not entirely immune to odors. While the metal walls resist absorption, the plastic lid, silicone gaskets, and rubber seals can still trap protein residues and develop strong odors if not cleaned properly.
To prevent odor buildup, rinse your shaker bottle with warm water immediately after finishing your shake. For regular maintenance, wash the bottle by hand using mild dish soap and a soft sponge or bottle brush; avoid using steel wool or abrasive scrubbers that can scratch the interior steel or damage the vacuum seal. If an odor does develop, soaking the bottle and lid in a solution of warm water, baking soda, and a splash of white vinegar can help neutralize the smell without damaging the materials.
Community discussion
Share your experience or ask a question. Comments are reviewed before publication.