
Choosing between a dedicated knee pad for yoga and a thicker yoga mat depends on whether your joint discomfort is localized to specific kneeling postures or felt throughout your entire practice, combined with your stability and portability needs. A dedicated knee pad for yoga provides targeted cushioning for specific poses without compromising the stability of your standing balances. Conversely, a thicker mat offers uniform, full-body joint support, which is ideal for floor-based practices but can make standing postures feel unstable.
To make the right choice, you must weigh how you practice, where you practice, and the specific physical feedback your body provides during your sessions. Investing in the wrong gear can lead to frustrated transitions, slipped poses, or continued joint strain.
Diagnose Your Knee Discomfort: Is It the Mat or the Pose?
Before purchasing new gear, it is essential to identify the root of your knee discomfort. General joint sensitivity is often felt across multiple points of contact, including your hips, elbows, and knees, during both floor and standing sequences. Localized pressure, however, occurs almost exclusively when your kneecap makes direct contact with the floor in high-pressure poses like Camel Pose (Ustrasana), Low Lunge (Anjaneyasana), or Cat-Cow (Marjaryasana).
Products mentioned in this guide
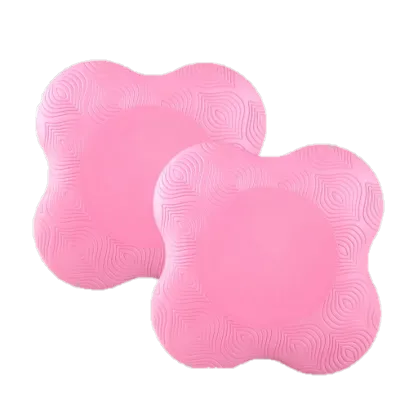
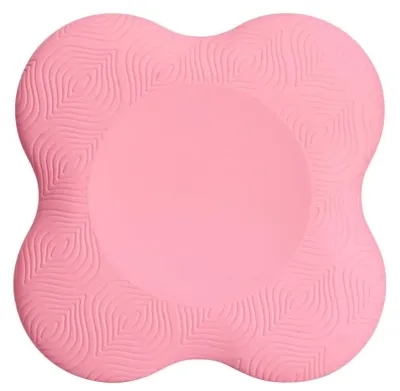
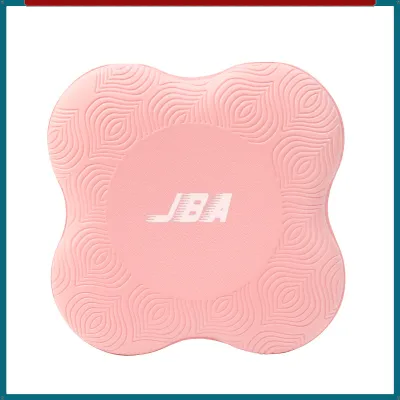
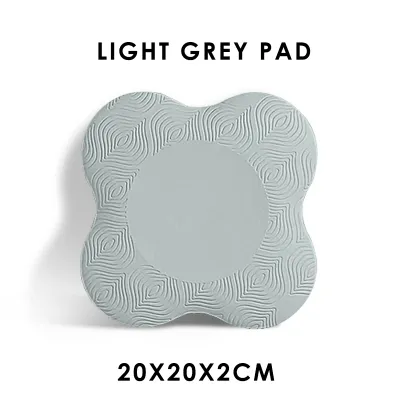
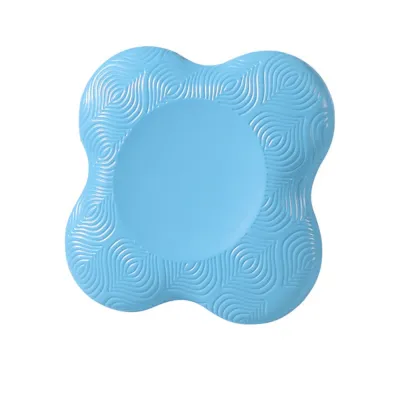
Prices are valid at publication and may change. Please refer to the product page for the latest price.
Observe exactly when the pain occurs during your practice. If your knees feel fine during standing sequences but experience a sharp, bruising sensation the moment you lower into a lunge, the issue is likely localized pressure. This occurs when the bony prominence of the patella presses through a thin mat directly onto a hard floor, compressing the sensitive bursa and nerves beneath. If you feel a dull ache throughout your entire lower body across all sequences, you may require more comprehensive, full-body cushioning.
It is crucial to establish a clear safety boundary before adjusting your equipment. Cushioning can alleviate pressure, but it cannot fix biomechanical misalignment, joint instability, or underlying structural injuries. If you experience sharp, shooting, throbbing, or persistent knee pain that lingers long after your practice ends, stop your sessions immediately and consult a physiotherapist or medical professional.
When a Thicker Yoga Mat Is the Right Upgrade
Upgrading to a thicker yoga mat is highly beneficial for practitioners who experience general joint sensitivity or focus on slow-paced, floor-based styles. If your practice consists primarily of Yin Yoga, Restorative Yoga, or Pilates, you spend a significant amount of time seated, kneeling, or lying down. A thicker mat—typically measuring between 6mm and 8mm—provides continuous, full-body protection, shielding your spine, hips, and knees from hard floors throughout the entire class.

However, thicker mats introduce a distinct trade-off regarding balance and stability. When you stand on a thick, soft surface, your feet sink into the material, which reduces your sensory feedback from the floor. This can make standing balances like Tree Pose (Vrksasana) or Warrior III (Virabhadrasana III) feel highly unstable, forcing your ankles and core to work significantly harder to keep you upright. For dynamic Vinyasa or Ashtanga practices, this lack of stability can disrupt your flow and alignment.
To mitigate this stability issue, you must look beyond thickness alone and evaluate material density. A cheap, low-density foam mat will bottom out under your weight, offering very little actual joint protection despite its thickness. A highly compressed, dense mat made from natural rubber or high-density polyurethane (PU) offers superior joint protection because it resists compression, keeping your joints elevated off the hard floor while maintaining a stable foundation for standing poses.
Keep in mind that upgrading your primary mat is a larger commitment. High-quality, dense mats are a significant financial investment, often ranging from S$80 to S$180 in Singapore. They are also considerably heavier and bulkier, making them more challenging to carry if you regularly commute to a local studio.
Why a Dedicated Knee Pad for Yoga Might Be Better
A dedicated knee pad for yoga is the superior choice for practitioners who love their current mat but need temporary, targeted cushioning during specific kneeling postures. If you practice active, balance-heavy styles like Vinyasa, Power, or Ashtanga Yoga, you need a thin, firm main mat (around 3mm to 4.5mm) to maintain a solid connection to the ground during standing sequences. A separate knee pad allows you to preserve that essential stability and only introduce cushioning when a pose demands it.
Versatility and portability are the primary advantages of a separate pad. These compact accessories can be placed horizontally across your mat for lunges, turned vertically for wide-knee child’s pose, or even placed under your sit bones or elbows. Because they are lightweight and small, they easily slip into a standard tote bag or backpack. This makes them incredibly convenient for yogis in Singapore who commute via the MRT to studios in busy areas like Tanjong Pagar or Orchard, where carrying a heavy, thick mat is highly impractical.
Many yoga-specific knee pads feature specialized ergonomic designs that outperform simple flat padding. Some are crafted with a contoured, cup-like center that cradles the patella, distributing your body weight away from the sensitive kneecap and onto the surrounding, more resilient areas of the knee. They are typically made from high-density, non-slip silicone or closed-cell foam that grips your existing mat securely, ensuring the pad does not slide during transitions.
Choosing a knee pad is also a highly cost-effective decision. If your current mat still has excellent grip and is in good structural condition, there is no need to replace it. A quality knee pad typically costs between S$15 and S$35, allowing you to resolve your knee discomfort without the expense of buying a brand-new premium mat.
Decision Guide: Thicker Mat vs. Knee Pad
To help you determine which option aligns with your practice, use the comparison matrix below to evaluate the key performance differences.
| Comparison Dimension | Thicker Yoga Mat (6mm – 8mm) | Dedicated Knee Pad for Yoga |
|---|---|---|
| Primary Use Case | Continuous, full-body joint cushioning | Targeted, temporary protection for specific poses |
| Impact on Balance | Can reduce stability in standing poses | None; main mat remains firm and stable |
| Portability | Heavy and bulky; harder to transport | Highly portable; fits easily into a daily bag |
| Cost-Effectiveness | Higher investment (S$80 – S$180+) | Budget-friendly (S$15 – S$35) |
| Best Yoga Styles | Yin, Restorative, Gentle Hatha, Pilates | Vinyasa, Ashtanga, Power Yoga, Hot Yoga |
Your decision logic should follow your primary practice style and environment. Choose a thicker mat if your practice is slow, highly floor-focused, and you primarily practice at home where transport weight is not an issue. Choose a dedicated knee pad if you practice dynamic styles, value sharp stability during standing balances, and frequently travel or commute to external yoga studios.
Free Cushioning Hacks to Try Before You Buy
Before spending money on new gear, you can try several zero-cost adjustments during your next practice to see if temporary physical modifications resolve your discomfort.
- The Mat Fold: When transitioning into a low lunge or table-top position, grab the side edge of your current yoga mat and fold it inward. This creates a triple-layered cushion of mat material directly under your kneeling knee. Once the pose is complete, simply unfold the mat and continue your practice.
- The Studio Blanket or Towel: Place a tightly folded cotton towel or a standard studio blanket flat under your knees. Ensure the fold is smooth and even; a lumpy towel can create uneven pressure points and throw off your pelvic alignment.
While trying these hacks, take a moment to inspect your current yoga mat for physical wear and tear. Over time, synthetic foam mats undergo permanent compression, losing their elastic memory and shock-absorbing properties. If your mat feels paper-thin or has visible, permanently flattened depressions where your knees and hands normally rest, it has reached the end of its functional lifespan. In this case, a replacement is necessary regardless of whether you choose a thicker mat or a separate pad.
Finally, always verify your alignment and form during poses. In kneeling postures, ensure your weight is distributed evenly and your hips are squared. In lunges, keep your front knee stacked directly over your ankle rather than letting it drift inward or outward, which places twisting forces on the joint. Padding should only be used to relieve pressure, never to mask structural pain caused by poor alignment or improper technique.
Frequently Asked Questions (FAQ)
Can I use a regular hardware store knee pad for yoga?
Using industrial or hardware store knee pads for yoga is not recommended. Hardware knee pads are designed for heavy impact and prolonged, static kneeling on rough construction surfaces. They are typically bulky, feature hard plastic outer shells, and utilize tight elastic straps that wrap around the back of your leg. These straps can severely restrict your circulation and limit your range of motion during fluid yoga transitions. Additionally, the materials used in industrial pads lack the slip-resistant grip required to stay stable on a polyurethane or rubber yoga mat, creating a significant slipping hazard during your practice.
Does a thicker yoga mat prevent wrist pain as well?
While a thicker yoga mat provides a softer surface for your hands, it is rarely the correct solution for wrist pain and can sometimes make the discomfort worse. When you press your hands into an overly soft or thick mat, your wrists sink deep into the material. This increases the extension angle of your wrist joint and places excessive pressure on the carpal tunnel. To protect your wrists, a firm, stable surface is actually preferred. You can address wrist discomfort more effectively by spreading your fingers wide, pressing firmly through your knuckles to distribute your weight, and actively engaging your core to lift weight out of your upper body.
How do I clean and maintain a yoga knee pad?
To maintain hygiene and preserve the grip of your yoga knee pad, clean it regularly, especially after sweaty sessions in humid climates. Wipe the pad down after use with a soft cloth dampened with warm water and a drop of mild, oil-free dish soap. Avoid harsh chemical cleaners or alcohol-based sprays, which can degrade silicone, TPE, or polyurethane materials over time. Allow the knee pad to air dry completely in a well-ventilated indoor space before packing it away. Never expose it to direct sunlight for extended periods, as UV rays can cause the material to crack, crumble, and lose its slip-resistant properties. Always consult the manufacturer’s care label for specific material guidelines.
Community discussion
Share your experience or ask a question. Comments are reviewed before publication.