
A leaking, stuck, or whistling water bottle cap can quickly disrupt your daily hydration routine, whether you are commuting through Singapore’s humid climate or heading out for an outdoor workout. Most Montigo bottle cap issues stem from simple, reversible causes like misaligned silicone seals, dried beverage residue, or internal pressure imbalances rather than permanent structural damage. By systematically diagnosing the cap, cleaning the hidden crevices, and properly reseating the gaskets, you can restore a completely airtight, leakproof seal without spending money on a brand-new lid.
Identifying the Root Cause of Your Bottle Cap Issues
Before attempting any physical adjustments, a methodical inspection will help you pinpoint exactly why your bottle cap is failing to perform. Begin by dry-wiping the entire cap assembly and examining the plastic threads, hinges, and silicone rings under a bright light. Look closely for any hairline cracks in the hard plastic, warping along the rim, or tiny tears in the flexible silicone gaskets. Even a microscopic gap in these components can compromise the vacuum seal and allow liquid to escape under pressure.
To isolate the exact source of a leak, perform a controlled “water test” over a sink. Fill your Montigo bottle about three-quarters full with room-temperature water, dry the exterior completely with a clean towel, and screw the cap on firmly. Tilt the bottle horizontally and slowly rotate it 360 degrees, watching closely to see if water droplets emerge from the main thread line, the spout hinge, or the air vent. If water seeps from the base of the cap, the issue lies with the main sealing ring or thread alignment; if it drips from the spout, the small stopper seal is likely misaligned.
Products mentioned in this guide
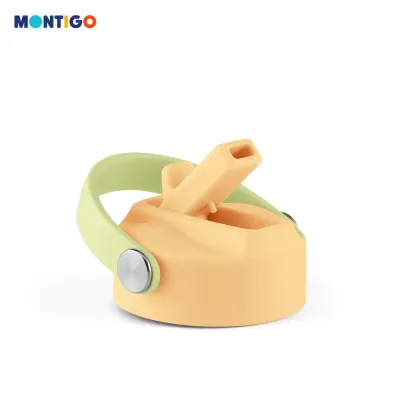
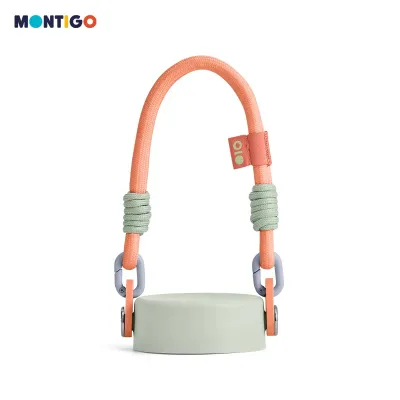
Prices are valid at publication and may change. Please refer to the product page for the latest price.
When dealing with a lid that refuses to budge, you must differentiate between physical debris blockage and vacuum lock. If the cap turns slightly but feels gritty or highly resistant, dried sugars from juices, sports drinks, or protein shakes have likely crystallized within the threads. If the cap is completely immobile and refuses to rotate even a millimeter, a sudden temperature drop inside the bottle has likely created a powerful internal vacuum, pulling the lid downward and locking the threads in place.
How to Fix a Leaking Montigo Bottle Cap
The most frequent cause of a leaking cap is a displaced or twisted silicone O-ring. To resolve this, carefully pry the silicone ring out of its groove using a blunt, flat tool like the handle of a spoon or a silicone spatula. Inspect the ring for any twists, as a single folded section prevents the cap from screwing down flush against the stainless steel rim. Once verified as intact, press the ring firmly back into its channel, ensuring it sits completely flat and even all the way around the perimeter.

Over time, fine particles of dust, lint, or dried beverage residue accumulate within the deep grooves of the cap threads. This buildup acts as a physical barrier, preventing the male threads of the bottle from engaging fully with the female threads of the cap. To clean these hard-to-reach areas, dip an old toothbrush or a specialized straw brush into warm, soapy water and scrub vigorously along the entire spiral path of the threads. Rinse the cap thoroughly under running water to wash away any loosened debris before reassembling.
Cross-threading is another common culprit that occurs when the cap is tightened at an angle, damaging the plastic threads and leaving a gap for water to escape. To prevent this, place the cap onto the bottle and turn it counterclockwise until you hear or feel a distinct click, which indicates the threads have aligned perfectly. Once aligned, turn the cap clockwise to tighten it. Avoid over-tightening, as excessive force can stretch the silicone seal or strip the plastic threads, permanently ruining the leakproof seal.
Solutions for a Stuck or Hard-to-Open Lid
A lid that is locked tight due to vacuum pressure requires a gentle approach to equalize the internal and external air pressure. This vacuum commonly occurs when you fill your bottle with hot liquids that gradually cool down, causing the air inside to contract and pull the cap inward. To break this vacuum safely, submerge the lower portion of the bottle in warm water for a few minutes to expand the air inside, or gently pry the edge of the silicone spout cover if your model has one to let air slip inside. Never use boiling water, as extreme thermal shock can damage the vacuum insulation of the bottle itself.
If sticky beverage residue is the primary reason your cap is jammed, a simple warm-water soak will dissolve the sugars holding the threads hostage. Fill a shallow bowl with warm water and a few drops of mild dishwashing liquid, then invert the bottle so only the cap and thread area are submerged. Let it soak for 15 to 20 minutes to allow the soapy water to penetrate the threads and break down the sticky buildup. After soaking, wrap a dry, textured dish towel around the cap to maximize your grip and turn it firmly.
When attempting to open a stubborn lid, your grip technique is crucial for preventing structural damage to the plastic. Place your palm flat over the top of the cap to distribute the pressure evenly, rather than squeezing the sides, which can deform the plastic and make the threads bind even tighter. Strictly avoid using metal pliers, pipe wrenches, or sharp metal tools to force the cap open. These tools apply concentrated, uneven pressure that can easily crack the plastic housing, strip the threads, or gouge the exterior finish of your bottle.
Addressing Degraded or Misaligned Seals
Maintaining the integrity of the silicone gaskets is essential for keeping your bottle watertight over months of heavy use. When removing the silicone seals for deep cleaning or inspection, never use sharp objects like knives, tweezers, or safety pins. These metal tools can easily puncture or slice the soft silicone, creating micro-tears that will cause permanent leaks. Instead, use a plastic toothpick, a wooden skewer, or your fingernails to gently lift the edge of the gasket out of its seating groove.
Once the gasket is removed, you will often find a buildup of dark spots, mold, or stubborn odors trapped in the deep, dark seal grooves of the cap. To clean these areas safely, create a paste using equal parts baking soda and water, apply it to the grooves with a cotton swab, and let it sit for 10 minutes before scrubbing with a small brush. For persistent odors or mold, soak the silicone rings in a mixture of warm water and white vinegar for 30 minutes, then rinse them thoroughly and let them air-dry completely in a well-ventilated area.
Silicone is highly durable, but it does degrade over time due to friction, heat, and exposure to acidic beverages. Inspect your seals regularly for visual indicators of permanent wear, such as a yellowed or cloudy appearance, a sticky texture that does not wash away, visible cracks, or a stretched-out shape that no longer fits snugly in the groove. If the seal is stretched or torn, it can no longer maintain a watertight barrier under pressure, and you will need to source an official replacement gasket to restore your bottle’s performance.
Preventive Maintenance for Long-Lasting Performance
Establishing a consistent cleaning routine is the most effective way to prevent cap failures, mold growth, and stubborn odors. After every use, disassemble all removable parts of the cap, including the main O-ring, spout seals, and straw attachments. Wash each component thoroughly with warm, soapy water, paying close attention to the crevices where moisture tends to linger. Allow all parts to air-dry completely on a clean drying rack before reassembling them, as trapping moisture inside a closed cap encourages bacterial growth.
When your Montigo bottle is not in use, store it with the cap off or screwed on very loosely. Keeping the cap tightly sealed during storage traps residual moisture, leading to musty odors that are difficult to remove. Furthermore, leaving the cap tightly compressed for long periods puts continuous pressure on the silicone gaskets, which can cause them to lose their elasticity and flatten out permanently over time. Storing the bottle open allows the interior to breathe and preserves the springiness of the seals.
Before tossing your bottle cap into the dishwasher, always verify the manufacturer’s guidelines for your specific model. While some hard plastic caps are labeled as top-rack dishwasher safe, the high heat and intense water jets of a dishwasher cycle can warp plastic threads and degrade silicone seals prematurely. Hand-washing with mild dish soap and warm water remains the safest and most reliable method to preserve the structural integrity and leakproof performance of your bottle cap over the long term.
When to Stop DIY and Contact Montigo Support
While most cap issues can be resolved with basic cleaning and adjustment, certain structural failures cannot be fixed at home. If you observe deep cracks in the hard plastic body of the cap, broken hinges on the flip lid, or stripped threads that slip when tightened, the structural integrity of the cap is compromised. Attempting to glue or patch these components with household adhesives is highly discouraged, as these glues are often not food-safe and will fail under the pressure of daily use.
It is also important to distinguish between a faulty cap and a failure of the bottle’s double-wall vacuum insulation. If you notice condensation forming on the outside of the stainless steel bottle body, or if your cold drinks warm up rapidly despite a tightly sealed cap, the vacuum seal between the steel walls has likely been compromised. This insulation failure is unrelated to the cap itself and usually occurs if the bottle has suffered a severe drop or impact, requiring a replacement of the entire bottle body.
If your diagnostic checks reveal a broken cap component or an insulation failure, stop your DIY efforts and seek official support. You can locate official replacement caps, gaskets, and accessories through authorized retail channels or online marketplaces in Singapore. If your bottle is still within its warranty period, gather your proof of purchase and contact official customer support to initiate a warranty claim, ensuring you receive genuine, food-grade replacement parts designed specifically for your model.
Frequently Asked Questions (FAQ)
Can I use a third-party silicone ring if the original Montigo seal is lost?
Using a third-party or generic silicone ring is generally not recommended due to the precise engineering required for a leakproof seal. Even a fraction of a millimeter difference in thickness, diameter, or elasticity can result in micro-leaks or make the cap incredibly difficult to screw on straight. Additionally, generic seals sold on unregulated online marketplaces may not carry the necessary food-grade material certifications, posing potential health risks when exposed to hot liquids or acidic beverages over time. To ensure safety and performance, always opt for official replacement seals.
Why does my bottle cap make a hissing sound when I open it?
A hissing sound when opening your bottle is a natural physical reaction caused by pressure equalization. When you fill your bottle with ice-cold or hot liquids, the temperature difference between the inside and outside of the bottle creates a pressure differential, resulting in a vacuum or positive pressure that releases when the seal is broken. However, if you are carrying sugary, dairy, or protein-rich drinks, a hissing sound can also indicate fermentation and gas buildup from bacterial activity. To prevent dangerous pressure buildup, avoid leaving these beverages in your bottle for extended periods.
Community discussion
Share your experience or ask a question. Comments are reviewed before publication.