
Choosing the right bike computer mount is a critical decision that directly impacts your riding safety, comfort, and cockpit organization. Whether you are navigating the winding paths of Singapore’s Park Connector Network (PCN) on a weekend hybrid or pushing your limits along the East Coast Park service road on a carbon road bike, how you view your ride data matters. The choice between an out-front mount and a stem mount comes down to your bike’s geometry, your preferred riding posture, and how you manage your handlebar accessories.
While both mounting styles serve the same primary purpose of holding your GPS device secure, they position the screen in fundamentally different locations. This placement affects your field of vision, the aerodynamics of your bicycle, and the physical space available for other essential gear like lights, bells, and bags. Understanding these differences allows you to configure a clean, functional cockpit that keeps your focus on the road ahead.
Core Differences Between Out-Front and Stem Mounts
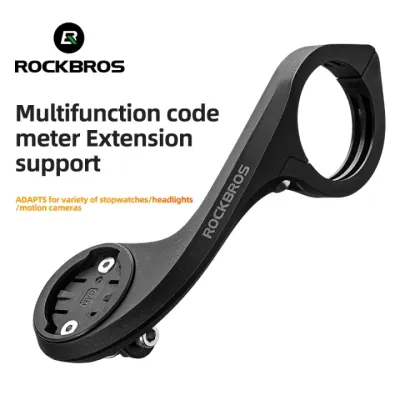
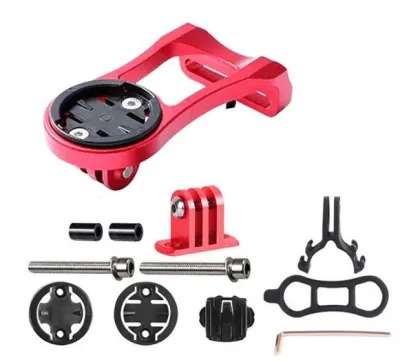
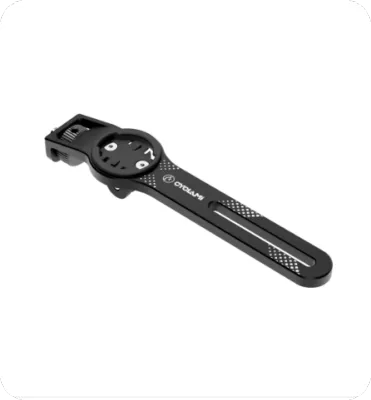
An out-front mount projects your bike computer forward, positioning the device ahead of the handlebars and typically flush with or slightly below the top of the stem. This design places the screen further away from your body, aligning it closely with your natural forward line of sight. By extending the device into the clean air ahead of the cockpit, out-front mounts create a streamlined, low-profile aesthetic that is highly favored by road cyclists and racers.
Products mentioned in this guide
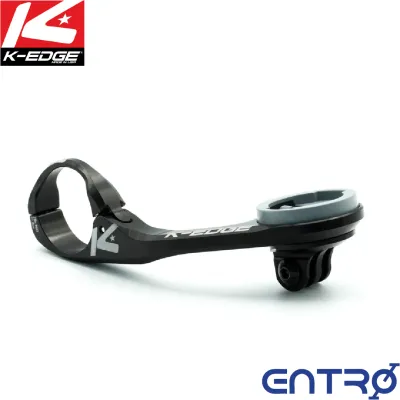
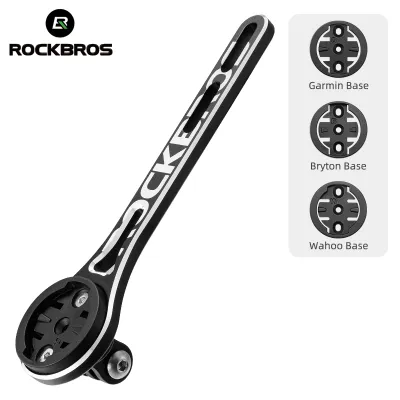
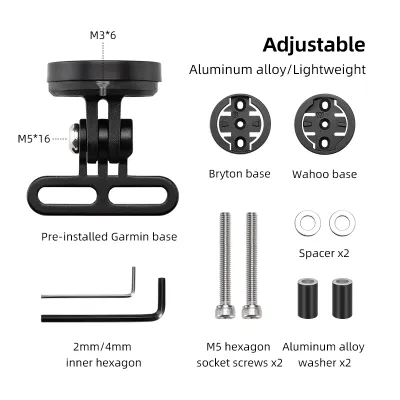
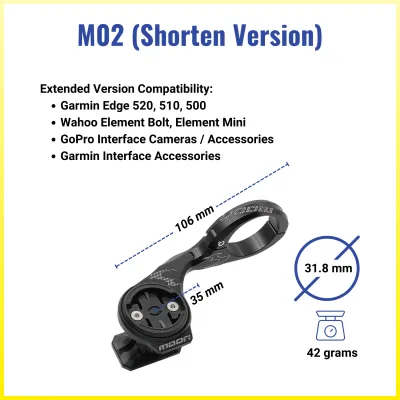
![[SG FREE ] Aluminum alloy Bicycle bike Computer support holder For Garmin Xoss Magane igpsport Blackbird](https://img.lazcdn.com/g/p/4f2925f9c3db3757217eac334787750c.jpg_400x400q80.jpg_.webp)
Prices are valid at publication and may change. Please refer to the product page for the latest price.
In contrast, a stem mount attaches the bike computer directly to the top of the stem body or onto the stem faceplate. This positioning keeps the device closer to your chest and higher up relative to your saddle position. Stem mounts are highly compact and do not extend past the front profile of your handlebars, making them less vulnerable to front-end impacts and keeping the device shielded behind the bar line.
The physical placement of each mount type also influences your cockpit’s weight distribution and cable routing. Out-front mounts place the weight of the computer further forward, which has a negligible effect on steering but can sometimes crowd mechanical brake and gear cables exiting the handlebar tape. Stem mounts keep the handlebar area clear of forward extensions, allowing cables to bend naturally without pressing against the mount arm, though they do occupy the space where you might otherwise mount a top-tube bag strap.
Key Comparison Dimensions for Your Riding Style
Evaluating how each mount type performs across practical cycling metrics helps you determine which style aligns with your typical riding conditions and habits.

Aerodynamics and Wind Resistance
At casual commuting speeds, the aerodynamic difference between mount types is minimal. However, as your speed increases past 25 km/h, frontal surface area becomes a key factor in wind resistance. An out-front mount aligns the computer horizontally with the handlebars, reducing the overall frontal profile of your bike and allowing air to flow smoothly over the device. A stem mount positions the computer higher and at a steeper angle, which can catch more wind and create minor turbulent drag, though this is generally only a concern for competitive time trials or high-speed road riding.
Visibility and Glance Angle
Your ability to read your screen quickly without losing focus on the path is a major safety consideration. Because an out-front mount places the computer further forward, you only need to shift your eyes slightly downward to read your speed, distance, or navigation map. Your peripheral vision remains focused on the road, which is crucial for spotting sudden obstacles, pedestrians, or other cyclists on shared paths. A stem mount requires you to tilt your head further down to view the screen, temporarily taking your eyes completely off the road ahead, which can be risky during fast group rides or in heavy urban traffic.
Handlebar Space and Accessory Clearance
Cockpit real estate is limited, especially if you carry safety lights, a bell, or a handlebar bag for long-distance rides. An out-front mount frees up space directly on the handlebars by suspending the computer in front of them. Many out-front models also feature dual-sided compatibility, allowing you to attach a front light or an action camera directly underneath the computer using a secondary adapter. A stem mount keeps the handlebars completely clear for your hands, but it occupies the entire top surface of the stem, preventing you from mounting accessories there and potentially interfering with the straps of a top-tube fuel bag.
Installation Complexity and Cockpit Integration
Stem mounts are generally simpler to install, often utilizing heavy-duty UV-resistant O-rings or silicone bands that wrap directly around the stem body. This tool-free installation makes them highly versatile and easy to swap between different bikes. Out-front mounts require a rigid clamp that bolts onto the handlebar, demanding precise torque application to prevent slipping. For modern road bikes with integrated, one-piece carbon handlebar and stem systems, standard round-clamp out-front mounts will not fit, requiring specialized faceplate-integrated mounts that bolt directly into the underside of the cockpit.
Compatibility and Bike Geometry Checks
Before purchasing a bike computer mount, you must verify several physical dimensions of your bicycle to ensure a secure and interference-free fit.
First, examine your stem’s length, angle, and faceplate design. If your bike has an exceptionally short stem (common on modern mountain bikes and gravel bikes, often ranging from 35mm to 50mm), there may not be enough flat surface area on the stem body to accommodate a standard band-mapped stem mount. Additionally, a steep negative stem angle will tilt a stem-mounted computer forward at an awkward angle, making the screen difficult to read under direct sunlight.
Second, assess your handlebar’s drop, reach, and overall clearance. When installing an out-front mount, ensure that the arm length is compatible with your computer size; a larger screen device may strike the handlebar clamp if the mount arm is too short. You must also verify that when you turn the handlebars fully to the left or right, the out-front mount and the computer do not strike your frame’s top tube, brake cables, or any frame-mounted bags.
Finally, review the manufacturer specifications for both your handlebars and the mount itself. If you plan to use a dual-sided out-front mount to hold both a heavy GPS unit and a high-lumen front light, check the maximum weight limit of the mount arm. Overloading a lightweight plastic or aluminum mount can lead to structural failure when riding over rough terrain, speed bumps, or uneven pavement.
Decision Framework: Which Mount Should You Choose?
To select the right mount for your setup, consider how your specific riding profile matches the strengths of each design.
Choose an Out-Front Mount If:
- You ride a road or gravel bike and frequently maintain an aggressive, aerodynamic riding position.
- You rely heavily on turn-by-turn navigation and need to view your map clearly with minimal head movement.
- You want to run a clean, integrated setup that combines your computer and front safety light on a single central mount.
- You have standard round handlebars with sufficient clamping space on either side of the stem.
Choose a Stem Mount If:
- You ride an upright hybrid, commuter, or mountain bike where aerodynamic drag is not a priority.
- You want to keep your computer protected behind the handlebar line to shield it from potential damage during off-road trail riding or transport.
- You use a highly integrated, proprietary cockpit that does not accept standard round handlebar clamps.
- You prefer a lightweight, simple, and cost-effective mounting solution that can be moved between multiple bikes in seconds.
Verify First If:
- You are mounting onto carbon fiber handlebars, which require strict adherence to torque limits to prevent structural crushing.
- You ride in extremely wet or humid tropical conditions, where sweat or rain can pool on a flat stem-mounted screen; an out-front mount allows water to run off more easily due to its forward-tilted position.
- Your bike uses non-standard handlebar diameters (such as 35mm or 25.4mm), as most standard out-front clamps are designed for 31.8mm bars and require specific shims.
Installation and Safety Best Practices
Proper installation is essential to protect your bike components and ensure your computer remains securely attached throughout your ride.
When installing any clamp-style out-front mount, always use a torque wrench to tighten the bolts to the manufacturer’s exact specifications. This is especially critical when clamping onto carbon fiber handlebars, where overtightening can cause micro-fractures that lead to sudden handlebar failure under load. Most manufacturers specify a torque limit between 2 Nm and 4 Nm for handlebar clamps; never guess the tightness by hand.
Always use the correct rubber spacers, shims, and washers provided with your mount. These components serve two vital purposes: they prevent the metal or hard plastic clamp from scratching your handlebars, and they provide the necessary friction to stop the mount from rotating or slipping downward when you ride over bumps. If your mount begins to sag under the weight of your device, do not simply tighten the bolt further; instead, check that the rubber shim is seated correctly and is free of grease or road grime.
Finally, establish clear stopping conditions during installation. If you feel any unusual resistance while turning the mounting bolts, stop immediately to check for cross-threading. If the mount arm pinches your brake or gear cables, or if it prevents your steering column from rotating smoothly from lock to lock, do not force the installation. Reroute your cables or select a different mount style to ensure your steering and braking systems remain completely unobstructed.
Frequently Asked Questions (FAQ)
Can I use an out-front mount with a carbon handlebar or stem?
Yes, you can use an out-front mount with carbon components, but you must verify that the mount clamp is specifically approved for use on carbon handlebars. Always apply a thin layer of carbon assembly paste to the inside of the clamp to increase friction, which allows you to secure the mount at a lower torque value. Never exceed the maximum torque limit printed on your handlebars or stem, and avoid using mounts with sharp metal edges that could score the carbon surface.
Do I need a specific adapter for different bike computer brands?
Yes, different bike computer brands use distinct, proprietary quarter-turn mounting interfaces that are not cross-compatible. For example, a Garmin mount insert uses a different tab orientation than a Wahoo or Bryton insert. Many aftermarket out-front mounts feature user-replaceable plastic inserts, allowing you to swap the mounting disc to match your specific device brand. Always ensure the insert is screwed down tightly to prevent your computer from rattling loose during your ride.
Community discussion
Share your experience or ask a question. Comments are reviewed before publication.