
Selecting the ideal Quad Lock bicycle mount depends on your handlebar configuration, riding posture, and the specific terrain you traverse. To find the right match, you must evaluate where you want your phone positioned for optimal visibility without compromising your control or safety. Whether you are training on open roads, navigating technical dirt trails, or commuting along Singapore’s extensive Park Connector Network (PCN), matching the mount’s physical design to your cycling style ensures your device remains secure and readable throughout your journey.
Understanding Your Core Mounting Positions
Before choosing a specific model, you need to understand how the three primary mounting positions alter your cockpit layout and viewing experience. Each position shifts the center of gravity of your device and changes how far you must look down from the path ahead to read your screen.
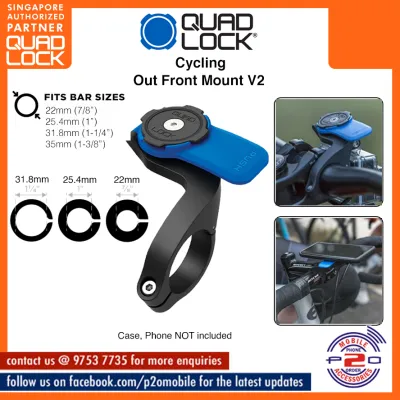
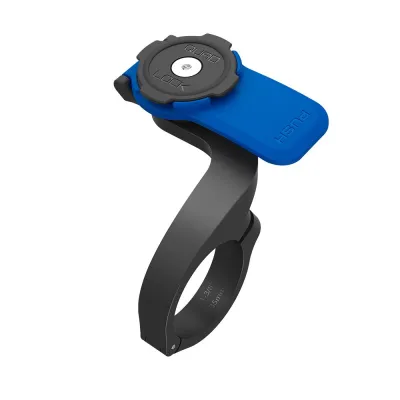
Out-front mounts position your phone forward of the handlebars, aligning the screen closely with your natural line of sight. This placement is highly favored for its aerodynamic profile, as it keeps the phone flush with the top of your handlebars. When selecting an out-front option, you must verify your handlebar diameter, which typically ranges from 22.2mm to 31.8mm or 35mm. Using the correct included spacer ensures a tight fit that prevents the mount from slipping under the weight of your phone during sudden bumps.
Products mentioned in this guide
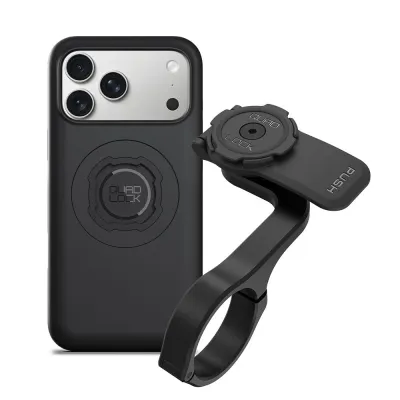
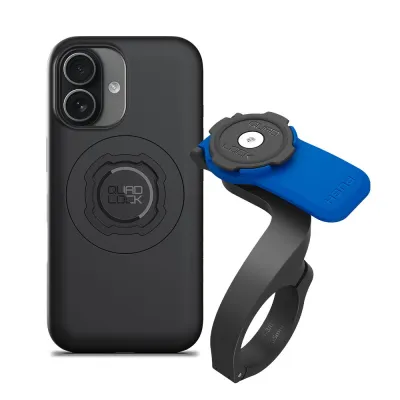
Prices are valid at publication and may change. Please refer to the product page for the latest price.
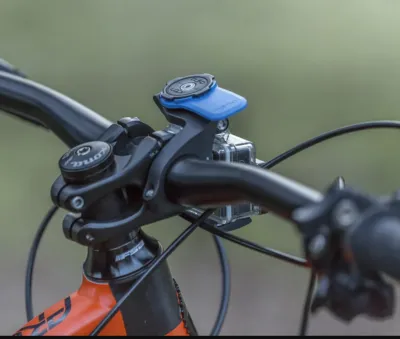
Stem mounts attach directly to the top of your steering stem, creating a highly centered and space-saving configuration. This setup is ideal if your handlebars are already crowded with lights, bells, or GPS computers. Because the phone sits directly over the stem, it remains highly protected from side impacts. However, you must inspect your stem length and angle beforehand; short or steeply angled stems may limit your viewing angle or cause the phone to interfere with your top tube when turning.
Handlebar mounts offer the greatest versatility, clamping directly to the flat or tapered sections of your bars. This position allows you to rotate the mount to find the exact viewing angle that minimizes glare from the sun. Before installing a handlebar mount, check the clearance around your brake lines and gear cables. Pressing a mount firmly against tight cables can pinch the housing, which may degrade your shifting performance or brake responsiveness over time.
Matching the Setup to Your Cycling Discipline
Road Cycling and Long-Distance Rides
Road cycling demands a setup that supports an aerodynamic riding posture and keeps your eyes focused on the road ahead. When you are riding in the drops or tucked over the hoods, looking down at a stem-mounted phone requires bending your neck at an uncomfortable angle. An out-front mount solves this by projecting the phone forward, allowing you to glance at your navigation with minimal head movement.

Modern road bikes often feature integrated carbon cockpits or aerodynamic, flat-profile handlebars rather than traditional round tubes. Standard round clamps will not fit these specialized shapes. If your road bike uses an integrated handlebar system, you must check for compatible faceplate mounts or specialized adapters that bolt directly to the underside of your stem faceplate. Ensuring this compatibility beforehand prevents component damage and guarantees a clean, secure integration.
Mountain Biking and Off-Road Trails
Off-road riding subjects your bicycle to intense vibrations, sudden drops, and occasional impacts. For mountain biking, keeping your phone protected from trail debris and crash damage is the primary concern. A stem mount or a reversed handlebar mount that positions the phone over the stem is highly recommended for trail riding. This keeps the device tucked away behind the handlebars, reducing the risk of it striking a tree branch or hitting the ground during a fall.
You must also consider your body clearance when navigating technical terrain. When descending steep slopes or maneuvering over obstacles, you will often shift your weight backward or hover over the top tube. Ensure that your chosen mounting position does not interfere with your knees or thighs during these active movements. Additionally, verify that the mount’s locking mechanism is fully engaged before hitting rough trails, as loose engagement can lead to your phone ejecting under heavy impacts.
Daily Commuting and Park Connector Network Rides
Commuting in urban environments and riding along the Park Connector Network requires a setup focused on convenience, quick access, and safety. Urban riders frequently stop at traffic lights, crosswalks, and shared pathways where pedestrian traffic is high. A mount with a quick-release collar allows you to detach your phone instantly when popping into a convenience store or parking your bike outside a cafe.
Low-profile mounts are particularly beneficial on crowded shared paths. A compact handlebar or stem setup keeps your cockpit narrow, minimizing the risk of your phone snagging on low-hanging branches, foliage, or other cyclists’ handlebars in tight spaces. When riding in high-traffic areas, always prioritize a mount that keeps your phone secure without distracting you from surrounding pedestrians and personal mobility device users.
Evaluating Essential Add-Ons for Protection
A complete mounting system often requires additional modules to safeguard your phone’s delicate internal components and external surfaces from environmental hazards. Depending on where and how you ride, these add-ons can prevent costly damage to your device.
Vibration dampeners are crucial accessories for protecting your smartphone’s optical image stabilization (OIS) systems. Many modern phone manufacturers warn that prolonged exposure to high-frequency vibrations can permanently damage these sensitive camera sensors. While bicycle tires absorb some road buzz, riding over rough tarmac, gravel, or trail chatter still transmits significant vibration through the frame. Adding a compatible vibration dampener between the mount and the phone case helps absorb these forces, preserving your camera’s functionality.
Weather protection is another vital consideration, especially given Singapore’s sudden tropical downpours. A slip-on weather shield, often referred to as a poncho, protects your phone’s ports and screen from heavy rain, mud, and sweat. Before purchasing a weather cover, verify that it maintains touchscreen usability so you can still navigate or answer calls in wet conditions. Keep in mind that fully enclosed covers can trap heat, so you should monitor your phone’s temperature during long rides in direct sunlight to prevent thermal shutdown.
Building Your Final Setup Checklist
To ensure a seamless and safe installation, run through this step-by-step verification checklist before finalizing your purchase:
First, confirm that your specific phone model is compatible with the dedicated phone case or universal adapter you plan to use. If you prefer magnetic mounting, verify whether the case supports the newer magnetic locking systems or if it is limited to the original twist-lock mechanism.
Second, measure your handlebar or stem diameter using a caliper or a flexible measuring tape. Compare these measurements against the clamping specifications of your chosen mount to ensure you have the correct rubber shims or spacers.
Third, review the manufacturer’s installation instructions for torque limits. Over-tightening the mounting bolts can crush carbon handlebars or strip the threads on aluminum clamps, while under-tightening can cause the mount to rotate unexpectedly while riding.
Finally, perform a static test by mounting your phone and turning your handlebars fully from left to right. Ensure that the phone does not strike your frame, cables, or accessories, and that your brake levers have full clearance to operate safely.
Frequently Asked Questions (FAQ)
Can I use the same Quad Lock mount on multiple bikes?
Yes, you can easily transfer the phone case between different mounts installed on multiple bicycles. The locking interface remains identical across the product ecosystem, allowing you to use one phone case on a road bike, a mountain bike, or a commuter. If you plan to move the physical mount itself between bikes, you will need to check that the handlebar diameters are compatible and keep the appropriate rubber spacers handy for each frame.
Will the mount scratch my carbon handlebars?
The mount should not scratch your carbon handlebars if you use the included protective rubber shims during installation. These shims act as a protective barrier between the hard plastic or aluminum clamp and the carbon surface. Always clean your handlebars thoroughly before mounting to remove any grit, and use a torque wrench to tighten the bolts strictly within the manufacturer’s recommended limits to prevent structural damage to the carbon fibers.
Community discussion
Share your experience or ask a question. Comments are reviewed before publication.