
Choosing the right bicycle back carrier depends entirely on your bike frame’s hardware, material, and your cargo needs. If your bike has standard threaded eyelets on the dropouts and seatstays, a rack-mounted carrier is the most stable choice for heavy loads. If your frame lacks eyelets but has a standard alloy seatpost, a seatpost-mounted carrier offers quick installation for light, everyday items. For full-suspension bikes or frames with non-standard tubing, frame-mounted adapters or specialized seatstay carriers provide a workaround, provided the manufacturer approves the clamping force. Before purchasing, your mandatory first step is to physically inspect your bike’s mounting points, brake clearance, and material limits to ensure the chosen system will not damage your frame or compromise safety.
Step 1: Inspect Your Bike Frame for Mounting Points
To determine which bicycle back carrier is compatible with your ride, you must first conduct a thorough physical inspection of your bicycle frame. Start by looking closely at the rear dropouts—the areas on both sides of the frame where the rear wheel axle secures. Look for small, threaded holes known as eyelets. Next, trace the seatstays—the two thin tubes running from below your saddle down to the rear axle—and check for a matching pair of threaded eyelets near the top. The presence of these four mounting points indicates your frame is ready for a traditional rack-mounted carrier.
If your inspection reveals a smooth frame without these threaded holes, you are dealing with an eyelet-free setup. This is common on carbon fiber road bikes, high-performance gravel bikes, and many mountain bikes. For these designs, you must evaluate alternative attachment points, such as the seatpost or the seatstays themselves. However, before planning any clamp-on solution, you must identify the material of these components. Carbon fiber is highly susceptible to crushing forces, meaning standard metal clamps can cause structural failure.
Products mentioned in this guide
![[SG SELLER] Bike Rear Rack Quick Release / Screw Bicycle Rear Luggage Cargo Carrier With Reflector Adjustable Aluminium Rear Seat](https://img.lazcdn.com/g/p/df5e80ccdc20fe15cba2d9b846590078.jpg_400x400q80.jpg_.webp)
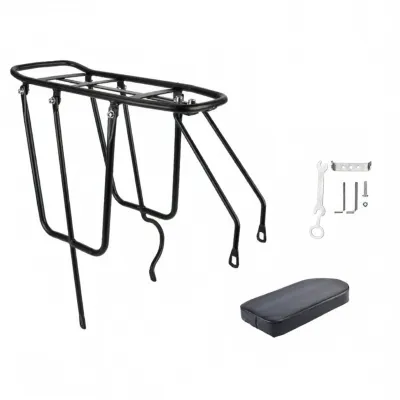
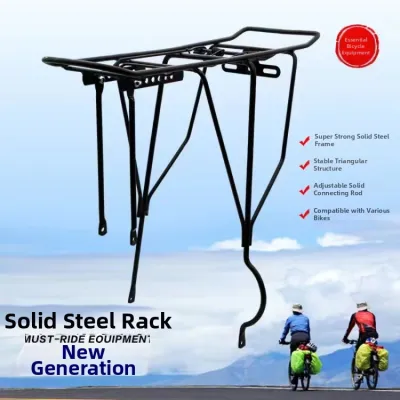
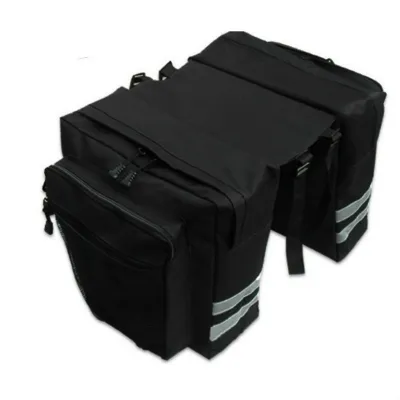
Prices are valid at publication and may change. Please refer to the product page for the latest price.
You must also check for physical obstructions around the rear wheel area. Look at your rear brake setup. Disc brake calipers, especially those mounted on the outside of the seatstay, can physically block the path of straight rack struts. Additionally, if you ride a full-suspension mountain bike, you must account for the movement of the rear suspension linkage. A carrier attached to both the moving rear triangle and the stationary seatpost will bind or break as the suspension compresses. Finally, measure the clearance between your tire and the frame to ensure the carrier struts will not rub against your tire under load.
Rack-Mounted Carriers: Best for Heavy Loads and Touring
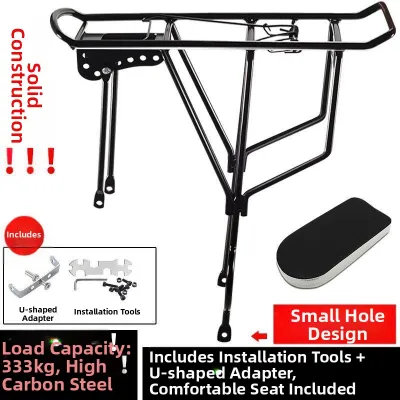
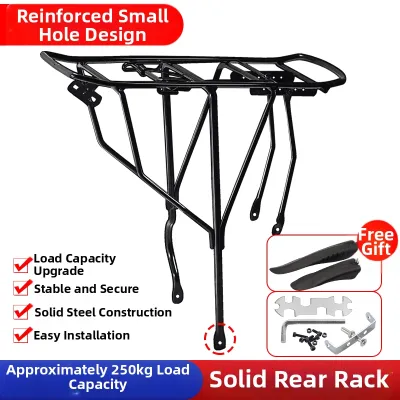
For riders planning long-distance touring, carrying heavy groceries, or transporting substantial gear, a traditional rack-mounted carrier is the standard choice. This system relies on a robust four-point connection, securing directly to the frame’s threaded eyelets at the dropouts and the seatstays. By distributing the cargo weight directly down into the strongest parts of the bicycle frame, this design minimizes sway and provides a highly stable platform even when navigating uneven pavement or gravel paths.

When selecting a rack-mounted system, you must verify compatibility with your specific axle configuration. Traditional racks are designed for bikes with standard quick-release skewers or solid threaded axles. If your modern bicycle uses a thru-axle system, you may need to purchase a specialized replacement thru-axle that features integrated mounting threads on the outer ends. Furthermore, you must check if your bike has disc brakes. If so, look for disc-specific racks that feature curved or offset lower mounting arms designed to clear the bulky brake caliper housing.
While rack-mounted carriers offer the highest load capacities, they do come with trade-offs. They add permanent weight to your bicycle and require a more involved installation process, often involving precise alignment of struts and torque-sensitive bolts. They are also generally incompatible with full-suspension frames, as the rigid struts cannot accommodate the pivoting movement of the rear suspension. If your frame is made of carbon fiber, even if it has eyelets, you must consult the manufacturer’s manual to verify the maximum weight the eyelets can safely support without cracking the surrounding composite material.
Seatpost-Mounted Carriers: Best for Quick Installation and Light Cargo
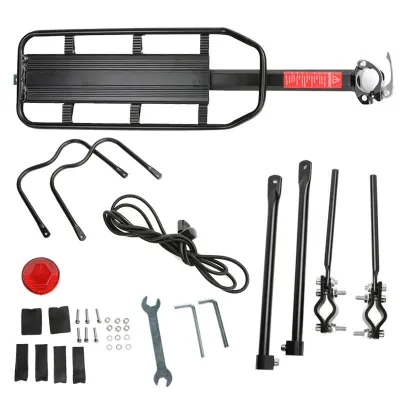
If your bicycle lacks frame eyelets and you only need to carry light, compact items like a change of clothes or a small commuter bag, a seatpost-mounted carrier is a highly convenient option. These carriers feature a cantilevered design, clamping directly to your seatpost using a quick-release bracket or a simple bolt-on collar. Because they do not connect to the frame dropouts, they require no mounting eyelets and can be installed or removed in a matter of seconds, making them ideal for riders who use the same bike for both sport and commuting.
However, the convenience of a seatpost-mounted carrier comes with strict structural limitations. Because the entire weight of the carrier and your cargo is supported by a single clamping point on the seatpost, these systems are subject to leverage forces that can cause the carrier to swing side-to-side during hard pedaling or cornering. Overloading a seatpost carrier can lead to seatpost slippage, damage to your saddle rails, or even catastrophic failure of the seatpost itself. You must always check the manufacturer’s specified weight limit on the product label and never exceed it.
Compatibility is also highly restricted by component materials and shapes. You must never install a clamp-on carrier on a carbon fiber seatpost, as the clamping pressure can easily crush or micro-fracture the carbon fibers, leading to sudden failure while riding. Similarly, these carriers are completely incompatible with dropper seatposts commonly found on mountain bikes, as clamping anything to the moving stanchion will damage the internal seals and ruin the dropper mechanism. Finally, ensure your seatpost is perfectly round; aerodynamic or proprietary oval seatposts cannot accommodate standard circular clamps.
Frame-Mounted and Seatstay Carriers: Solutions for Non-Standard Bikes
For bicycles that lack traditional eyelets but cannot use a seatpost carrier—such as full-suspension mountain bikes, carbon gravel bikes, or bikes with dropper posts—specialized frame-mounted and seatstay carriers offer a viable alternative. These systems typically utilize heavy-duty straps, rubber-lined clamps, or specialized p-clips that wrap directly around the seatstays. By securing to the seatstays rather than the seatpost, they keep the cargo weight lower and more stable while bypassing the need for integrated frame eyelets.
When using seatstay clamp adapters or p-clips, you must exercise extreme caution regarding installation and material limits. Metal clamps tightened directly onto thin-walled aluminum or steel tubes can easily crimp or crush the tubing. On carbon fiber frames, aftermarket clamps are generally prohibited unless the frame manufacturer has explicitly approved specific mounting systems. To prevent cosmetic and structural damage, always use the protective rubber liners provided with the clamps, and use a torque wrench to ensure you do not exceed the manufacturer’s tightening specifications.
For full-suspension bikes, you must look for specialized carriers designed to mount entirely on the active rear triangle. These carriers move in unison with the rear suspension, preventing the binding issues that occur with rigid racks. However, because these systems attach to the moving parts of the bike, you must verify that the carrier and its cargo will not contact your saddle, tire, or suspension linkage when the rear shock is fully compressed. Always perform a dry run by deflating the rear shock or compressing the suspension manually before riding with a loaded carrier.
Feature Comparison: Matching the System to Your Ride
To help you narrow down your choices, the following comparison outlines how each mounting system aligns with different bicycle designs and cargo requirements. When reviewing these options, remember that individual product specifications vary. Always verify the exact weight limits and compatibility requirements printed on the product packaging or detailed in the manufacturer’s instruction manual before making a final purchase.
| Mounting System | Required Frame Features | Relative Load Capacity | Installation Complexity | Ideal Bike Types |
|---|---|---|---|---|
| Rack-Mounted | Threaded eyelets on dropouts and seatstays | High (suitable for heavy touring gear) | Moderate to High (requires tools and alignment) | Touring, commuter, and hybrid bikes with standard eyelets |
| Seatpost-Mounted | Standard round alloy seatpost (no carbon or dropper posts) | Low (suitable for light commuter bags) | Low (quick-release or simple bolt-on clamp) | Road and mountain bikes with alloy seatposts used for light commuting |
| Frame/Seatstay-Mounted | Sturdy seatstays (requires manufacturer approval for carbon) | Moderate (suitable for day trips and light touring) | Moderate (requires careful strap or clamp adjustment) | Full-suspension mountain bikes, gravel bikes, and eyelet-free frames |
Please note that the load capacities listed above are relative indicators. You must cross-reference the carrier’s rated limit with your bicycle’s maximum rear load capacity, which can be found in your bike’s owner’s manual. Never assume a carrier can safely support its maximum rated load if your bicycle frame is not rated to handle that weight.
Verifying Load Limits and Safety Clearances
Once you have selected a compatible mounting system, you must perform a series of safety checks before loading your gear and heading out. Your first step is to cross-reference the weight limits of both the carrier and your bicycle frame. If your carrier is rated for a higher weight than your bicycle frame’s rear cargo limit, you must strictly adhere to the lower limit of the two. Overloading the rear of your bicycle can severely alter its handling characteristics, making steering light and unpredictable, especially on steep climbs.
Next, check for physical clearances while the bicycle is fully loaded. Stand next to your bike and rotate the pedals to check for heel strike. If your heels contact the carrier or your pannier bags while pedaling, you will need to adjust the carrier backward or choose bags with angled profiles to ensure a clear pedaling path. Additionally, check the tire clearance under load. Compress the rear suspension or push down heavily on the saddle to ensure the carrier does not contact the rear tire, which could cause a sudden wheel lockup.
Finally, establish clear stop conditions during installation. If you encounter conflicting torque specifications between your bicycle frame manual and the carrier instructions, or if you are unsure about clamping forces on a carbon fiber frame, stop immediately. Do not attempt to force a fit or overtighten bolts. Consult your local bicycle shop or contact the frame manufacturer directly to verify safety. Additionally, ensure your loaded carrier does not block your rear reflector or tail light; if it does, you must relocate your safety lighting to the designated mounting points on the rear of the carrier.
Frequently Asked Questions (FAQ)
This section addresses common compatibility and installation questions to help you safely set up your bicycle back carrier.
Can I use a seatpost carrier on a carbon fiber seatpost?
No, you should never install a seatpost-mounted carrier on a carbon fiber seatpost. Carbon fiber is engineered to withstand specific directional forces, such as vertical support, but it is highly vulnerable to radial clamping forces and lateral twisting. Clamping a metal bracket onto a carbon post can easily crush the composite tube or cause micro-fractures that are invisible to the naked eye. These fractures can lead to sudden, catastrophic failure of the seatpost while you are riding. If your bicycle has a carbon seatpost, you must either swap it for a compatible alloy seatpost or opt for a frame-mounted or seatstay carrier approved for your frame material.
Will a rear carrier interfere with my disc brakes?
Yes, standard rear carriers can easily interfere with disc brake systems. The disc brake caliper is typically mounted on the left chainstay or seatstay, which often blocks the straight path from the carrier’s lower mounting strut to the frame’s threaded eyelet. To resolve this issue, you must look for disc-specific carriers. These models feature wider lower mounting arms or specialized offset spacers that curve around the brake caliper housing, allowing the carrier to bolt securely to the eyelets without contacting the brake mechanism. Alternatively, you can use specialized adapter brackets designed to raise the mounting point above the caliper, provided they are approved by both the rack and frame manufacturers.
Community discussion
Share your experience or ask a question. Comments are reviewed before publication.