
Using resistance bands for post-workout recovery stretching is an excellent way to restore muscle length, improve joint mobility, and transition your nervous system from a high-alert state to a restful recovery mode. While many fitness enthusiasts associate these elastic tools primarily with strength building, their ability to provide controlled, accommodating tension makes them ideal for targeted flexibility work. By assisting your limbs through a full range of motion, bands allow you to customize the depth of each stretch without straining your joints or forcing your body into awkward, unstable positions.
Incorporating a structured band stretching routine after an intense training session helps alleviate residual muscle tightness and promotes healthy blood circulation. Unlike static stretching against the floor, where gravity can sometimes create excessive pressure, a band acts as an extension of your limbs, giving you precise control over the angle and intensity of the stretch. This guide outlines how to safely prepare your space, execute key stretches for major muscle groups, and apply proper breathing techniques to maximize your recovery.
Preparing for Your Resistance Band Recovery Session
Before beginning your recovery routine, it is essential to assess your physical state and select the appropriate equipment. After a demanding workout, your muscles are fatigued and highly susceptible to overstretching if too much force is applied. For recovery purposes, always opt for a light-to-medium tension band, such as a thin loop band or a flat therapy band. Heavy resistance bands are designed for strength training and will trigger a protective muscle contraction rather than the deep relaxation required for recovery.
Products mentioned in this guide
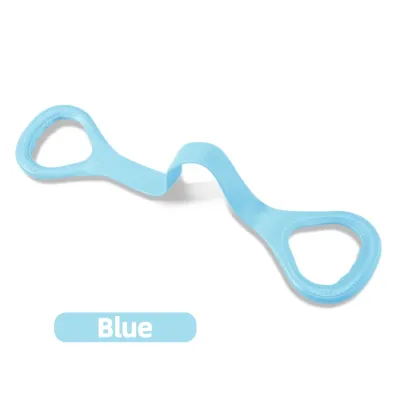
![[FAST DISPATCH] Resistance Band / Mini Band / Yoga Band / Exercise Band / Resistance Band Set](https://img.lazcdn.com/g/p/6a15b95a59e51bb49b2d0b5f23e8e2ec.jpg_400x400q80.jpg_.webp)

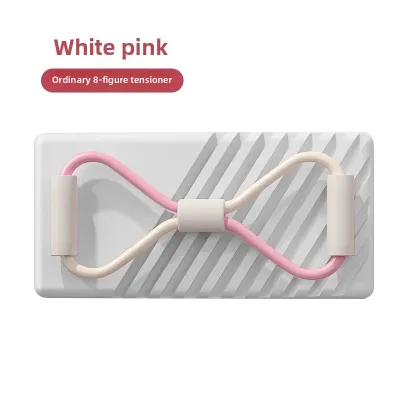
![[Ships From SG] Resistance Band Power Stretch Band Sports Fitness Recovery Warm-Up Muscle Strength Pull Up Gym Yoga](https://img.lazcdn.com/g/p/41f91314a296be8807bf5f66c3355de4.jpg_400x400q80.jpg_.webp)



Prices are valid at publication and may change. Please refer to the product page for the latest price.
Inspect your equipment thoroughly before every session. Examine the entire length of the band for micro-tears, discoloration, small punctures, or structural weak spots that could cause the band to snap under tension. If you notice any signs of wear, discard the band immediately to prevent sudden snapping during a stretch, which can lead to impact injuries.
Set up your recovery space on a flat, non-slip surface. In warm or humid environments, such as a home workout space in Singapore, sweat can quickly make hard floors slippery. Laying down a high-grip exercise mat provides a stable foundation for both floor-based and standing stretches. Ensure there are no sharp objects, furniture corners, or cluttered items nearby that could interfere with your movement or damage the band if it comes into contact with them.
Step-by-Step Resistance Band Stretches for Major Muscle Groups
To achieve the best recovery results, structure your routine to flow logically from one muscle group to the next. A systematic approach prevents unnecessary repositioning and allows your body to settle into a relaxed rhythm. Generally, it is highly effective to sequence your stretches from the larger, high-power muscle groups of the lower body up to the smaller, more complex structures of the upper body and spine.

Throughout this routine, focus on maintaining consistent, gentle tension rather than pulling the band to its absolute limit. The band should serve as a supportive guide that helps you find a comfortable barrier, not a mechanical winch that forces your joints past their natural range of motion. Transition slowly between movements, releasing tension gradually to avoid sudden muscle spasms.
Lower Body and Hip Mobility
The lower body bears the brunt of high-impact activities like running, jumping, and heavy lifting. Using a resistance bands workout approach adapted for recovery can significantly ease tightness in the hips, hamstrings, and quadriceps.
To target the hamstrings, begin with a supine hamstring stretch. Lie flat on your back on your exercise mat, bend one knee to place your foot flat on the floor, and loop the center of a long band around the arch of your opposite foot. Slowly extend the banded leg toward the ceiling, holding the ends of the band with both hands. Use the band to gently guide your leg closer to your torso until you feel a mild stretch along the back of your thigh. Keep your lower back pressed firmly into the mat and avoid locking your knee joint; keeping a micro-bend in the knee protects the joint capsule and focuses the stretch on the muscle belly.
For the hip flexors and quadriceps, transition to a kneeling lunge position. Anchor one end of the band to a secure, low point behind you, and loop the other end around the ankle of your rear leg. Gently press your hips forward while keeping your torso upright. The band will provide a gentle forward pull on your rear ankle, deepening the stretch along the front of your thigh and hip. If you prefer a floor-based option, lie on your stomach, loop the band around your foot, and pull the band over your shoulder to gently draw your heel toward your glutes. Always maintain a neutral spine and engage your core slightly to prevent your lower back from arching excessively.
Upper Body and Shoulder Release
Upper-body tightness often accumulates in the chest, shoulders, and upper back, especially after overhead pressing, rowing, or prolonged periods of sitting. Mobilizing the shoulder girdle helps restore postural alignment and relieves tension in the neck.
Start with band pull-aparts to encourage thoracic extension and open up the chest. Stand with your feet shoulder-width apart, holding a light band horizontally in front of you at shoulder height with an overhand grip. Keeping your elbows slightly soft, slowly pull your hands apart, expanding your chest and squeezing your shoulder blades together. Control the return movement to the starting position, ensuring the band does not snap back. This movement helps counteract the rounded-shoulder posture common after intense workouts or long desk sessions.
To release the latissimus dorsi and triceps, perform an assisted overhead stretch. Hold one end of the band in your right hand and raise your arm overhead, letting your elbow bend so your hand drops behind your neck. Reach your left hand behind your lower back to grasp the lower end of the band. Gently pull downward with your left hand to draw your right elbow closer to your head, stretching the triceps. To transition into a lat stretch, lean your torso slightly to the left while keeping your weight evenly distributed through both feet. Coordinate your movements with deep, slow exhalations to encourage the large muscles of the back and shoulders to release their grip.
Spine and Core Decompression
A tense core and compressed spine can lead to lower back discomfort and restricted movement. Gentle, band-assisted rotational and flexion exercises help restore space between the vertebrae and soothe tight spinal stabilizers.
Begin with a seated spinal twist using light band resistance. Sit tall on the floor with your legs extended straight in front of you. Loop the band around the soles of your feet and hold the ends with both hands. Keeping your spine long and your shoulders relaxed, slowly rotate your torso to the right, pulling the right side of the band back as if drawing a bow. Return to the center and repeat on the left side. The light resistance of the band provides tactile feedback, helping you initiate the rotation from your mid-back rather than forcing the movement from your lower lumbar spine.
Next, perform a modified cat-cow stretch with the band looped across your mid-back. Kneel on all fours, securing the ends of the band flat under your hands. As you inhale, gently lower your belly toward the floor and lift your chest, feeling the band rest lightly against your back. As you exhale, press through your hands and arch your spine toward the ceiling, pushing directly against the resistance of the band. This resistance provides sensory feedback that helps you isolate and mobilize individual segments of your spine. Always respect your body’s natural limits; do not force your spine into extreme flexion or extension, especially if you have a history of back sensitivity.
Pacing, Hold Times, and Breathing Techniques
To transition your body from a state of exertion to recovery, you must manage the pace of your stretching routine carefully. Moving too quickly or pulling too hard can trigger the stretch reflex—an involuntary muscle contraction designed to prevent tearing when a muscle is stretched too fast or too far. To bypass this reflex, perform all movements slowly and deliberately.
Hold each static stretch for 20 to 60 seconds. This duration allows the muscle fibers and surrounding connective tissues to gradually adapt to the elongated position. Rather than watching a clock, focus on your body’s feedback. If you feel the muscle pulsing or resisting, back off slightly until you find a comfortable, sustainable sensation of mild tension.
Your breathing pattern plays a critical role in down-regulating your central nervous system. Practice diaphragmatic breathing throughout your routine. Inhale deeply through your nose for a count of four, allowing your abdomen to expand fully. Exhale slowly through your mouth for a count of six, letting your muscles sink deeper into the stretch as you empty your lungs. This slow, prolonged exhalation signals to your brain that it is safe to relax, which directly reduces muscle tone and enhances overall flexibility.
Safety Boundaries and When to Avoid Band Stretching
While resistance band stretching is generally safe and highly beneficial, it is crucial to recognize the boundaries between productive recovery and potential injury. Understanding how your body responds to stretching will help you avoid overexertion and protect your joints.
| Sensation / Condition | Action to Take | Safety Guidance |
|---|---|---|
| Dull, warm, or broad muscle tension | Continue stretching | This is a normal, productive stretch. Maintain gentle breathing. |
| Sharp, pinching, or localized joint pain | Stop immediately | This indicates joint impingement or ligament strain. Do not push through. |
| Numbness, tingling, or shooting sensations | Release the stretch | This suggests nerve compression. Adjust your angle or stop the movement. |
| Acute muscle strains or joint sprains | Avoid stretching | Stretching damaged tissue can worsen tears. Focus on rest and ice. |
| Severe, debilitating DOMS | Postpone deep stretching | Highly inflamed muscles need gentle, active recovery (like walking) first. |
Never attempt to stretch through sharp, sudden, or radiating pain. If you experience persistent discomfort that does not subside after releasing the stretch, or if you suspect you have sustained a soft-tissue tear, stop your routine entirely. In such cases, consult a qualified physiotherapist or sports medicine professional to receive a personalized assessment and recovery plan.
Frequently Asked Questions (FAQ)
Can I use resistance bands for stretching every day?
Yes, you can use resistance bands for light mobility work and gentle stretching on a daily basis. Daily movement helps maintain joint health, improves circulation, and counteracts the stiffness caused by prolonged sitting. However, the intensity of your daily stretching should match your physical state. On days following highly intense workouts, keep the stretches exceptionally gentle and focus on relaxation. Avoid deep, aggressive static stretching every day, as your muscle fibers require adequate time to repair and rebuild between intense training sessions.
Should I stretch with bands before or after my workout?
Resistance bands can be used both before and after a workout, but the technique must match the phase of your training. Before a workout, use bands for dynamic mobility exercises—such as active shoulder pass-throughs or leg swings—to increase blood flow, warm up the joints, and prepare your nervous system for movement. Avoid holding static stretches before training, as this can temporarily reduce muscle power. After your workout, transition to static, band-assisted holds where you maintain a position for 20 to 60 seconds. This post-workout phase is the ideal time to focus on lengthening fatigued muscles and promoting systemic relaxation.
Community discussion
Share your experience or ask a question. Comments are reviewed before publication.