
Selecting the ideal resistance band with handle depends on your physical strength baseline, your specific training objectives, and how the handle’s material and mechanism interact with your grip during movement. Choosing the wrong resistance can lead to poor form or plateaued progress, while an unsuitable handle design can cause wrist strain or premature wear, especially in warm, humid climates.
To build an effective home or travel workout setup, you need to match the band’s tension profile to your target exercises and select a grip style—whether foam, hard plastic, or rotating—that supports natural joint alignment. Understanding these key factors allows you to customize your training, protect your joints, and achieve consistent progress without the need for bulky gym equipment.
Identify Your Fitness Level and Training Goals
Before purchasing a resistance band with handle, you must assess your current strength baseline and previous experience with fitness equipment. If you are a beginner who is completely new to strength training, your muscles and nervous system require time to adapt to external resistance. For this stage, lightweight, highly controllable bands are ideal because they allow you to focus on learning proper movement patterns without overloading your joints.
Products mentioned in this guide
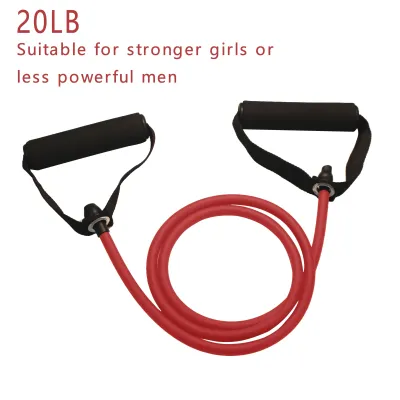
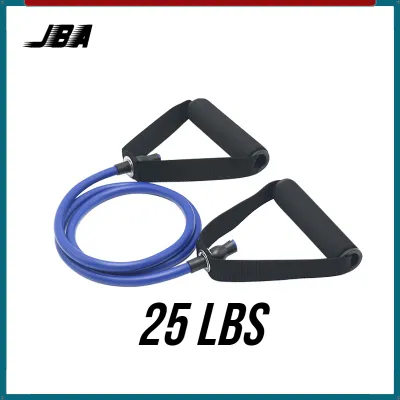
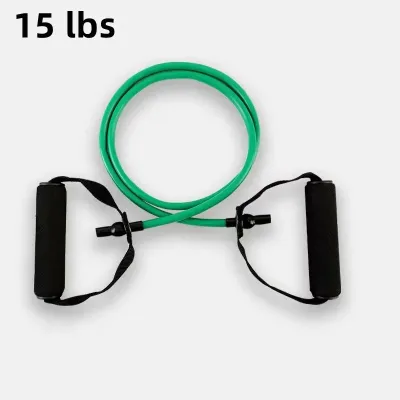
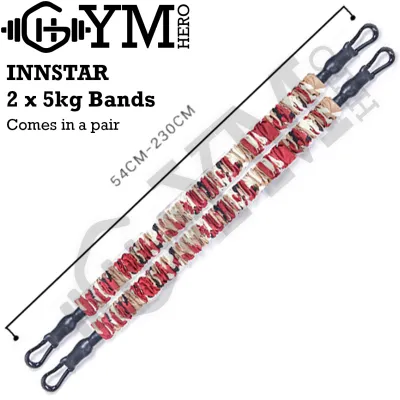
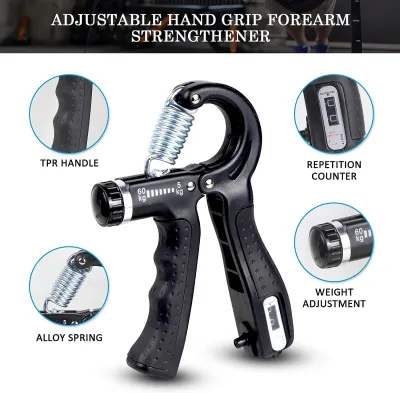
![[LOCAL SG SELLER 3 Days Delivery]11Pcs Resistance band come with handle / Yoga Fitness Home elestic band gym Kit pull Rope gym Equipment / Resistance loop band/ home gym/ Multifuction Pull Rope/ Resistance trainig band/ Pull Rope workout /Rubber band gym](https://img.lazcdn.com/g/p/e2a1e4613b71f7e53e57d610dc9e01cd.png_400x400q80.png_.webp)
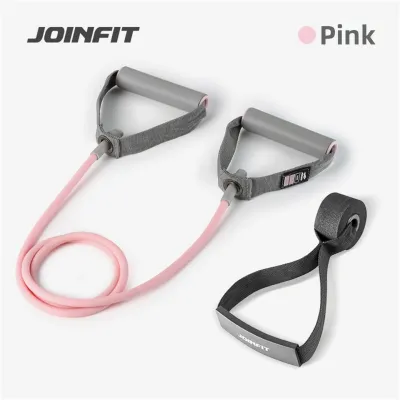
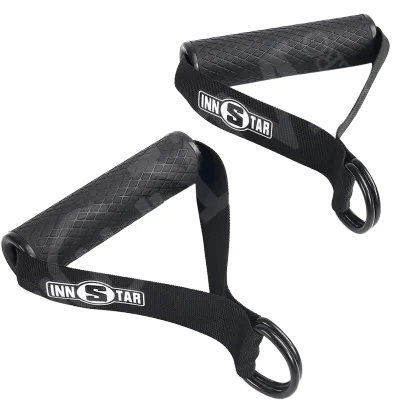
Prices are valid at publication and may change. Please refer to the product page for the latest price.
If you are an intermediate fitness enthusiast transitioning from gym-based cable machines or free weights to a space-saving home setup, you already understand basic movement patterns like chest presses, rows, and shoulder presses. You will require a wider range of resistance levels that can closely mimic the tension curves of commercial gym cables. Advanced lifters, on the other hand, will need exceptionally durable, high-tension bands and heavy-duty handles that can withstand high force without bending or slipping.
Your primary training goals will dictate the specific tension and grip requirements of your resistance bands:
- Muscle Endurance: Requires high-repetition sets (typically 15 to 25 reps) with short rest. The band's tension must be light enough for continuous movement without early fatigue.
- Hypertrophy (Muscle Growth): Requires moderate repetitions (8 to 12 reps) close to failure. Choose a band heavy enough to challenge the muscle during the initial lift while allowing a full range of motion.
- Maximal Strength: Focuses on low repetitions (1 to 6 reps) with high resistance. This requires thick bands or stacked tubes, demanding handles with reinforced steel rings and heavy-duty webbing.
- Rehabilitation and Mobility: Focuses on controlled, low-impact activation. Ultra-light bands gently engage stabilizing muscles, like the rotator cuffs, without compressive joint stress.
Unlike free weights, which provide a constant gravitational force, resistance bands offer progressive tension—the resistance increases as the band stretches. This means your grip must remain exceptionally secure as the force peaks at the end of the movement. Understanding this unique tension curve is essential for selecting the correct band weight and handle design.
Match Resistance Levels to Your Workouts
Resistance bands are typically color-coded or printed with estimated weight ratings in pounds or kilograms. However, it is important to understand that these ratings represent the tension at a specific stretch length (usually two to three times the band’s resting length) rather than a static weight. At the start of an exercise when the band is slack, the actual tension is significantly lower than the printed rating. Always verify the manufacturer’s specific tension chart to understand the exact force curve of your band.

To select the right resistance levels for your workouts, you can use the following general framework based on your training goals:
- Light Resistance (approx. 2 kg to 7 kg): Best for rehabilitation, rotator cuff activation, dynamic warm-ups, and high-repetition work for smaller muscles like triceps.
- Medium Resistance (approx. 8 kg to 14 kg): Ideal for general fitness, active recovery, and moderate-intensity exercises like bicep curls and chest flyes.
- Heavy Resistance (approx. 15 kg to 22 kg): Suited for hypertrophy and strength, especially compound movements like seated rows, chest presses, and assisted squats.
- Extra-Heavy Resistance (23 kg and above): Designed for advanced strength training and heavy lower-body exercises requiring high core stability.
For a versatile and progressive workout routine, purchasing a resistance band set with interchangeable tubes and clip-on handles is highly practical compared to buying a single fixed-resistance band. As you perform different exercises, your strength levels will vary significantly; your legs and back can handle far more resistance than your shoulders and arms. An interchangeable set allows you to swap tubes instantly, customize the tension for every exercise, and combine multiple tubes on a single handle to apply progressive overload as your strength increases over time.
To determine if a specific band level is appropriate for your target exercise, perform a simple self-test. Select a band and attempt to complete a set of 10 to 12 repetitions with strict, controlled form. If you can easily complete all repetitions without feeling any muscular fatigue, the resistance is too light to stimulate strength or muscle growth. Conversely, if you must swing your body, arch your lower back, or shorten the range of motion to complete the movement, the resistance is too heavy. The ideal resistance level should make the last two repetitions of your set feel highly challenging to complete, yet you can still maintain perfect form without compensatory joint movements.
Choose the Right Handle Design for Comfort and Control
The handle of your resistance band is your direct point of contact with the resistance, making its design, material, and mechanism critical for both comfort and exercise performance. Selecting the right grip style ensures that you can transfer force efficiently while protecting your hands and wrists from unnecessary strain.
Foam Handles
Foam grips are usually made from high-density ethylene-vinyl acetate (EVA) or neoprene foam wrapped around a rigid plastic core. They are exceptionally soft and comfortable, making them a popular choice for beginners or those who find hard surfaces painful on their palms. The primary benefit of foam handles is shock absorption and comfort during high-repetition workouts, where friction against the skin can lead to blisters or calluses.
However, foam is a porous material. In warm and humid climates, foam handles act like a sponge, absorbing sweat, body oils, and moisture during intense workouts. This absorption not only makes the handles slippery and difficult to grip mid-workout, but it also accelerates the breakdown of the foam material, leading to cracking, peeling, and unpleasant odors over time. If you choose foam handles, you must be prepared to clean and dry them thoroughly after every session to maintain hygiene and longevity.
Plastic or Hard Rubber Handles
These handles feature a solid plastic or textured thermoplastic rubber (TPR) grip molded over a rigid core. They do not absorb moisture, making them highly hygienic and exceptionally easy to wipe clean after a sweaty workout. Because they do not compress under load, plastic or hard rubber handles provide a highly stable, unyielding surface that ensures direct force transfer from your hands to the resistance band.
This makes them the superior choice for heavy resistance training, such as heavy chest presses, deadlifts, or rows, where maintaining strict wrist alignment and a firm, non-slip grip is critical. The trade-off is comfort; for users with sensitive hands, the textured surface of hard rubber or plastic can feel abrasive, especially during pulling movements. Wearing lightweight fitness gloves can easily mitigate this discomfort while preserving the durability and hygiene benefits of the hard handles.
Rotating Handles
Standard resistance band handles are fixed to a webbing strap, meaning the angle of the handle is locked relative to the band. During dynamic, multi-joint movements like woodchoppers, rotational chest presses, or tricep pushdowns, this fixed angle forces your wrists and forearms to twist awkwardly to maintain a grip. Rotating handles solve this issue by incorporating a built-in swivel mechanism or a rotating sleeve that spins 360 degrees around the attachment strap.
This allows the handle to rotate freely, following the natural anatomical path of your hand and wrist throughout the entire movement. By eliminating rotational friction and awkward wrist angles, rotating handles significantly reduce joint strain on the wrists, elbows, and forearms, allowing you to focus entirely on targeting the intended muscle group. They are highly recommended for dynamic, functional training and for individuals prone to joint discomfort.
When choosing a handle, you should also consider ergonomic factors such as thickness and contouring. Standard handles are typically around 28mm to 30mm in diameter, which works well for most hand sizes. However, thicker handles (32mm to 35mm) distribute the pulling force over a larger surface area of your palm, which can reduce hand cramping and grip fatigue during heavy pulling exercises. Additionally, contoured grips that mimic the natural arch of a closed fist prevent your hand from sliding side-to-side during exercise, maximizing grip security and overall workout efficiency.
Safety Checks and Maintenance for Resistance Bands
Because resistance bands store significant kinetic energy when stretched, safety must always be your top priority. If a band snaps under high tension, it can whip back with extreme force, potentially causing severe bruising, skin lacerations, or eye injuries. Performing regular safety checks and maintaining your equipment properly will drastically reduce the risk of failure.
Before every workout, perform a quick visual and tactile inspection of your bands. Hold the band up to the light and run your fingers along its entire length, checking for micro-tears, small cuts, surface abrasions, discoloration, or dry-rot cracks. Pay special attention to the connection points where the tube or flat band attaches to the metal carabiners, plastic clips, or fabric webbing of the handles. These areas experience the highest friction and stress during use, making them the most common failure points. If you notice any peeling, fraying webbing, loose stitching, or structural wear, retire the band immediately and replace it.
To prevent the band from slipping or snapping back, always anchor it securely. If you are training at home, use a dedicated, heavy-duty door anchor. Insert the anchor through the hinge side of a sturdy door that closes toward you, and ensure the door is fully latched (and locked, if possible) before you begin. If you are anchoring to an outdoor structure, ensure the surface is completely smooth. Avoid rough concrete pillars, rusted metal railings, or splintered wooden posts, which can easily slice through the latex under tension. Additionally, never stretch a resistance band beyond its maximum elongation limit, which is typically three times its original resting length.
Proper storage is essential to preserve the structural integrity and lifespan of your resistance bands, especially in warm, humid climates. Exposure to ultraviolet (UV) light from direct sunlight, extreme heat, and moisture will cause natural latex to oxidize, dry out, and become brittle. Store your bands in a cool, dry, and dark place, such as a drawer, storage bin, or closet inside your home. Never leave them hanging on a sunny balcony, in a hot car trunk, or in a damp bathroom. Keep them away from sharp objects like keys, scissors, or gym equipment with rough edges, and always store them in a relaxed state without any tension.
Frequently Asked Questions (FAQ)
Can I combine multiple resistance bands with handles for a heavier workout?
Yes, you can stack multiple resistance tubes onto a single handle, provided your equipment is designed with clip-on carabiners. This is an excellent way to apply progressive overload. However, always verify that the handle’s D-ring, carabiners, and anchor points are structurally rated by the manufacturer to withstand the combined tension of all attached bands simultaneously.
Are resistance bands with handles better than loop bands?
Neither style is universally superior; they serve different training purposes. Handled resistance bands are optimized for upper-body pushing and pulling exercises because the grip mimics the handles of gym cable machines. Continuous loop bands (or power bands) lack handles and are better suited for lower-body movements, assisted chin-ups, glute activation, and deep, full-body stretching.
How do I clean foam handles after a sweaty workout?
To clean foam handles, wipe them down immediately after your workout with a damp microfiber cloth and a small amount of mild, diluted dish soap. Gently squeeze out any excess moisture and allow them to air-dry completely in a well-ventilated, indoor area away from direct sunlight. Never soak the handles in water or use harsh chemical disinfectants, as these can dissolve the foam adhesives and degrade the underlying core.
Community discussion
Share your experience or ask a question. Comments are reviewed before publication.