
The right bike bag depends on your riding style, gear volume, and how often you need to access your items on the go. Whether you are navigating the paved Park Connector Network (PCN) on a weekend leisure ride, commuting to work, or packing for an overnight tour, matching your bag to your specific activity ensures a balanced ride and easy access to your essentials.
Quick Match: Which Bike Bag Fits Your Primary Riding Style?
Choosing the ideal bike bag starts with identifying your primary riding scenario and the gear you need to carry. A compact setup works best for short, fast rides, while multi-day tours require high-capacity storage solutions.
| Bag Type | Primary Activity | Typical Volume | Access Frequency |
|---|---|---|---|
| Frame Bag | Fast Commutes / Long Rides | Small to Medium | High (while riding) |
| Saddle Bag | Minimalist Commutes / Road | Very Small | Low (stopped) |
| Handlebar Bag | Casual PCN / Light Touring | Medium | High (stopped/riding) |
| Seat Pack | Weekend Touring / Bikepacking | Large | Low (stopped) |
When evaluating gear volume, consider your daily essentials. Items like phones, keys, and wallets require minimal space, whereas spare clothing, food, and camping gear demand larger capacities. Access frequency is equally important; keep items you need on the move, such as snacks or maps, in easily reachable bags, while saving less accessible spots for emergency tools.
Products mentioned in this guide
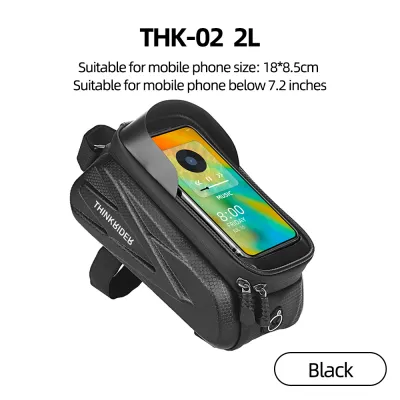
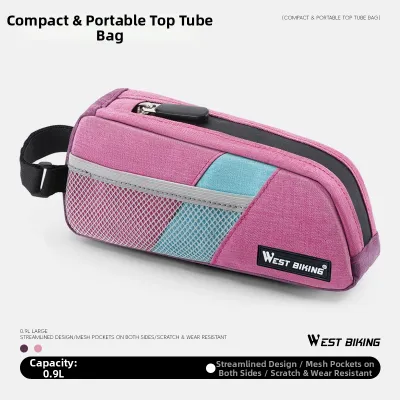
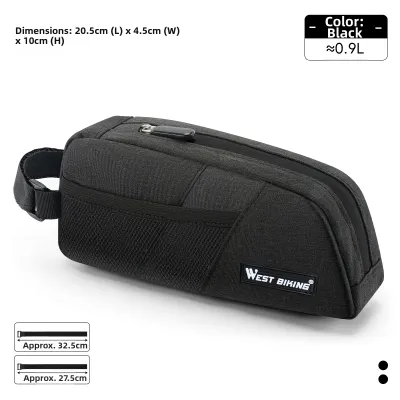
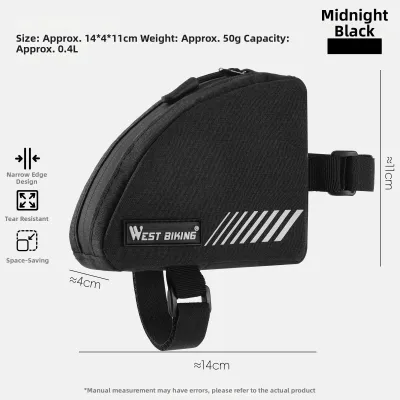
Prices are valid at publication and may change. Please refer to the product page for the latest price.
Frame Bags: Best for Quick Access and Unobstructed Handling
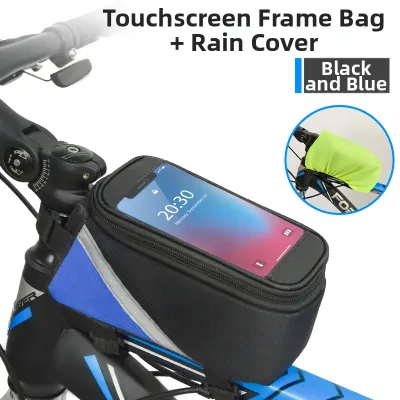
Frame bags sit directly within the main triangle of your bicycle, making them an excellent choice for riders who want to carry heavier items without affecting steering. Because the weight is centered and low, these bags are ideal for fast commutes and long-distance endurance rides where maintaining aerodynamics and stable handling is a priority.

Before purchasing, you must check your frame’s physical dimensions. Measure the inner clearance of your front triangle to ensure the bag fits snugly without bunching. Additionally, inspect your frame for external or internal cable routing; tight straps can pinch exposed cables against the tubes, potentially affecting shifting or braking performance.
There are notable trade-offs to consider with this placement. A full-frame bag will likely block access to your water bottle cages, forcing you to find alternative hydration solutions such as a hydration pack or specialized cage adapters. Furthermore, wider frame bags can rub against your knees while pedaling, so verifying the bag’s width against your natural pedaling stance is highly recommended.
Saddle Bags: Ideal for Minimalist Commutes and Basic Repairs
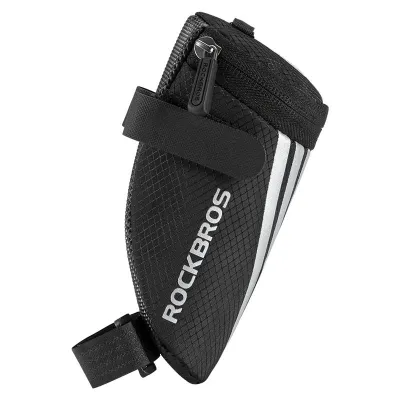
For cyclists who prefer a streamlined setup, the classic saddle bag remains the standard choice for carrying essential roadside repair kits. These compact bags tuck neatly under the saddle rails, keeping your tools out of sight and protected from the elements until they are needed.
Typically, a standard saddle bag is sized to hold a spare inner tube, tire levers, a multi-tool, and a small patch kit. Because these items are relatively heavy for their size, placing them directly under the saddle keeps the weight centered along the bike’s centerline, ensuring stable and predictable handling during sharp turns or out-of-saddle climbing.
Before securing a saddle bag, verify that your bike has sufficient clearance. You need to measure the distance between the bottom of the bag and the top of your rear tire to prevent friction when the suspension compresses or when riding over bumps. Additionally, ensure there is enough exposed seat post to attach the stabilizing strap, and check if the bag features a dedicated loop for mounting a rear safety light to maintain visibility.
Handlebar Bags: Perfect for Casual Rides and Easy Access
Handlebar bags are highly favored by casual riders navigating park connectors and light tourers who appreciate having their personal belongings within arm’s reach. These bags position your gear directly in front of you, making it incredibly simple to grab a camera, phone, or snack without having to dismount.
However, installing a handlebar bag requires careful attention to your cockpit setup. You must check that the bag does not interfere with your brake levers or gear shifters, particularly on drop-bar road bikes where space is limited. Ensure that the mounting straps do not pinch or kink your brake and derailleur cables, which could lead to stiff steering or poor shifting response.
It is also important to understand how front-loaded weight alters your bicycle’s steering dynamics. Carrying heavy items on your handlebars increases steering inertia, making the front wheel feel heavier and slower to respond at low speeds. To maintain stable handling, reserve your handlebar bag for lighter, bulkier items and avoid packing heavy tools or dense locks in this position.
Seat Packs: Built for Bulky Gear and Weekend Touring
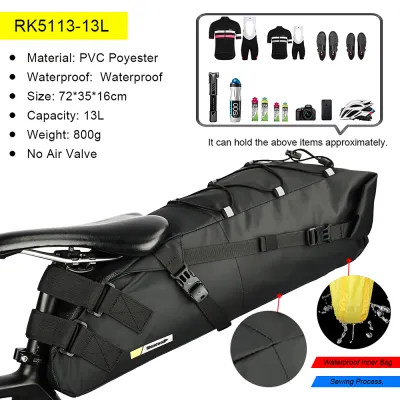
When your riding plans expand to overnight adventures or weekend tours, a high-capacity seat pack becomes indispensable. These large, conical bags attach to your seat rails and seat post, extending backward to carry bulky items like spare clothing, lightweight sleeping gear, or camp kitchen essentials.
Because these packs can hold significant volume, checking the manufacturer’s capacity labels and utilizing built-in compression straps is vital. Properly compressing your gear prevents it from shifting inside the bag, which helps maintain a compact profile and keeps the load as close to the seat post as possible.
A common challenge with large seat packs is lateral sway, which can cause the rear of the bike to wag during out-of-saddle pedaling. To minimize this effect, pack your heaviest items deepest inside the bag, closest to the seat post, and pull all mounting straps as tight as possible. Additionally, verify compatibility with your specific seat post; standard seat packs can damage the sliding mechanism of dropper posts unless you use a specialized adapter or a dropper-compatible mounting system.
Route Matching: Adapting Your Bag Choice to Local Trails and Weather
Choosing the right bike bag also requires evaluating the specific environments where you ride. When navigating shared paths and park connectors in Singapore, keeping a slim bag profile is essential to avoid snagging on trailside foliage or posing a hazard to pedestrians. High-visibility details or integrated light loops on your bags are highly beneficial for evening rides along these popular routes.
The tropical climate presents unique challenges, including sudden downpours and high humidity. When selecting a bag, carefully check product labels for water resistance ratings, looking for terms like “fully waterproof,” “welded seams,” or “IPX-rated” protection. Materials like polyurethane-coated nylon or polyester offer excellent durability and prevent moisture from seeping in during heavy rain, protecting your electronics and spare clothing.
On mixed-terrain trails or uneven paved paths, loose bags can rattle, distract you, or even work themselves free. Always take a moment before your ride to secure all loose straps, tuck away dangling buckles, and double-check that the bag is firmly anchored to your bike’s frame. A snug fit not only eliminates annoying noises but also prevents the bag fabric from rubbing against your bike’s finish.
Pre-Purchase Checks: Verifying Fit and Component Compatibility
Before purchasing any bike bag, performing a few precise physical measurements will save you from compatibility headaches. Use a flexible measuring tape to check your frame triangle’s inner dimensions, the length of your exposed seat post, and the width of your saddle rails. Comparing these measurements directly against the manufacturer’s specified bag dimensions ensures a secure and functional fit.
It is equally critical to review manufacturer warnings regarding your bicycle’s materials and components. Carbon fiber frames and seat posts require extra care, as abrasive dirt trapped beneath tight straps can wear down the outer resin layer over time. If you ride a full-suspension bike, you must also account for rear wheel travel to ensure a large seat pack won’t contact the tire when the rear shock is fully compressed.
To safeguard your bike’s paint and structural integrity, inspect the strap materials of the bag you plan to buy. Applying high-quality frame protection tape to all contact points on your frame or seat post before mounting the bag is a highly effective way to prevent paint scuffs and cosmetic wear. Taking these simple precautions ensures your gear remains secure while keeping your bicycle in pristine condition.
Frequently Asked Questions (FAQ)
Can I use multiple bike bags at the same time?
Yes, combining different bag types is a common practice for longer rides, provided you balance the total weight distribution. Ensure that heavy items are distributed evenly between the front, center, and rear of the bike to maintain stable handling. Always check that the bags do not physically interfere with each other, block your safety lights, or restrict your natural riding posture and movement.
How do I clean and maintain my bike bag after riding in the rain?
After riding in wet or humid conditions, empty your bike bag completely and wipe down both the interior and exterior with a damp cloth to remove road grime. Hang the bag to air-dry completely in a well-ventilated area away from direct sunlight to prevent mold, mildew, and unpleasant odors. Periodically inspect the zippers, buckles, and straps for wear, and consult the manufacturer’s guidelines if you need to re-treat the fabric with a water-repellent spray.
Community discussion
Share your experience or ask a question. Comments are reviewed before publication.