
Selecting the right EVOC saddle bag requires balancing your typical ride duration, the volume of gear you must carry, and your bicycle’s physical dimensions. A bag that is too small leaves you stranded without essential tools during a mechanical failure, while an oversized bag adds unnecessary weight and can sway, disrupting your bike’s handling. By matching your specific riding profile to the appropriate bag category, you can ensure your gear remains secure, dry, and accessible throughout your journey.
Identify Your Ride Profile and Gear Needs
Your cycling routine dictates your storage requirements. Short urban commutes or quick fitness loops on paved paths demand very little gear, typically limited to a spare tube, tire levers, and a multi-tool. For these rides, keeping your setup lightweight and aerodynamic is the primary goal.
As your mileage increases to medium gravel loops or full-day road excursions, your gear list expands. You must prepare for changing weather conditions, nutritional needs, and minor medical emergencies. This means carrying a lightweight windbreaker, energy bars, and a basic first-aid kit alongside your standard repair tools.
Products mentioned in this guide
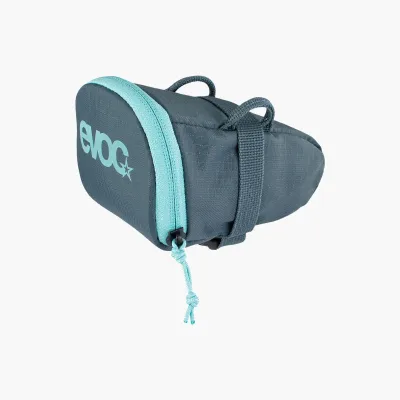
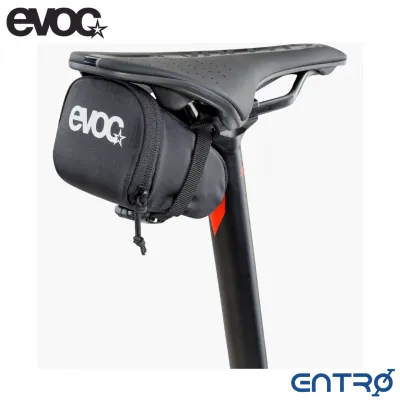
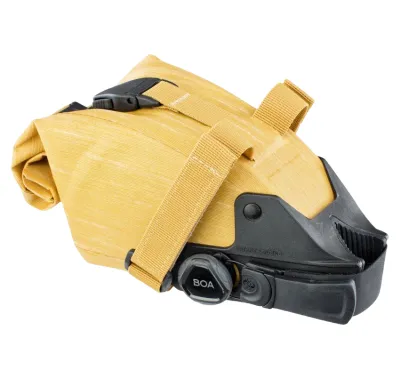
Prices are valid at publication and may change. Please refer to the product page for the latest price.
Multi-day bikepacking trips and long-distance expeditions represent the upper limit of storage needs. These journeys require carrying bulky items such as sleeping gear, a change of clothes, and cooking equipment. The weight and volume of this gear demand a highly stable, high-capacity storage solution.
Local environmental factors also play a critical role in your decision. For instance, when riding along the Park Connector Network (PCN) or rustic trails in Singapore, high humidity and sudden tropical downpours are common. Your gear must be protected from moisture, and you may need rapid access to a rain jacket or poncho without unpacking your entire bag.
Compare EVOC Saddle Bag Categories by Capacity and Use
EVOC offers a diverse range of saddle bags designed to cater to different cycling disciplines and storage demands. Because product lines, model names, and exact liter capacities frequently update, it is essential to verify the latest specifications on the official EVOC website or product labels before making a purchase.

Rather than focusing solely on specific model numbers, you should evaluate these bags based on their functional categories: compact, mid-size, and large. Each category features distinct construction methods, mounting systems, and stability features tailored to specific riding styles and terrain types.
Compact Road and Commuter Bags
Compact saddle bags are designed for minimalists who prioritize speed, efficiency, and a clean bike profile. These bags typically tuck neatly beneath the saddle rails, minimizing wind resistance and keeping the overall weight of the bicycle low.
The ideal gear load for a compact bag is strictly limited to roadside essentials. You can expect to pack one or two spare inner tubes, a pair of tire levers, a CO2 inflator with cartridges, and a compact multi-tool. This setup ensures you can repair common punctures and make minor adjustments without carrying excess bulk.
When evaluating compact options, inspect the strap systems and aerodynamic shaping. The bag should feature secure hook-and-loop fasteners or buckle systems that wrap tightly around the saddle rails and seatpost to prevent any side-to-side sway during high-cadence pedaling or out-of-the-saddle climbing.
Additionally, you must verify the physical clearance between your saddle rails and the top of your rear tire. Even with small bags, insufficient clearance can lead to the bag rubbing against the tire when riding over bumps, which can damage both the bag and the tire.
Mid-Size Gravel and Light Touring Bags
Mid-size saddle bags strike a balance between storage capacity and streamlined performance, making them highly suitable for gravel riding, light touring, and extended day trips. These bags offer enough volume to accommodate extra layers and sustenance without requiring a heavy rack system.
Your typical gear load for a mid-size bag includes your standard flat-repair kit, plus additional items for comfort and safety. This might consist of a packable windbreaker or rain shell, extra energy gels, a small first-aid kit, and perhaps a portable power bank to keep your navigation devices charged.
Look for bags constructed from water-resistant materials and featuring roll-top closures or expandable compartments. Roll-top designs are particularly useful because they allow you to compress the bag to the exact volume of your contents, preventing items from rattling around on rough surfaces.
Mounting stability is crucial for mid-size bags, especially when venturing onto unpaved gravel paths or uneven trails. Verify that the mounting system utilizes robust, reinforced straps that secure tightly to both the saddle rails and the seatpost, minimizing movement when riding over corrugated terrain.
Large Bikepacking and Expedition Bags
Large saddle bags, often referred to as seat packs, are engineered for self-supported adventures, multi-day bikepacking, and wilderness expeditions. These high-volume bags maximize the unused space behind your saddle, allowing you to carry substantial gear without the aerodynamic drag of traditional panniers.
The ideal gear load for these large bags consists of bulky but relatively lightweight items. You can pack a compact sleeping bag, a bivy sack or lightweight tent body, spare clothing, and camp utilities. It is best to pack the heaviest items closest to the seatpost to maintain a stable center of gravity.
Because of the significant weight and leverage exerted by a large, fully loaded bag, you must verify whether the model requires a dedicated mounting harness or an external support frame. A robust harness system helps prevent the “tail-wag” effect, where the bag sways from side to side as you pedal, which can severely compromise your bike’s handling and balance.
Furthermore, check for external utility features such as integrated bungee cords, compression straps, or daisy chains. These attachment points allow you to lash wet gear, a lightweight jacket, or a safety light directly to the outside of the bag for quick access and drying on the go.
Key Features to Verify Before You Buy
Before finalizing your purchase, it is vital to check specific physical and functional details on the product label or official specifications sheet to ensure compatibility with your bike and riding habits.
- Water Resistance: Examine the manufacturer's material descriptions and IP (Ingress Protection) ratings. If you frequently ride in wet climates or expect sudden downpours, look for fully waterproof fabrics with welded seams and roll-top closures rather than basic water-resistant coatings that may eventually saturate.
- Mounting System: Verify how the bag attaches to your bicycle. Some models use simple hook-and-loop straps, while others utilize rigid buckle systems or proprietary quick-release brackets. Ensure the mounting hardware is compatible with your saddle rail material; for example, some carbon rails have non-standard shapes or weight limits that require specific mounting considerations.
- Clearance and Fit: Measure the vertical distance from your saddle rails to the top of your rear tire, as well as the exposed length of your seatpost. This is especially critical for mountain bikes with rear suspension, as you must account for the tire moving upward when the shock compresses fully.
- Visibility: Safety is paramount, particularly during early morning, late evening, or rainy rides. Check if the saddle bag features integrated loops for clipping on a rear safety light and verify the presence of highly reflective elements or logos on the back and sides of the bag.
Decision Framework: Matching the Bag to Your Ride
To select the ideal bag, apply a simple conditional framework based on your primary riding style. If your typical outings last under three hours, you prioritize a lightweight setup, and you only need to carry basic flat-repair tools, a compact road bag is your best option.
If you regularly embark on full-day rides, encounter unpredictable weather, and need to carry extra layers, nutrition, and safety gear, choose a mid-size gravel or light touring bag. This option provides the necessary versatility without adding excessive bulk.
If you are planning multi-day, self-sustained expeditions where you must carry shelter, sleeping gear, and multiple changes of clothing, a large bikepacking seat pack is essential.
Regardless of your storage needs, always verify your bike’s physical limitations first. If your bicycle has limited seatpost exposure, a dropper post, or minimal rear tire clearance, you may be restricted to a smaller bag size, requiring you to distribute your gear to other frame bags or a handlebar roll.
Frequently Asked Questions (FAQ)
How do I clean and maintain my EVOC saddle bag?
To preserve the integrity of the materials and coatings, always check the care label or manufacturer instructions for specific cleaning guidelines. For general dirt and road grime, gently wipe the exterior and interior of the bag with a damp cloth and mild, non-abrasive soap. Avoid using harsh chemical solvents, bleach, or machine washing, as these can strip away water-resistant coatings and damage the seams. After cleaning, open all compartments and allow the bag to air-dry completely in a well-ventilated area away from direct sunlight before storing it to prevent the growth of mold, mildew, or unpleasant odors.
Can I use an EVOC saddle bag with a dropper seatpost?
Using a saddle bag with a dropper seatpost depends entirely on the bag’s mounting design and your bike’s setup. Because dropper posts slide up and down, standard strap systems that wrap tightly around the moving stanchion can scratch the surface, damage the seals, or restrict the post’s movement. To determine compatibility, measure the exposed stanchion length at your lowest riding position and check the bag’s minimum clearance requirements. If you plan to use a saddle bag on a dropper post, look for models designed with specialized dropper-compatible straps, or use a dedicated dropper-post adapter accessory to protect the stanchion, and consult the manufacturer’s guidelines for approved configurations.
Community discussion
Share your experience or ask a question. Comments are reviewed before publication.