
Selecting the right Theraband resistance level for your post-run recovery routine is a balancing act between promoting muscle repair and avoiding unnecessary strain. For most runners, the most appropriate choice lies within the lighter end of the resistance spectrum—typically the yellow, red, or green bands. After a demanding run, your muscles are already micro-damaged and fatigued; introducing heavy resistance can exacerbate this damage, leading to prolonged soreness or acute injury. By choosing a lighter band, you prioritize gentle mobilization, increased blood circulation, and active recovery, which collectively help flush out metabolic waste and restore your natural range of motion.
Your choice should also align with your current physical condition, training history, and the specific muscle groups you intend to target. A band that feels sufficiently supportive for a hamstring stretch might prove far too stiff for a shoulder mobility exercise. Understanding how to navigate the color-coded resistance system and matching it to your recovery objectives ensures that your post-run routine remains therapeutic rather than destructive.
Understanding the Theraband Color-Coded System
The manufacturer’s progressive resistance system is designed to help users systematically scale their workouts and recovery sessions. This system uses a distinct sequence of colors to represent increasing levels of tension. While the classic progression typically starts with tan or yellow as the lightest options, it moves through red, green, blue, black, silver, and gold. For post-run recovery, runners almost exclusively operate within the lower half of this spectrum. The lighter bands provide just enough tension to assist with stretching and light muscle activation without triggering the high-threshold motor units that cause further muscle breakdown.
Products mentioned in this guide
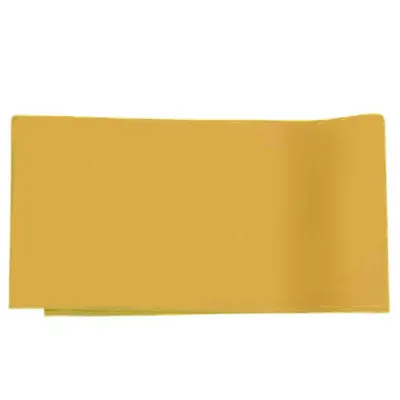
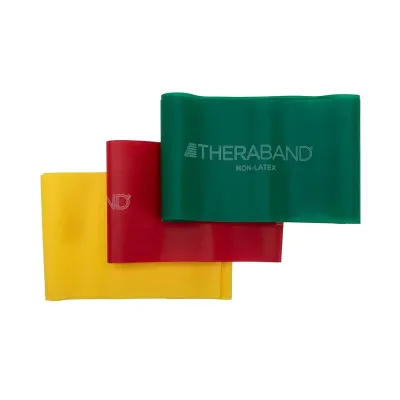
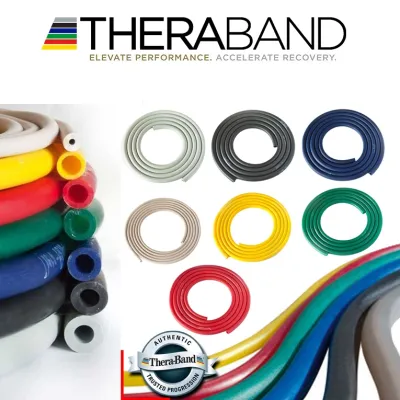
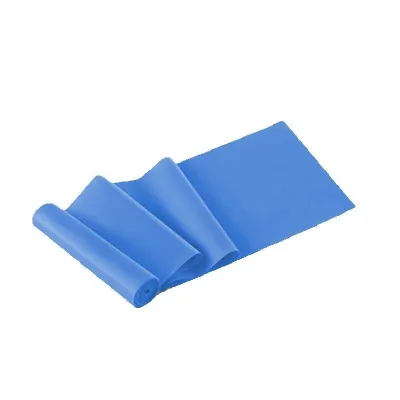
Prices are valid at publication and may change. Please refer to the product page for the latest price.
It is important to recognize that the exact resistance values are not uniform across all product lines. A yellow flat band does not exert the exact same pull as a yellow tubular band with handles or a yellow continuous loop band. The resistance of any band is dynamic, increasing as the material is stretched beyond its resting length. Because of these variations, you should always verify the specific tension charts and metrics printed on the product packaging or the official user guide. Relying on color alone without checking the specific product line’s specifications can lead to unexpected resistance levels during your routine.
When planning a post-run recovery session, the primary goal is to facilitate movement rather than build strength. The lighter tiers—specifically yellow and red—are excellent for delicate, high-repetition movements and deep, assisted stretches. Green bands can occasionally be introduced for larger muscle groups, such as the glutes or hamstrings, where a bit more feedback is required to feel the stretch. However, moving into the blue or black tiers during a recovery session is generally counterproductive, as these heavier bands demand significant muscular effort that can interfere with the body’s natural healing processes.
Matching Resistance to Your Specific Recovery Goals
To get the most out of your post-run routine, you must align the band’s resistance with your immediate physiological goals. Active recovery is not about pushing your limits; it is about creating an environment where your body can repair itself more efficiently.

Gentle Stretching and Mobility
When your primary objective is to improve flexibility and release tension in the fascia, you should select the lightest available resistance levels, such as tan or yellow. At this level, the band acts primarily as an extension of your limbs, allowing you to sink into stretches without straining to reach your feet or hold a position. For example, during a lying hamstring stretch, a light flat band supports the weight of your leg, enabling you to relax your quadriceps and hip flexors. The focus here is entirely on movement quality, joint decompression, and gentle elongation of the muscle fibers, rather than forcing the joint past its comfortable range of motion.
Joint Stability and Mild Activation
After a long run, stabilizing muscles around your hips, knees, and ankles can become temporarily inhibited or fatigued. Using a light-to-medium band, such as red or green, can help re-engage these crucial stabilizers through low-intensity exercises like lateral band walks or ankle distraction. This level of resistance provides valuable neuromuscular feedback, helping your brain reconnect with stabilizing muscles without exhausting them. The goal is to stimulate blood flow and restore joint tracking, which helps prevent post-run stiffness and prepares your body for subsequent daily activities.
The Over-Resistance Risk
Using a band that is too heavy during a recovery session is a common mistake that directly contradicts the purpose of a cool-down. High resistance forces your muscles to contract intensely, which can cause additional micro-tears in fibers that are already compromised from your run. This extra stress can lead to severe delayed onset muscle soreness or even acute muscle strains. Instead of flushing out metabolic waste, heavy resistance traps tension in the muscles, prolonging your recovery window and increasing the risk of injury during your next training session.
Adjusting for Your Fitness Level and Injury History
Your individual training background, overall physical conditioning, and any past injuries play a decisive role in determining which resistance level is appropriate for your recovery.
Beginners and Post-Injury Phases
If you are new to running or are currently recovering from an injury, your neuromuscular pathways may not be fully optimized. In these scenarios, you should always start with the lowest resistance level available. Using a tan or yellow band allows you to focus entirely on executing movements with proper form and control. This cautious approach helps rebuild joint stability and muscle coordination without overloading healing tissues. It is far better to complete a recovery routine with a band that feels slightly too light than to risk re-injury by using a band that demands too much physical effort.
Advanced Runners
Experienced athletes with a high training volume often possess greater baseline strength and joint stability, but this does not mean they should automatically use heavy bands for recovery. Instead, advanced runners can benefit from mixing different resistance levels within a single recovery session. You might use a very light yellow band for delicate areas like the rotator cuff or ankle stabilizers, while opting for a red or green band to assist with larger, more robust muscle groups like the glutes and hip adductors. This targeted approach ensures that each muscle group receives the appropriate level of feedback without being overloaded.
Pain and Discomfort Boundaries
During any post-run recovery exercise, you must maintain a clear distinction between a productive stretching sensation and actual pain. A safe, effective stretch should feel like a mild, dull pull within the muscle belly. If you experience sharp, stabbing, or radiating pain in your joints, tendons, or ligaments, this is an immediate stop condition. Continuing to pull against a resistance band when experiencing joint discomfort can exacerbate underlying issues like tendinitis or ligament sprains. If pain persists, discontinue the exercises and consult a qualified healthcare professional or physical therapist for a personalized assessment.
Safety Checks and Equipment Selection Before Use
Before you begin any resistance band routine, performing a quick safety inspection of your equipment and environment is essential to prevent accidents and ensure a smooth recovery session.
First, inspect your band thoroughly before every single use. Look closely for any signs of wear, such as micro-tears along the edges, white stress marks where the material has been overstretched, discoloration, or brittleness. In Singapore’s warm and highly humid climate, latex and non-latex synthetic bands can degrade more rapidly if stored in non-air-conditioned spaces or exposed to direct sunlight. If you notice any of these warning signs, or if the band feels unusually sticky or dry, discard it immediately. A band that snaps under tension can cause painful welts or facial injuries.
Second, verify that the format of the band you are using is suitable for the specific exercises you plan to perform. Flat latex bands are highly versatile for wrapping around the feet or hands during passive stretching. Tubular bands with integrated handles are often better suited for upper-body mobility work where a secure grip is required. Continuous loop bands are excellent for lower-body exercises because they stay securely in place around your thighs or ankles without needing to be tied in knots. Matching the band format to the exercise minimizes the risk of the band slipping or releasing unexpectedly.
Finally, pay close attention to your anchoring points. If your recovery routine involves securing the band to an external object, ensure that the anchor point is completely stable. Avoid using light furniture, doors that do not latch securely, or sharp-edged posts that could cut into the band material. If you are using a door anchor, always position it on the side of the door that closes away from you, so that pulling the band pulls the door shut rather than open. Double-check that the anchor is locked in place before applying any tension.
Structuring Your Post-Run Theraband Routine
Integrating resistance bands into your post-run routine should follow a logical, structured flow to maximize the therapeutic benefits and promote systemic relaxation.
A highly effective approach is to use a bottom-up sequencing strategy, starting with the feet and ankles and moving upward to the hips and lower back. This sequence mirrors the impact patterns of running, addressing the most heavily taxed joints first. You might begin with gentle ankle distraction and calf stretches using a light flat band, then progress to hamstring and IT band mobilization, and finish with hip opener exercises. This systematic progression helps restore circulation throughout the entire lower body, ensuring that no major muscle group is overlooked.
Throughout your routine, focus on maintaining a controlled, deliberate tempo. Avoid any bouncing or ballistic movements, which can trigger the stretch reflex and cause muscles to contract rather than relax. Synchronize your movements with your breathing, exhaling slowly as you enter the stretch or apply light tension, and inhaling as you release. Keep your movements within a strictly pain-free range of motion; forcing a joint into an extreme position does not accelerate recovery and can lead to joint instability.
To optimize your recovery over time, consider keeping a simple digital or paper log of your sessions. Note the specific band colors you used, the exercises performed, and how your muscles felt the following morning. This practice allows you to track your progress and make systematic adjustments. If you find that a red band consistently leaves your hips feeling tight the next day, you can easily scale back to a yellow band for your next session. Conversely, if a yellow band no longer provides enough feedback to help you stabilize your joints, you can safely trial a red band.
Frequently Asked Questions (FAQ)
Can I use the same Theraband level for upper and lower body recovery?
No, you should generally avoid using a single resistance level for your entire body. The muscle groups in your lower body, such as your glutes, quadriceps, and hamstrings, are significantly larger and stronger than the stabilizing muscles of your upper body, such as the rotator cuff and upper back. A band that provides the right amount of gentle tension for a hamstring stretch will likely be far too stiff and demanding for shoulder mobility exercises. To ensure safe and effective recovery, assess each muscle group independently and select a lighter band for your upper body and a slightly more supportive band for your lower body.
How often should I replace my Theraband for safety?
There is no fixed calendar date for replacing a resistance band, as its lifespan depends heavily on usage frequency, storage conditions, and environmental factors. In humid environments like Singapore, rubber and latex materials can degrade faster. You should inspect your band before every session and replace it immediately if you observe any fraying, micro-tears, discoloration, loss of elasticity, or a sticky texture. Even without visible damage, frequent runners who use their bands multiple times a week typically find it safest to replace them every one to two years to prevent unexpected snapping.
Is it better to use a loop band or a flat Theraband for running recovery?
The choice between a loop band and a flat band depends on the specific exercises in your recovery routine. Continuous loop bands are highly efficient for lower-body stabilization and activation exercises, such as lateral walks or clamshells, because they stay securely around your legs without slipping or requiring knots. Flat bands, on the other hand, offer excellent versatility for full-body stretching and fascial release. They can be easily wrapped around the arches of your feet, held at varying widths for shoulder mobility, or tied to anchors, making them an excellent all-around tool for general post-run flexibility.
Community discussion
Share your experience or ask a question. Comments are reviewed before publication.