
Using a stretching band is one of the most effective ways for beginners to improve full-body flexibility and mobility safely. Unlike static stretching where you rely solely on gravity or your own reach, a stretching band acts as an extension of your limbs. This tool provides gentle, adjustable tension that helps you access deeper ranges of motion without straining your muscles or joints. By offering controlled assistance, a stretching band allows you to target specific muscle groups with precision, making it an invaluable accessory for anyone starting a flexibility journey. Whether you are looking to relieve tightness from sitting at a desk all day in Singapore’s offices or preparing your body for more intense athletic activities, learning the proper techniques for using this simple tool will ensure you progress safely and effectively.
Understanding Your Stretching Band and Safety Basics
Before you begin stretching, it is essential to understand the different types of bands available and how to use them safely. Stretching bands generally fall into three categories: loop bands, tube bands with handles, and flat therapy bands. Loop bands are continuous elastic circles, often used for lower body resistance and deep hamstring stretches. Tube bands feature plastic or foam handles at each end, which can provide a more secure grip for upper body movements. Flat therapy bands are wide, open-ended strips of latex or non-latex material that offer a highly customizable grip, making them the preferred choice for gentle, restorative flexibility routines.
Safety must always be your primary concern when working with elastic materials. Before every session, perform a thorough visual inspection of your stretching band. Look closely for any tiny tears, discoloration, nicks, or weak spots along the entire length of the material. Even a minor scratch can cause a band to snap under tension, which can lead to painful rebounds and potential injury. If you notice any signs of wear, discard the band immediately and replace it.
Products mentioned in this guide
![🇸🇬 [HEAVY DUTY] Heavy Duty Resistance Band / Stretch Band / Pull Up Band](https://img.lazcdn.com/g/p/d5dfc1f3620cc4714a3061652e8f8a07.jpg_400x400q80.jpg_.webp)
![[Instock] Hare Fitness Resistance Band / Loop Band / Exercise Band / Fitness Exercise Yoga Band / Elastic Band](https://img.lazcdn.com/g/p/1e99323346e15e19f578b55dfd52710c.jpg_400x400q80.jpg_.webp)


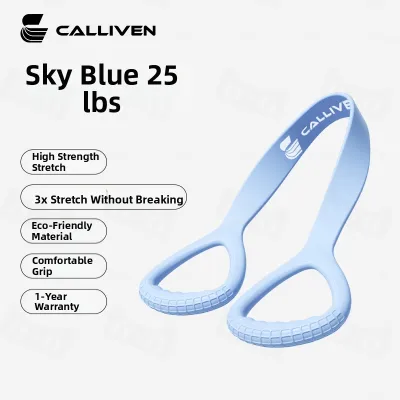

Prices are valid at publication and may change. Please refer to the product page for the latest price.
Additionally, always read the manufacturer’s guidelines regarding maximum stretch limits and resistance levels. Overstretching a band past its intended capacity increases the risk of structural failure. Proper material care is also vital, especially in warm, humid climates like Singapore. Store your bands in a cool, dry place away from direct sunlight, as UV rays and high humidity can degrade the elastic material over time, causing it to become brittle and prone to snapping.
Essential Warm-Up and Setup Techniques
To get the most out of your stretching routine and prevent muscle strains, you must prepare your body and your environment before applying any band tension. Never stretch cold muscles. Engaging in a brief, five-to-ten-minute dynamic warm-up is crucial for increasing blood flow and raising your core body temperature. Simple movements such as gentle arm circles, torso twists, and light marching in place will prepare your neuromuscular system for the deeper stretches to follow.

Once your body is warm, establish a secure setup. If your stretch requires anchoring the band to an external object, ensure the anchor point is completely stable and immovable, such as a heavy piece of gym equipment or a dedicated door anchor. Avoid securing the band to lightweight furniture or doors that could easily swing open. If you are performing standing or seated stretches where your body acts as the anchor, establish a firm grip and solid footing. Place the band securely under the arches of your feet rather than the toes to prevent it from slipping off and snapping upward.
As you begin each stretch, adjust your band length and grip width to maintain complete control. Holding the band closer to the center increases resistance, while moving your hands further apart reduces tension. Find a starting position that allows you to move through the stretch smoothly without forcing the material to its absolute limit. Your grip should be firm but relaxed, preventing unnecessary tension in your hands and forearms.
Step-by-Step Full-Body Stretching Routine
A structured, full-body stretching routine ensures that all major muscle groups are addressed systematically, promoting balanced flexibility. Moving through the sequence smoothly—starting from the upper body and working your way down—helps maintain a steady heart rate and keeps your muscles warm. Focus on transitioning gently between each posture, avoiding sudden or jerky movements.
Upper Body and Shoulder Mobility
To release tension in the chest, shoulders, and upper back, begin with controlled band pull-aparts and shoulder pass-throughs. For the pull-apart, hold the band in front of you at shoulder height with your hands slightly wider than shoulder-width apart. Keeping your arms straight, slowly pull the band outward by squeezing your shoulder blades together, then return to the starting position with control. For pass-throughs, hold the band with a wide grip, raise it slowly over your head, and bring it down toward your lower back, maintaining steady, rhythmic breathing throughout.
During these overhead movements, it is critical to maintain a neutral spine. Avoid arching your lower back or shrugging your shoulders up toward your ears, as this transfers the tension away from the targeted muscles and onto your neck and spine. Keep your core lightly engaged and your shoulders relaxed and pulled down.
As a beginner, you must learn to recognize the difference between a productive muscle stretch and sharp joint discomfort. A safe stretch should feel like a gentle, warm pulling sensation in the belly of the muscle. If you feel any pinching, grinding, or sharp pain in the shoulder joints, widen your grip on the band immediately to reduce the tension, or stop the movement entirely.
Core and Lower Back Release
The core and lower back require a gentle touch, as these areas are highly sensitive to sudden rotational forces. To stretch the obliques and release tension along the spine, perform seated or supine torso twists using light band tension. Sit on the floor with your legs extended, loop the band around the soles of your feet, and hold the ends with both hands. Slowly rotate your torso to one side, using the band to gently guide and support the rotation without forcing your body past its natural limit.
Throughout these rotational movements, keep your core muscles lightly engaged. This active engagement acts as a natural corset, supporting the lumbar spine and preventing you from over-rotating or placing excessive stress on the spinal discs. The band should serve as a supportive guide, not a tool to pull yourself into an extreme twist.
If you experience any lower back discomfort, tingling, or a pinching sensation during the twist, modify the stretch angle immediately. You can reduce the rotation, bend your knees slightly, or loosen your grip on the band. If the discomfort persists, stop the exercise immediately to protect your spine from strain.
Hips, Hamstrings, and Leg Flexibility
Tightness in the lower body is incredibly common, particularly for those who spend long hours sitting. To improve hip mobility and hamstring length, transition to a supine hamstring stretch. Lie flat on your back, loop the center of the stretching band around the arch of one foot, and hold the ends of the band in your hands. Slowly raise your leg toward the ceiling, keeping your hips flat on the floor, and use the band to gently pull the leg closer to your torso until you feel a stretch along the back of your thigh.
If you are prone to knee hyperextension or have tight hamstrings, keep the working leg slightly bent at the knee. Locking out the joint transfers the tension from the muscle belly to the tendons and the knee joint itself, which can lead to strain. A slight bend ensures the stretch remains safely focused on the hamstring muscle.
Use the stretching band to guide your limb mindfully rather than forcing the joint into its end-range motion. For seated hip openers, loop the band around your feet and gently guide your knees outward. Let the resistance of the band assist your muscles in relaxing, rather than pulling aggressively, which can cause the muscles to contract defensively.
How to Build a Safe and Effective Routine
Integrating stretching band exercises into your weekly fitness schedule requires a balanced approach that prioritizes consistency over intensity. For beginners, a frequency of two to three sessions per week is an excellent starting point. Each session should last approximately 15 to 20 minutes, allowing ample time to move through the full-body routine without rushing. Listen closely to your body’s recovery signals; if your muscles feel excessively sore or fatigued the day after a session, allow an extra day of rest before stretching again.
Progress in flexibility is best tracked through observable range-of-motion changes in your daily activities rather than arbitrary measurements. You might notice that it becomes easier to bend down and tie your shoes, or that your shoulders feel less stiff when reaching overhead. Keeping a simple journal of how your body feels during daily tasks is a highly effective way to monitor your long-term progress.
When you feel ready to progress, do so gradually. Only adjust your grip width to increase tension or move to a thicker band when your current routine feels completely controlled and effortless. Progression should never come at the expense of proper form. If you find yourself holding your breath, shrugging your shoulders, or losing your balance, return to a lighter resistance level until you can execute the movement with perfect control.
Common Mistakes and When to Stop
One of the most common mistakes beginners make when using a stretching band is bouncing or using momentum to force a deeper stretch. This ballistic movement triggers the stretch reflex, a protective mechanism that causes the muscle to contract to prevent tearing. Bouncing not only defeats the purpose of the stretch but also significantly increases the risk of muscle strains and micro-tears. Instead, hold each stretch statically, maintaining a steady, controlled position while breathing deeply.
You must also remain highly sensitive to your body’s warning signs. While a mild, dull ache is normal during a deep stretch, you should never push through sharp pain, numbness, tingling, or joint instability. These sensations are clear indicators that a nerve is being compressed or a joint is being placed under unsafe stress.
If you experience any of these warning signs, stop the stretch immediately. Do not attempt to work through the pain. If the discomfort or pain persists after your session, or if you experience swelling or localized heat in a joint, consult a qualified healthcare professional or physical therapist to ensure you have not sustained an injury.
Frequently Asked Questions (FAQ)
How often should beginners use a stretching band?
For beginners, using a stretching band two to three times per week is generally highly effective for building baseline flexibility. The ideal frequency depends on your individual recovery rate, the intensity of your sessions, and your overall daily activity level. Always listen to your body and check the manufacturer’s guidelines or consult a fitness professional to design a personalized schedule that matches your physical condition.
Can I use a stretching band if I have joint pain?
If you have pre-existing joint pain, you should obtain a professional medical evaluation before introducing any external tension, including stretching bands. While bands are excellent tools for healthy joints, they place mechanical stress on the body and should never replace prescribed physical therapy or medical treatment. Always consult a healthcare professional to ensure stretching is safe for your specific condition.

Community discussion
Share your experience or ask a question. Comments are reviewed before publication.