
Recovering from a sprained ankle requires a systematic approach to support, protection, and rehabilitation. Finding the right ankle brace for injury recovery is not about choosing a single “best” product, but rather matching the level of support to your specific stage of healing. An inappropriate brace can either fail to protect a vulnerable joint or unnecessarily restrict movement, delaying your long-term recovery.
To make an informed choice, you must evaluate your current physical condition, understand how different brace designs function, and recognize the key features that ensure both comfort and safety. This guide provides a comprehensive framework to help you select the most appropriate support for your recovery journey, ensuring a safe and effective return to daily activities and sports.
Understanding Your Ankle Sprain Recovery Needs
Every ankle sprain is unique, and your recovery needs will shift dramatically as your ligaments heal. Using the wrong type of support at the wrong time can hinder your progress. For instance, wearing a highly rigid brace during the late stages of recovery can cause muscle weakness, while wearing a flimsy sleeve immediately after a severe sprain can lead to re-injury. Identifying your current recovery phase is the first step in making a safe purchase.
Products mentioned in this guide
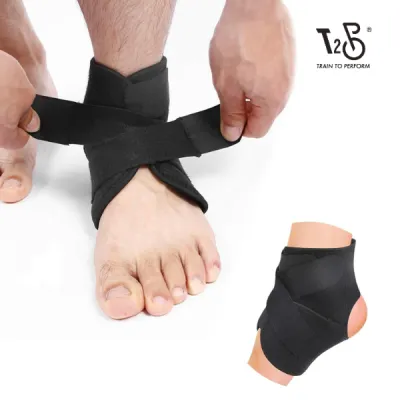
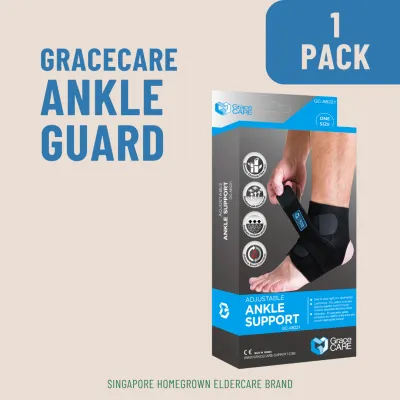
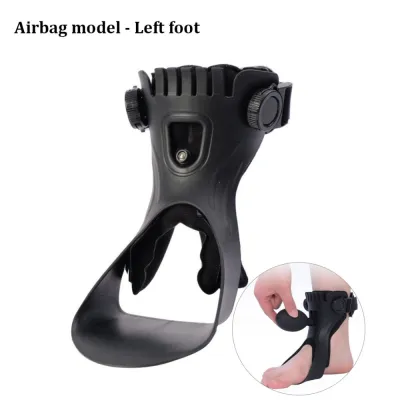
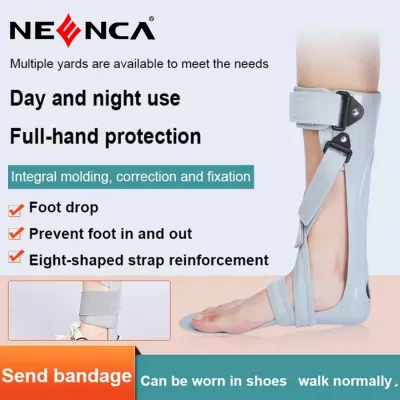
Prices are valid at publication and may change. Please refer to the product page for the latest price.
The Acute Phase (0 to 72 Hours) Immediately following an injury, the primary goals are to control swelling, protect the damaged ligaments from further stretching, and manage pain. This phase is characterized by visible swelling, bruising, and difficulty bearing weight. During this time, the ankle joint is highly unstable and requires maximum mechanical immobilization to allow the torn fibers to begin binding together.
The Sub-Acute Phase (Weeks 2 to 6) As the initial swelling subsides and sharp pain transitions into a dull ache, you enter the sub-acute phase. You may be able to bear weight and walk short distances, but the joint will still feel weak, stiff, and vulnerable to lateral movements. The focus during this period shifts to controlled mobilization, gradual weight-bearing, and early rehabilitation exercises. Your support gear must allow forward and backward movement while strictly preventing side-to-side rolling.
The Return-to-Activity Phase (Week 6 and Beyond) In the final stage of recovery, your normal walking gait is restored, and swelling is minimal or absent. However, the newly formed scar tissue is still maturing and lacks the full tensile strength of healthy ligaments. When returning to high-demand activities, lateral cutting sports, or walking on uneven surfaces, you need a lightweight support that enhances joint awareness without restricting your natural athletic performance.
Over-the-Counter vs. Custom Orthotics Standard over-the-counter (OTC) braces are highly effective for Grade I (mild stretch) and Grade II (moderate partial tear) sprains. They offer accessible, adjustable, and cost-effective stabilization. However, severe Grade III sprains (complete ligament rupture) or injuries accompanied by avulsion fractures require custom-molded orthotics or prescribed medical walking boots. These specialized devices are designed to completely eliminate weight-bearing forces and must be fitted by a healthcare professional.
The Importance of Professional Diagnosis Before purchasing any ankle brace for injury recovery, consulting a doctor or physiotherapist is essential. A professional assessment rules out underlying fractures, syndesmotic (high ankle) sprains, or nerve damage that standard braces cannot safely accommodate. A physiotherapist can also provide a tailored rehabilitation plan, ensuring that your brace acts as a complement to active recovery rather than a permanent crutch.
Matching Brace Types to Recovery Stages
Ankle braces are generally categorized into three main designs, each offering a different balance of stabilization, compression, and mobility. Matching these designs to your specific recovery phase ensures that your joint receives the exact level of assistance it needs to heal without developing unnecessary stiffness.

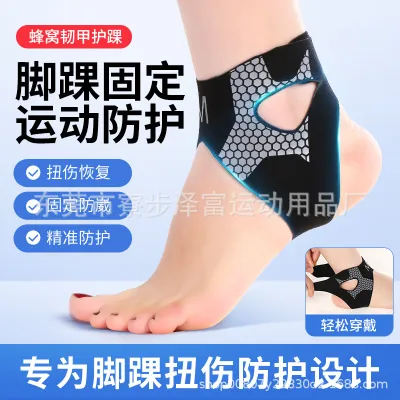
Compression Sleeves Compression sleeves are typically made of elasticized knit fabrics, nylon, or thin neoprene. They slip over the foot like a sock and provide uniform pressure around the entire joint.
- Primary Function: These sleeves offer minimal mechanical support, meaning they will not physically stop your ankle from rolling. Instead, they excel at managing mild, residual swelling and enhancing proprioception—the body's subconscious awareness of joint position in space.
- Best Suited For: The late return-to-activity phase, daily wear during light household tasks, or as a psychological confidence booster when transitioning back to low-impact exercise.
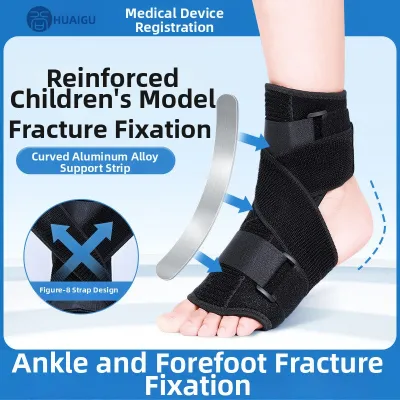
Lace-Up and Figure-Eight Strap Braces Lace-up braces feature a fabric boot secured with laces, often combined with long elastic straps that wrap around the ankle in a figure-eight pattern to lock the heel in place.
- Primary Function: This design closely mimics professional athletic taping. The laces allow you to customize the tightness along the entire length of the foot, while the figure-eight straps provide moderate to high lateral stability. They allow natural up-and-down bending (plantarflexion and dorsiflexion) while restricting the side-to-side movements (inversion and eversion) that cause sprains.
- Best Suited For: The sub-acute phase of recovery, daily walking, light rehabilitation exercises, and protection during recreational sports.
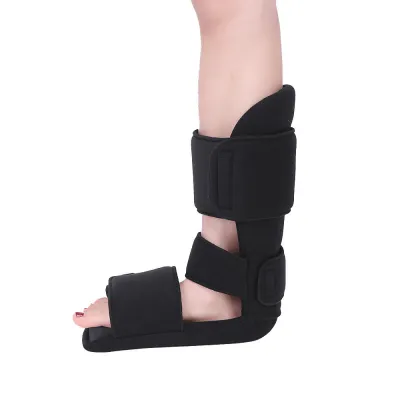
Rigid or Hinged Braces Rigid braces utilize hard plastic or composite side panels (stirrups) that run up the medial and lateral sides of the ankle, secured by heavy-duty Velcro straps. Hinged models incorporate a mechanical joint at the ankle bone to allow natural walking mechanics while blocking lateral movement.
- Primary Function: These braces provide maximum mechanical stabilization. By physically blocking lateral rotation, they protect highly vulnerable ligaments from accidental twisting, even under significant physical stress.
- Best Suited For: The acute phase of moderate-to-severe sprains, early weight-bearing under medical guidance, and high-risk, high-impact court sports (such as basketball, netball, or badminton) where rapid lateral changes of direction are frequent.
Essential Features to Check Before Purchasing
When browsing online marketplaces or visiting local medical supply stores, it is easy to be overwhelmed by the variety of options. To ensure you select a high-quality, practical ankle brace for injury recovery, evaluate the following design and material specifications.
Breathability and Moisture-Wicking Fabrics In Singapore’s hot and humid tropical climate, heat and sweat accumulation inside a brace can quickly lead to skin irritation, chafing, and bacterial or fungal infections. Avoid thick, solid neoprene braces that trap heat. Instead, look for advanced synthetic blends, 3D spacer fabrics, perforated neoprene, or moisture-wicking knit materials. These fabrics allow air to circulate and pull sweat away from the skin, keeping the joint cool and dry during extended wear.
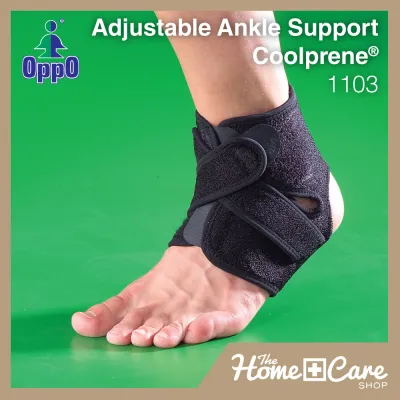
Adjustability Mechanisms Ankle swelling is rarely constant; it typically fluctuates throughout the day, often worsening after prolonged standing, walking, or sitting. A rigid, non-adjustable support can become painfully tight as swelling increases, or too loose as it subsides. Look for braces featuring dual-strap Velcro systems, speed-lacing mechanisms, or independent tension zones. These features allow you to make quick, micro-adjustments to the compression level without needing to remove your shoe.
Shoe Compatibility and Profile Thickness A highly supportive brace is of no use if it cannot fit inside your footwear. Some rigid or heavily padded lace-up braces are incredibly bulky, requiring you to wear a larger shoe size or stretch out your favorite athletic trainers. If you plan to wear the brace to work, school, or during sports, look for low-profile designs. These utilize high-density, thin materials under the arch and around the heel, allowing the brace to slide comfortably into standard athletic shoes, school shoes, or flat casual footwear.
Ensuring Proper Fit and Safe Usage
Even the most advanced ankle brace for injury recovery will fail to protect your joint—and may even cause secondary injuries—if it is fitted incorrectly or worn improperly. Following precise application guidelines is critical for safe and effective recovery.
Relying on Precise Sizing Charts Never purchase an ankle brace based solely on your standard shoe size. Because bone structure, swelling levels, and calf widths vary greatly, manufacturers provide specific sizing charts based on physical measurements. Use a flexible measuring tape to measure the circumference of your ankle (just above the bony protrusions) or the diagonal distance around your heel and instep. Compare these measurements directly to the manufacturer’s guide to find your correct size.
Achieving Proper Anatomical Alignment When putting on your brace, pay close attention to how the structural elements align with your anatomy. For rigid or hinged braces, the molded plastic stirrups or mechanical hinges must align perfectly with the medial (inner) and lateral (outer) ankle bones (malleoli). If the hinges sit too high, too low, or too far forward, they will create painful pressure points, cause skin chafing, and fail to provide the intended mechanical support.
Monitoring for Warning Signs While a recovery brace should feel snug and highly supportive, it must never restrict your blood circulation or compress your nerves. Monitor your foot and toes closely while wearing the brace. If you experience any of the following warning signs, loosen the straps immediately or remove the brace:
- Coldness or pale, bluish skin in your toes.
- Numbness, tingling, or a "pins and needles" sensation in your foot.
- Deep, throbbing pain that increases after putting the brace on.
- Severe skin redness, blisters, or raw spots along the edges of the brace.
Transitioning Out of the Brace and Next Steps
An ankle brace is an invaluable tool for protecting a healing joint, but it is designed to be a temporary aid. Over-relying on external support for too long can lead to muscle laziness, joint stiffness, and chronic instability. Knowing when and how to transition away from the brace is a vital part of your long-term recovery.
Identifying Physical Milestones You can begin gradually weaning yourself off the brace once you meet specific functional milestones. These include the ability to walk pain-free on flat ground without a limp, stand steadily on the injured leg for at least thirty seconds with your eyes open, and perform basic daily tasks without experiencing post-activity swelling. Start by removing the brace during low-risk, controlled environments, such as sitting at your desk or walking short distances on flat surfaces inside your home.
The Critical Role of Active Rehabilitation When you remove a brace, you must replace that external support with internal strength. A structured rehabilitation program is essential to rebuild the muscles, tendons, and neural pathways surrounding the joint. Focus on three key areas:
- Strengthening: Exercises like calf raises, toe walks, and resistance band lateral movements to strengthen the peroneal muscles on the outside of the ankle.
- Mobility: Gentle ankle circles and calf stretches to restore a full, natural range of motion.
- Balance and Proprioception: Single-leg stands on flat ground, progressing to uneven surfaces like a pillow or balance pad, to retrain your brain to detect and correct sudden joint movements.
Recognizing Stop Conditions Transitioning out of a brace is rarely a perfectly linear process. If you experience a sudden flare-up of swelling, sharp pain during normal walking, or a sensation that your ankle is “giving way” or sliding out of place, stop weaning off the brace immediately. Reapply the support and consult your physiotherapist or doctor. These symptoms indicate that your ligaments require more healing time, or that your stabilizing muscles are not yet strong enough to handle unsupported weight-bearing.
Frequently Asked Questions (FAQ)
Can I wear an ankle brace while sleeping?
Generally, you should remove your ankle brace before going to sleep. During rest, your body requires unrestricted blood circulation to facilitate tissue repair, and keeping a tight, supportive garment on overnight can lead to localized swelling, skin breakdown, and nerve compression. Exceptions to this rule only apply if you have received specific medical instructions from an orthopedic surgeon or physiotherapist, such as immediately following a major surgical repair or during the management of severe, acute instability where accidental nocturnal movements must be strictly prevented.
How do I clean and maintain my ankle brace?
Regular cleaning is essential to maintain hygiene, prevent skin irritation, and preserve the elasticity and structural integrity of your brace. Always check the manufacturer’s care label first. Most fabric, knit, and neoprene braces should be hand-washed in cold water using a mild, non-biological detergent, as machine washing and harsh detergents can degrade elastic fibers and weaken Velcro closures. After washing, gently squeeze out excess water without wringing the fabric, and lay the brace flat to air-dry in a well-ventilated indoor space. Avoid direct sunlight, clothes dryers, or radiators, as high heat can warp plastic components and ruin synthetic materials.
Should I wear the brace on both ankles for prevention?
Unless you have a documented history of chronic instability or bilateral injuries, wearing a brace on both ankles is generally unnecessary and can be counterproductive. Prophylactic bracing on a healthy, uninjured ankle can lead to a reliance on external support, which may gradually weaken the natural stabilizing muscles and reduce joint mobility over time. Instead of bracing a healthy joint, focus on targeted neuromuscular training, agility drills, and lower-body strengthening exercises to build natural, long-term resilience against future sprains.

Community discussion
Share your experience or ask a question. Comments are reviewed before publication.