
Finding the right Zwift trainer for a Housing & Development Board (HDB) flat in Singapore requires balancing performance with the realities of high-density vertical living. The ideal setup must fit into multi-purpose rooms, operate quietly enough to keep peace with immediate neighbors, and withstand the local tropical climate. Direct-drive trainers generally offer the quietest operation and most realistic ride feel, while wheel-on trainers provide a lighter, more budget-friendly, and highly stowable alternative. By evaluating your space, noise tolerance, and training goals, you can select a smart trainer that integrates seamlessly into your home.
Evaluating Space and Noise Constraints in Compact Apartments
HDB flats are designed for efficient living, meaning dedicated workout rooms are rare. Most cyclists set up their trainers in living rooms, studies, or bedrooms. Before purchasing, measure your designated training zone. You need to account for the length of your bicycle, the footprint of the trainer, and at least half a meter of clearance on either side for safe mounting and dismounting. If your workout space must revert to a family area or home office after your ride, prioritizing a trainer with folding legs or a compact storage footprint is essential.
Noise is the most critical factor when living in close proximity to neighbors. HDB blocks are constructed with reinforced concrete slabs, which are highly efficient at transmitting structure-borne vibrations. While airborne noise (the whirring of the trainer or your bike’s drivetrain) can be masked by closed doors or headphones, structure-borne vibration travels directly through the floorboards into the ceiling of the unit below. This low-frequency hum can be highly disruptive, especially during early morning or late-night training sessions.
Products mentioned in this guide
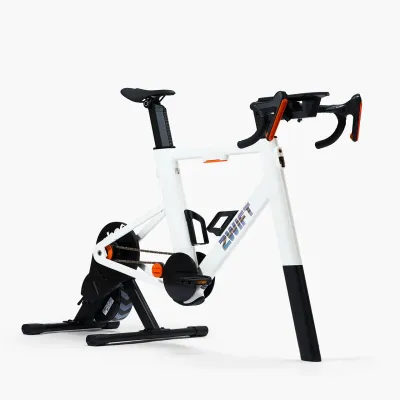
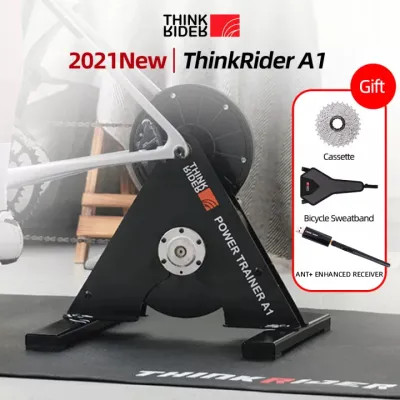
Prices are valid at publication and may change. Please refer to the product page for the latest price.
To mitigate this, you must assess both the mechanical noise of the trainer and the vibration it transfers to the floor. Direct-drive trainers eliminate tire friction, making them inherently quieter than wheel-on models. However, even the quietest trainer can cause vibrations if placed directly on bare tiles, vinyl, or parquet flooring. Incorporating vibration-dampening accessories is a non-negotiable step for apartment dwellers who wish to maintain good relations with neighbors.
Direct-Drive vs. Wheel-On Trainers for Apartment Living
Direct-drive trainers require you to remove your bicycle’s rear wheel and mount the frame directly onto the trainer’s cassette. This design offers several advantages for HDB living. Because there is no tire-on-roller contact, the high-pitched whine associated with indoor cycling is virtually eliminated. The heavy internal flywheel provides a smooth, realistic road feel and absorbs much of the sudden kinetic energy that causes floor vibration. However, direct-drive units are heavy, often weighing between 15 and 25 kilograms, making them more challenging to move frequently. They also require a dedicated cassette compatible with your bike’s drivetrain, adding to the initial setup complexity.

Wheel-on trainers, by contrast, keep your rear wheel intact and press the tire against a small roller. These models are significantly lighter, typically weighing under 10 kilograms, and are much easier to fold up and slide under a bed or into a utility closet. The trade-off is noise and vibration. The friction between the tire and the roller generates a distinct, high-frequency hum that easily penetrates thin walls. Additionally, tire slippage during accelerations can cause sudden spikes in vibration. Wheel-on trainers also cause rapid tire wear, often requiring a dedicated, hard-compound trainer tire to prevent black rubber dust from coating your living space.
| Decision Dimension | Direct-Drive Trainers | Wheel-On Trainers |
|---|---|---|
| Physical Footprint | Larger when deployed; often features folding legs for storage. | Compact and highly foldable; easily fits in small closets. |
| Weight & Portability | Heavy (15–25 kg); less convenient for daily relocation. | Light (under 10 kg); highly portable and easy to carry. |
| Noise Profile | Very quiet; primary noise comes from your bicycle drivetrain. | Moderate to loud; high-pitched hum from tire-on-roller friction. |
| Structure-Borne Vibration | Low; heavy flywheel dampens sudden kinetic energy. | Moderate to high; tire slippage and roller rotation cause floor hum. |
| Setup Complexity | High; requires rear wheel removal and cassette installation. | Low; quick-release or thru-axle clamp mechanism. |
| Tire Wear | None; saves wear on your outdoor road tires. | High; requires a dedicated trainer tire to prevent debris. |
Essential Features for a Zwift-Compatible Indoor Setup
To enjoy an immersive virtual cycling experience on Zwift, your trainer must communicate reliably with your devices. Look for dual-band connectivity supporting both ANT+ and Bluetooth protocols. In high-density HDB estates, wireless signal congestion is common due to dozens of neighboring Wi-Fi routers and smart home devices. A trainer with robust Bluetooth channels or an option for a wired connection can prevent frustrating signal dropouts mid-ride. Ensure the trainer is compatible with your preferred viewing platform, whether that is a laptop, tablet, smartphone, or Apple TV.
Incline simulation and power accuracy are key to matching your training intensity. Smart trainers simulate hills by automatically adjusting resistance based on the virtual terrain. For most recreational riders in Singapore, a trainer capable of simulating gradients up to 10% or 15% is more than sufficient to replicate virtual climbs. Power accuracy is another critical metric; look for models that offer a verified accuracy range within +/- 2% to +/- 5% to ensure your training data remains consistent over time.
Physical usability features should not be overlooked when space is tight. If you cannot leave your trainer permanently set up, look for models with integrated carry handles. The handle should be ergonomically positioned to balance the heavy flywheel weight, reducing strain on your back when lifting the unit. Some advanced models also feature small transport wheels or leveling feet, which allow you to stabilize the trainer on slightly uneven apartment floors.
Budgeting and Purchasing Smart Trainers in Singapore
When planning your budget, look beyond the sticker price of the trainer itself. A complete indoor setup often requires several essential accessories. For direct-drive trainers, you may need to purchase a compatible cassette (typically S$50 to S$100) and the necessary tools for installation if one is not included. A high-density vibration-dampening mat is another essential purchase, costing around S$40 to S$120. You should also factor in the cost of a front wheel riser block to level your bike, a sweat guard to protect your frame, and a powerful floor fan to keep you cool.
In Singapore, smart trainers can be purchased through authorized local distributors, official brand stores, or general online marketplaces. Purchasing from an authorized local distributor or official brand store is highly recommended for heavy fitness equipment. While importing a trainer from overseas online retailers might offer a slight initial discount, the shipping costs for a heavy unit can quickly erase those savings. More importantly, local warranty support is invaluable if you encounter mechanical or electronic issues.
Before finalizing your purchase, carefully verify the warranty terms. A standard manufacturer’s warranty typically covers the frame and electronics for one to two years. Confirm whether the local distributor handles warranty claims directly and if they offer on-site repair or require you to transport the heavy unit to their service center. Reliable local after-sales support ensures that you will not be left with an expensive, non-functional paperweight if a component fails.
Optimizing Your Indoor Cycling Setup for Small Spaces
Setting up your trainer correctly is vital for comfort, safety, and equipment longevity. Singapore’s tropical climate means high indoor humidity, which accelerates sweat production during intense workouts. Position your trainer in a well-ventilated area, ideally near a window or directly under an air conditioning vent. Place a powerful floor fan or industrial velocity fan in front of your bike to maximize airflow. Position your screen (TV, laptop, or tablet) at eye level to prevent neck strain, ensuring it does not block main walkways or emergency exits in your home.
Protecting your HDB flooring is essential, especially if you have parquet, laminate, or vinyl floors that are sensitive to moisture and pressure. Always place a heavy-duty, water-resistant PVC or rubber mat under your entire setup. This mat serves a dual purpose: it catches highly corrosive sweat before it reaches your floorboards, and it absorbs the high-frequency vibrations generated by the trainer’s motor and flywheel. For added protection, drape a specialized sweat towel or “sweat guard” over your bike’s top tube to shield the headset and bottom bracket from sweat accumulation.
A disciplined post-ride routine will extend the lifespan of your equipment and keep your living space clean. Sweat contains high concentrations of salt, which can rapidly corrode aluminum frames, steel bolts, and the trainer’s internal components. After every ride, use a damp microfiber cloth to wipe down your bicycle frame, handlebars, and the trainer itself. Once dry, fold the trainer’s legs (if applicable) and store it in a designated closet or corner. Unplug all power cables and store them neatly to prevent tripping hazards for other household members.
Frequently Asked Questions (FAQ)
Do I need a riser block for my front wheel when using a smart trainer?
Whether you need a riser block depends on the design of your specific smart trainer. Many direct-drive trainers are designed to sit low to the ground, which naturally lowers the rear axle of your bicycle. Without a front wheel riser block, your bike will slope downward, shifting your body weight forward onto your hands and wrists. This unnatural riding position can cause hand numbness, neck strain, and saddle discomfort during long Zwift sessions. A riser block levels the bike’s geometry, restoring your natural outdoor riding posture. Some modern trainers are designed to keep the bike level without a block, so check the manufacturer’s specifications before purchasing.
Will my downstairs neighbors hear my smart trainer during night rides?
Your neighbors are highly likely to hear your trainer during late-night rides if you do not take steps to isolate the equipment. While modern smart trainers are relatively quiet in terms of airborne noise, the physical rotation of the flywheel and your pedaling motion generate low-frequency vibrations. These vibrations travel through the trainer’s legs directly into the concrete floor of your HDB flat, acting like a speaker cone that amplifies the sound in the apartment below. To prevent complaints, always use a high-density rubber isolation mat. Additionally, avoid high-cadence sprints or heavy out-of-the-saddle efforts after hours, as these movements generate the highest levels of structure-borne vibration.
Can I leave my smart trainer set up permanently in a small room?
You can leave your trainer permanently set up if you have a dedicated space, but doing so in a multi-purpose room requires careful environmental management. In Singapore’s humid climate, leaving a bike and trainer exposed can lead to dust accumulation on the drivetrain, which mixes with chain lube to form an abrasive paste. If the room is not air-conditioned, high humidity can also accelerate corrosion on sweat-exposed bolts. If you choose a permanent setup, use a breathable protective cover when the equipment is not in use. If the room serves other daily functions, folding the trainer and storing it away is the best practice to maximize living space and protect the gear from accidental damage.

Community discussion
Share your experience or ask a question. Comments are reviewed before publication.