
Selecting the right front bike light is a critical decision that directly impacts your safety, comfort, and confidence when cycling at night. In Singapore, riders frequently navigate two vastly different environments: the dark, scenic paths of the Park Connector Network (PCN) and the bustling, highly illuminated urban roads. The lighting requirements for these two scenarios are fundamentally different, meaning a light that excels in one setting might be inadequate or even hazardous in the other.
The core of the decision lies in balancing your need to see the path ahead with your need to be seen by other road users. While a high-powered, wide-angle beam is essential for spotting hazards on unlit park connectors, a more focused, moderate-output light is ideal for navigating city traffic without blinding oncoming drivers. By evaluating your typical routes and understanding key light specifications, you can select a setup that keeps you safe, compliant, and visible throughout your journey.
Core Lighting Goals: Illuminating the Trail vs Being Seen
The fundamental difference between PCN night cycling and urban road commuting comes down to ambient light. On a dark, unlit park connector, your front bike light serves as your primary source of vision. Without it, you are riding blind, unable to anticipate turns, changes in pavement texture, or obstacles. In this environment, your goal is active illumination: you need to cast a bright, wide blanket of light onto the trail surface to reveal potential hazards well before you reach them.
Products mentioned in this guide
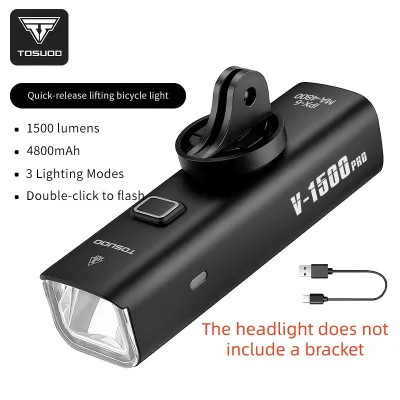
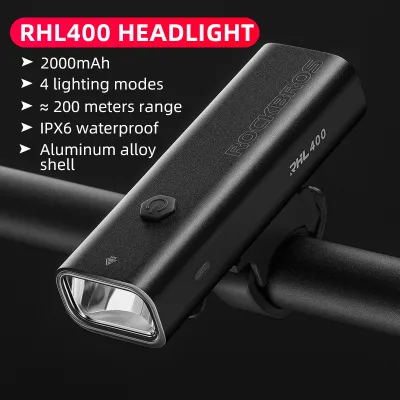
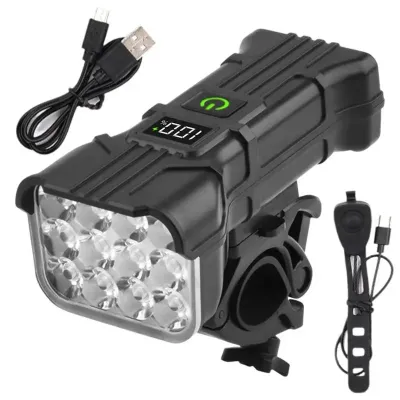
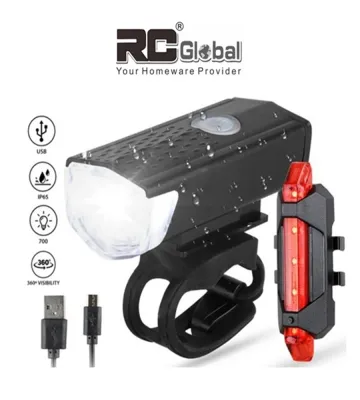
Prices are valid at publication and may change. Please refer to the product page for the latest price.
Conversely, when you transition to urban roads, the surrounding infrastructure changes completely. Streetlights, storefronts, and vehicle headlights flood the environment with ambient light, making a high-powered trail light unnecessary for path illumination. Instead, your primary goal shifts to passive visibility, often referred to as “being seen.” On the road, your light must cut through the visual clutter of the city to alert motorists, pedestrians, and other cyclists of your presence, particularly at critical conflict points like intersections and roundabouts.
Managing glare is a vital safety responsibility. A light that is too bright or aimed incorrectly can temporarily blind oncoming path users, leading to head-on collisions. Understanding how to balance light output with beam control is the first step in choosing a front light that protects everyone.
Evaluating Brightness and Beam for PCN Night Cycling
Navigating the PCN at night requires a light capable of revealing the immediate terrain in high detail. Because these paths are shared with runners, walkers, and other cyclists, and often feature sharp bends, low-hanging branches, or sudden debris, a narrow spotlight is insufficient. You need a wide beam throw (often called a flood beam) that illuminates not just the path directly ahead, but also the grass shoulders and path edges where pedestrians or wildlife might suddenly step out.

When assessing brightness, measured in lumens, consider your typical riding speed. For a relaxed pace of around 15 km/h, a light output of 400 lumens provides enough forward visibility to react to obstacles safely. However, if you ride a road bike or a fast commuter at speeds exceeding 20 km/h, you will require a stronger output of 600 to 800 lumens. This higher brightness projects the beam further down the path, giving you the necessary stopping distance at higher velocities.
While high brightness is essential on dark stretches, look for lights with multiple constant-output modes. When approaching oncoming path users, dropping your light to a lower setting (such as 200 lumens) prevents blinding them while maintaining enough visibility to ride safely.
Evaluating Brightness and Beam for Urban Road Commuting
On well-lit urban roads, high-lumen output is not only unnecessary but can actually be counterproductive. An excessively bright light bouncing off wet asphalt or road signs can create distracting glare for you and oncoming drivers. For road commuting, a light output of 100 to 200 lumens is generally more than enough to ensure you are highly visible to traffic without causing unnecessary distraction.
The beam pattern for road riding should be highly focused to maximize visibility from the front and sides. Many commuter-specific lights feature side cut-outs or amber side lights built into the housing. This design allows light to spill out laterally, ensuring that motorists pulling out of side streets or turning at intersections can spot you from the side—a common blind spot for standard front lights.
Additionally, look for lights designed with a horizontal beam cut-off. These lights use specialized reflectors to direct light downward onto the road surface, preventing it from rising above handlebar level. This ensures your light illuminates the road directly in front of your tires while keeping the bright hotspot out of the eyes of oncoming drivers.
Adapting One Front Bike Light for Mixed Routes
For many cyclists, a typical commute is not exclusive to one environment. You might start your journey on busy, well-lit public roads and finish with a long, dark stretch along a coastal PCN. If you want to use a single front light for these mixed routes, versatility is key. You need a light that can transition seamlessly between different lighting modes with minimal effort while riding.
Prioritize lights with a simple, intuitive interface, such as a single large button. This allows you to quickly toggle from a low-power flashing mode on the road to a high-power steady beam as you enter a dark park connector. Avoid lights that force you to cycle through a blinding strobe mode to switch settings.
Battery capacity is another critical factor for mixed-route riders. High-lumen modes draw significantly more power, which can drain a battery in a fraction of the time compared to low-power or flashing modes. When selecting a light, verify the manufacturer’s runtime specifications for each setting. Ensure the battery can support your maximum required brightness for the entire duration of your dark PCN segments, plus a comfortable safety margin to account for unexpected delays or heavy rain.
Mounting, Compliance, and Pre-Ride Safety Checks
Even the most advanced front light is useless if it shifts out of position, falls off, or fails during a ride. Ensuring your light is securely mounted and fully compliant with local standards is essential for a trouble-free night commute.
Mounting Checklist:
- Choose a mount that matches your handlebar diameter, featuring a secure locking mechanism or a heavy-duty silicone strap.
- Tighten the mount sufficiently to prevent the light from drooping when riding over rough pavement or speed bumps.
- Position the light close to the center of your handlebars to align the beam with your direction of travel.
Compliance and Regulations:
- Always verify local traffic regulations regarding bicycle safety equipment. In Singapore, bicycles must display a front light showing a visible white light and a rear light showing a red light during hours of darkness.
- Ensure your light is mounted at a height and angle that complies with local anti-glare guidelines, keeping the beam directed downward toward the road surface.
Pre-Ride Inspection:
- Check the battery charge indicator before every ride to ensure you have sufficient power for your planned route.
- Wipe the lens with a clean, damp cloth to remove road grime, dust, or dried water spots that can severely reduce light output.
- Perform a quick alignment check by turning the light on and verifying that the beam's hotspot is aimed at the ground approximately 5 to 10 meters ahead of your front wheel, rather than pointing straight ahead into the horizon.
Frequently Asked Questions (FAQ)
Is it safe to use a flashing front light on unlit park connectors?
Using a flashing or strobe mode on unlit park connectors is highly discouraged and can be dangerous. In pitch-black environments, a flashing light disrupts your depth perception, making it difficult to judge distances, spot potholes, or see oncoming obstacles clearly.
Additionally, strobe lights are highly disorienting to oncoming cyclists and pedestrians on narrow, shared paths. Always switch to a steady, constant beam when riding on unlit PCNs, reserving flashing modes strictly for well-lit roads where you need to stand out to motorists.
How do I know if my bike light is too bright for oncoming traffic?
You can perform a simple wall test to check your light’s alignment and glare potential. Stand your bicycle upright about 3 to 5 meters away from a flat wall and turn on your light at its typical riding brightness.
Observe the bright hotspot on the wall. If the top edge of the light beam rises above your handlebar height, the light is angled too high and will blind oncoming traffic. Adjust the light downward until the main hotspot sits well below handlebar level, ensuring the light illuminates the ground rather than the eyes of others.

Community discussion
Share your experience or ask a question. Comments are reviewed before publication.