
Choosing the right fish hook is one of the most critical decisions a new angler faces, directly impacting whether a fish is successfully hooked or manages to escape. For beginners, the selection process involves matching the hook’s shape and size to both the chosen bait and the target species, while ensuring the hook’s strength matches the fishing environment. By understanding basic hook anatomy, sizing conventions, and specialized designs, you can confidently select the right tackle for your next outing.
Understanding Fish Hook Anatomy and Sizing Standards
To make informed decisions at the tackle shop, you must first become familiar with the physical components of a fish hook. Every hook consists of five primary parts: the eye, the shank, the bend, the point, and the barb. The eye is the loop at the top where you tie your fishing line. The shank is the straight section of the hook that extends down from the eye to the curve. The bend is the curved portion of the metal, which transitions into the point, the sharp tip designed to penetrate the fish’s mouth. Finally, the barb is the backward-facing projection near the point that prevents the hook from slipping out once embedded.
Understanding how hook sizes are categorized can be confusing for beginners because the industry uses two distinct scales. Standard hooks use a simple numerical scale where larger numbers represent smaller hooks. For example, a tiny size 12 hook is much smaller than a size 1 hook. Once you go larger than size 1, the scale transitions to the “aught” system, written as a number followed by a slash and a zero (such as 1/0, 2/0, or 5/0). In the aught system, larger numbers represent larger hooks, meaning a 5/0 hook is significantly larger and thicker than a 1/0 hook.
Products mentioned in this guide
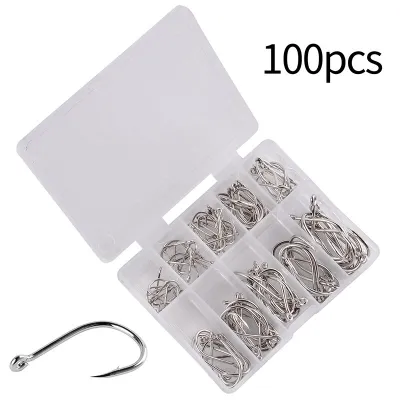
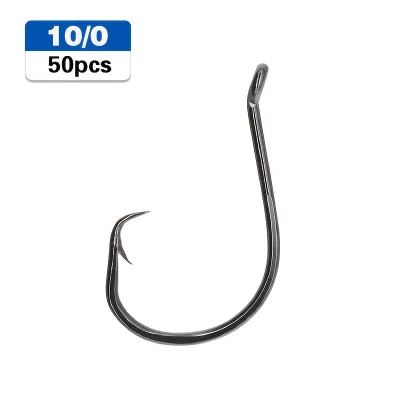
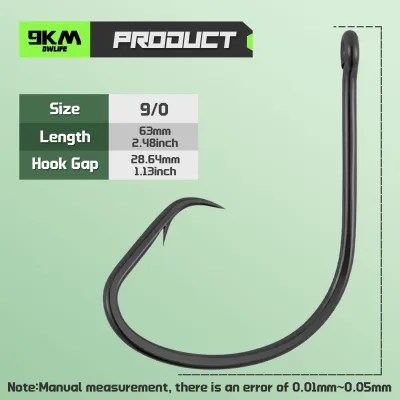
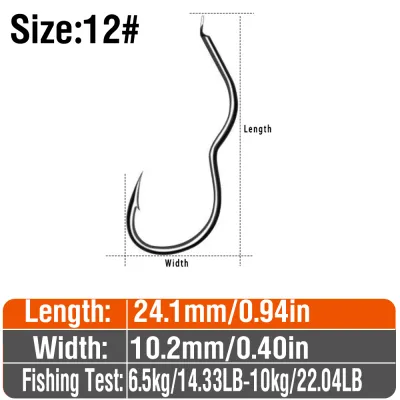

Prices are valid at publication and may change. Please refer to the product page for the latest price.
Because hook sizing is not universally standardized across all manufacturers, you should always check the physical dimensions of the hook rather than relying solely on the printed size number. A size 2 hook from one brand may have a wider gap—the distance between the shank and the point—than a size 2 hook from another brand. When shopping, physically compare the hooks to ensure the gap is wide enough to accommodate your bait while leaving enough of the point exposed to hook a fish.
Common Fish Hook Shapes Every Beginner Should Know
As a beginner, you will encounter a vast array of hook shapes, but mastering a few versatile designs will cover almost all of your early fishing scenarios. Baitholder hooks are highly popular for natural bait fishing. These hooks feature small, backward-facing barbs along the shank itself, which help keep soft baits like earthworms, live prawns, or dough bait from sliding down and bunching up near the bend. They are excellent for general bait fishing in local ponds or coastal jetties.

Circle hooks are engineered with a distinct shape where the point curves sharply back toward the shank at a 90-degree angle. This design is highly recommended for conservation-minded anglers and catch-and-release fishing. When a fish swallows the bait and swims away, the circle hook slides safely out of the throat without catching. As the line tightens, the hook rotates and embeds itself securely in the corner of the fish’s mouth, significantly reducing the risk of deep hooking or injuring the fish’s internal organs.
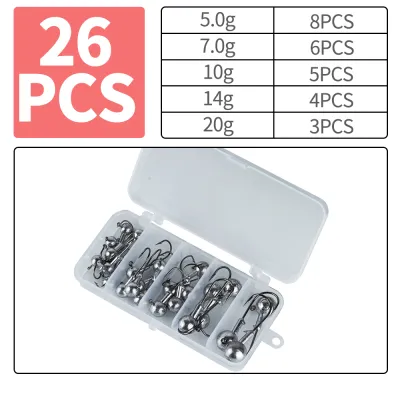
Jig hooks feature a specialized bend near the eye, which is molded into a lead or tungsten weight head. These hooks are designed for active, vertical presentations where you bounce the weighted hook along the bottom or jig it through the water column. They are commonly paired with soft plastic lures, making them a staple for anglers who prefer active lure fishing over stationary bait fishing.
Treble hooks consist of three separate points branching out from a single shank. These are most commonly found attached to hard artificial lures like minnows, crankbaits, and spinners to maximize the chances of a hookup when a predatory fish strikes. However, because treble hooks can cause more damage to fish and are harder to remove safely, you must always check local venue rules before using them. Many managed reservoirs and private payponds restrict or ban treble hooks in favor of single hooks.
How to Match the Hook to Your Bait and Target Species
Selecting the right hook requires finding a balance between the size of your bait and the physical characteristics of your target fish. The gap of the hook must be wide enough to accommodate the thickness of your bait. If you use a hook with a gap that is too narrow, the bait will cover the point entirely, preventing the hook from penetrating the fish’s mouth when you strike. Conversely, using a hook that is too large for your bait will make the presentation look unnatural and may cause live bait to die quickly.
Consider the mouth anatomy and feeding behavior of your target species. Fish with small mouths and delicate lips, such as small estuary species, require small, fine-wire hooks that can easily penetrate soft tissue without tearing. On the other hand, predatory fish with bony, hard jaws require sturdier hooks with sharp, robust points that can pierce tough cartilage. If you are targeting fish that swallow bait whole, a circle hook is the safest and most effective choice.
Adjusting the wire thickness of your hook is also crucial depending on your fishing environment. Fine-wire hooks are excellent for delicate presentations in clear, open water because they penetrate easily with light tackle. However, if you are fishing around heavy cover like submerged structures, rocks, or jetty pylons, you will need a heavy-duty, thick-wire hook. Heavy-wire hooks resist bending or straightening when you have to apply heavy pressure to pull a strong fish away from obstacles.
Step-by-Step Guide to Tying and Rigging Your Hook
Attaching your hook securely to your fishing line is a fundamental skill that every beginner must master. Two of the most reliable and beginner-friendly knots are the Palomar knot and the Improved Clinch knot. The Improved Clinch knot is highly effective for standard monofilament and fluorocarbon lines, providing excellent knot strength and reliability.
To tie the Improved Clinch knot, follow these clear steps:
- Thread the tag end of your fishing line through the eye of the hook, pulling about 15 centimeters of line through.
- Wrap the tag end around the standing line five to six times, creating a spiral pattern.
- Take the tag end and pass it through the small loop that has formed right next to the eye of the hook.
- Pass the tag end back through the large loop you just created in the previous step.
- Moisten the line with water or saliva to reduce friction, then pull the tag end and the standing line simultaneously to slide the knot tight against the eye.
Once the knot is fully formed, you must test its strength before casting. Hold the hook carefully with a pair of pliers and pull firmly on the main line to ensure the knot does not slip or unravel. Inspect the knot visually to confirm the wraps are neat and tightly coiled. Finally, use line cutters to trim the tag end, leaving about two to three millimeters of line to allow for minor settling under tension without the knot coming undone.
Safe Handling, Storage, and Maintenance
Working with sharp hooks requires strict safety habits to prevent injury to yourself and the fish. When unhooking a fish, always use long-nosed pliers or a dedicated hook extraction tool rather than your bare fingers. This keeps your hands clear of thrashing fish and sharp hook points. When walking between fishing spots, never let your hook dangle freely; secure it to the hook keeper on your rod or clip it safely to one of the rod guides.
Proper maintenance is essential to prevent your hooks from rusting and losing their structural integrity. After every fishing trip, especially when fishing in saltwater environments, rinse your used hooks thoroughly with fresh water to remove salt deposits and organic residue. Allow the hooks to dry completely on a clean towel before putting them back into your tackle box, as storing wet hooks will quickly ruin your entire collection.
Organize your hooks in a compartmentalized tackle box with secure latches to keep different sizes and styles separated. Avoid mixing rusted hooks with clean ones, as rust can easily transfer and compromise the strength of your unused tackle. To further protect your gear from moisture, place a small silica gel packet inside your tackle box compartments to absorb any residual humidity.
Frequently Asked Questions (FAQ)
Do I need to pinch down the barb on my fish hook?
Pinching down the barb with a pair of pliers is highly recommended for catch-and-release fishing, as it makes hook removal much faster and minimizes tissue damage to the fish. It also makes it significantly easier and less painful to remove a hook if you accidentally hook yourself or your clothing. Additionally, you should check local fishing regulations before heading out; some managed reservoirs, nature parks, and private fishing ponds in Singapore mandate the use of barbless hooks to protect local fish populations.
How often should I replace my fish hooks?
You should inspect your hooks regularly and replace them whenever you notice signs of physical damage or wear. Perform a visual and tactile check before every trip: if a hook shows signs of rust, has a bent shank, or has a dull point that fails to scrape cleanly against your fingernail, discard it. It is also wise to replace your hook after landing a exceptionally large fish, snagging on heavy underwater structures, or experiencing a hard fight that may have caused invisible metal fatigue.

Community discussion
Share your experience or ask a question. Comments are reviewed before publication.