
Choosing the right front bike light is one of the most critical decisions you will make for your daily cycling routine. Whether you are navigating the bustling, well-lit pathways of the Park Connector Network (PCN) or commuting along dark, rain-slicked roads, your light serves a dual purpose: helping you see the path ahead and ensuring you are visible to pedestrians, motorists, and other cyclists. The ideal choice depends heavily on where, when, and how fast you ride.
To find the right balance between brightness, battery life, and durability, you must evaluate your typical riding environment. A light designed for dark, off-road trails will be unnecessarily bright and bulky for a casual evening cruise on a shared path, while a basic safety flasher will leave you dangerously blind on an unlit backroad. By matching your specific cycling routine to the correct hardware specifications, you can ride confidently and safely in any conditions.
Quick Guide: Identify Your Primary Cycling Scenario
Before comparing technical specifications, take a moment to analyze your regular riding routes. Local cycling infrastructure generally falls into three distinct categories, each demanding a different level of illumination and beam performance. Identifying where you spend the majority of your saddle time will immediately narrow down your options.
Products mentioned in this guide
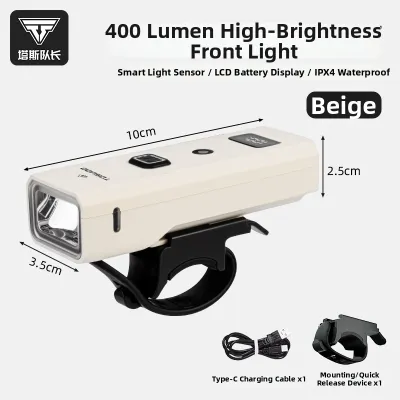
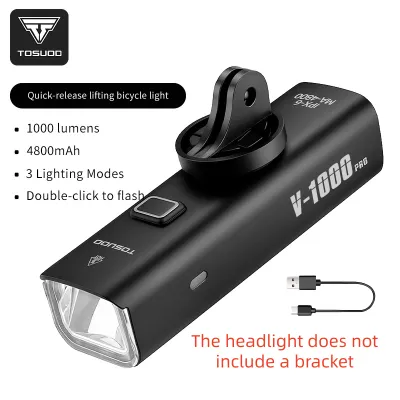
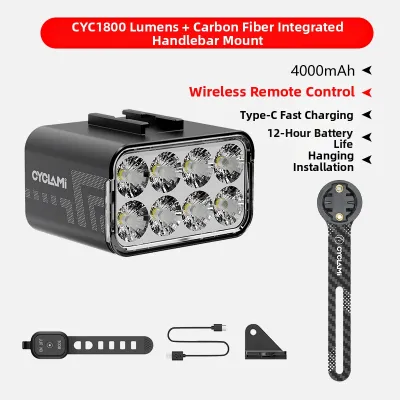
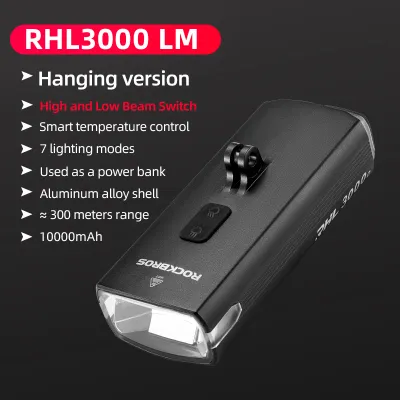
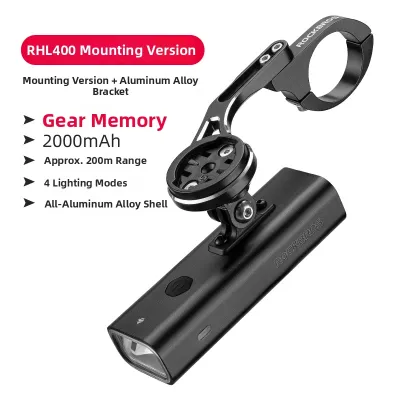
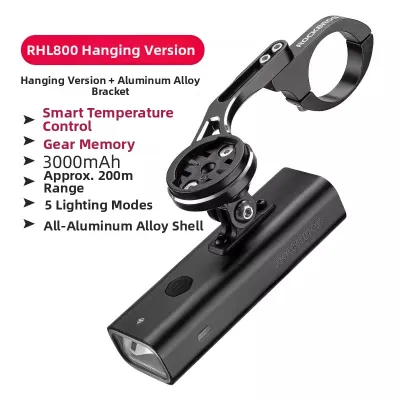
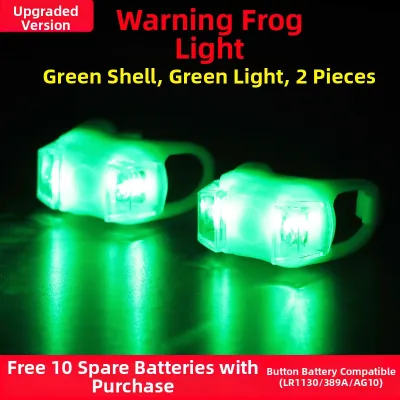
Prices are valid at publication and may change. Please refer to the product page for the latest price.
- Well-Lit Park Connector Network (PCN) Paths: These shared pathways are highly popular for recreational riding and evening fitness loops. Because they are generally well-illuminated by overhead park lighting, your primary safety concern is not lighting up a pitch-black path, but rather alerting oncoming joggers, pedestrians, and other active mobility users of your approach.
- Unlit Night Commutes and Industrial Roads: If your commute takes you along quiet secondary roads, industrial estates, or park areas after the main lights go out, you will encounter significant dark patches. Here, you need a light that actively illuminates road hazards, such as potholes, debris, and uneven expansion joints, well in advance.
- Mixed-Terrain and Off-Road Trails: For those who venture onto gravel paths, dirt tracks, or forested mountain biking trails, ambient light is virtually non-existent. The terrain is unpredictable, requiring a light that can reveal low-hanging branches, loose rocks, and sudden drops.
To self-assess your needs, ask yourself three questions: What time of night do you ride most often? Are your routes consistently illuminated by streetlights? What is your average riding speed? Faster riders require a longer beam throw to give them adequate reaction time, whereas slower, recreational riders can prioritize wider, close-range visibility.
Matching Light Specs to Your Specific Riding Scenario
Once you have identified your primary riding environment, you can look at specific light characteristics. Lumens, beam patterns, and light modes are not one-size-fits-all; they must be tailored to your scenario to ensure safety without causing inconvenience to others.

Well-Lit PCN and Urban Paths
On highly populated, well-lit paths, high-power beams are often counterproductive. A blinding light can dazzle oncoming cyclists and pedestrians, creating a hazard rather than preventing one. For these routes, focus on “to-be-seen” lights.
- Brightness Range: A light output of 100 to 300 lumens is generally sufficient to make your presence known without causing glare.
- Beam Pattern: Look for a wide, diffused beam that spreads light evenly across a broad area, making you visible from multiple angles.
- Key Features: Prioritize lights with dedicated pulsing or daytime running modes. Side-visibility cutouts—small amber or clear windows on the side of the light housing—are highly beneficial, as they allow your light to be seen by traffic approaching from intersections.
Unlit Night Commutes and Rural Roads
When streetlights disappear, your front bike light becomes your sole guide. You must transition from a “to-be-seen” light to a powerful “to-see” light that projects a clear path forward.
- Brightness Range: Look for a light capable of delivering 400 to 800 lumens. This range provides enough illumination to spot road hazards at moderate commuting speeds.
- Beam Pattern: A focused, long-throw beam is essential. Ideally, choose a light with a shaped beam or a physical cutoff line at the top of the lens. This design mimics automotive headlights, directing the light downward onto the road surface rather than scattering it upward into the eyes of oncoming drivers.
- Key Features: Multiple brightness steps are crucial so you can dim the light on well-lit road sections to conserve battery, then boost it to full power when entering dark stretches.
Mixed-Use and Off-Road Trails
Off-road riding demands the highest level of light output and the most robust construction. Because trail obstacles can appear from any direction, a standard narrow road beam is insufficient.
- Brightness Range: Trail riding typically requires 1000 lumens or more to cut through dense foliage and illuminate uneven ground.
- Beam Pattern: A flood-and-spot combination is ideal. You need a wide flood beam to illuminate the trail edges and overhanging branches, paired with a powerful spot beam to light up the trail far ahead.
- Key Features: Look for highly secure, heavy-duty mounting brackets that prevent the light from shifting or vibrating loose on rough terrain. Many trail riders also pair a handlebar-mounted light with a helmet-mounted light to ensure they can see exactly where they are looking, especially around tight corners.
Essential Hardware Features to Verify Before You Buy
Beyond brightness and beam patterns, the usability of a front bike light depends on its physical design and construction. Verifying these hardware features before making a purchase will save you from frustration during your daily rides.
Mounting Systems
A light is only as good as its mount. If the mounting bracket is flimsy, the light will bounce, flicker, or slide down your handlebars on bumpy roads.
- Compatibility: Ensure the mount is compatible with your handlebar diameter. Standard handlebars are typically 25.4mm or 31.8mm, but modern road bikes may feature aerodynamic, non-round bars that require specialized strap mounts.
- Stability: Tool-free silicone strap mounts are convenient for quickly swapping the light between different bikes, but they can slip on rough surfaces. For heavy lights, a rigid plastic or aluminum bracket secured with a thumb screw offers superior stability.
- Quick Release: Choose a system that allows you to easily slide the light body off the mount while leaving the bracket attached to the handlebar. This makes it simple to remove the light when parking your bike in public areas to prevent theft.
Power and Charging
Modern front bike lights are almost exclusively powered by rechargeable lithium-ion batteries, but the charging infrastructure and capacity vary.
- USB-C Connectivity: Look for lights that utilize USB-C charging ports. This standard offers faster charging times and allows you to use the same cable as your phone or other modern accessories.
- Battery Indicators: A reliable, multi-stage battery indicator (such as a color-changing LED on the power button) is essential. It prevents you from being unexpectedly stranded in the dark with a dead battery.
- Run Times: Always check the manufacturer's specified run times across different modes. A light that claims 800 lumens may only run at that peak brightness for an hour, but could last for several hours on a lower, 200-lumen setting.
Weather Resistance
Cycling in tropical climates means you must be prepared for sudden, torrential downpours and high humidity. A non-waterproof light will quickly fail when moisture penetrates the casing.
- IP Ratings: Check the Ingress Protection (IP) rating of the light. An IPX4 rating offers basic splash resistance, which is fine for light drizzle. However, for peace of mind during heavy tropical storms, look for a rating of IPX6 (protection against powerful water jets) or IPX7 (temporary immersion in water).
- Port Covers: Inspect the rubber seal covering the charging port. It should fit snugly and securely; a loose port cover is the most common entry point for water damage.
Beam Modes and Controls
When riding, you need to be able to adjust your light settings quickly and safely without taking your eyes off the path.
- Tactile Buttons: The power button should be raised or textured, making it easy to locate and press even when wearing full-finger cycling gloves.
- Mode Memory: High-quality lights feature mode memory, meaning they turn on in the same mode you last used. This saves you from cycling through a series of flashing modes every time you turn the light on.
- Simple Interface: Avoid lights that require you to pass through a blinding strobe mode to turn the unit off. A simple press-and-hold to turn off is the industry standard for user-friendly operation.
Cross-Scenario Compatibility: Can One Light Handle Every Ride?
If your cycling routine includes a mix of casual PCN weekend rides and dark weekday night commutes, you might wonder if you can get away with buying just one front bike light. The short answer is yes, provided you select a highly versatile model.
Investing in a single, high-output light (such as an 800-lumen model) offers excellent cross-scenario compatibility. When riding on crowded, well-lit PCN paths, you can run the light on its lowest steady setting or a gentle pulse mode. This conserves battery life—often extending a single charge to last for several days of riding—while keeping you visible to others. When your route transitions to unlit roads, you can instantly toggle the light to its high-power setting to illuminate the path ahead.
However, relying on a single light does come with trade-offs. High-output lights are generally heavier, bulkier, and more expensive. If you only ride on well-lit paths, carrying a heavy, high-lumen light is unnecessary. Additionally, a single light offers no redundancy; if the battery dies or the unit fails mid-ride, you are left in complete darkness.
For riders with diverse routines, a dual-light strategy is often the most practical approach. You can permanently mount a small, lightweight, budget-friendly “be-seen” light to your handlebars or helmet for daily PCN rides. For planned night commutes or trail rides, you can temporarily mount a more powerful, dedicated “to-see” light. This setup provides a backup light source, ensures you always have the right tool for the terrain, and helps manage your budget by avoiding the need for a single, ultra-premium multi-purpose unit.
To help you decide, consider this simple decision framework based on your budget and riding habits:
- The Budget-Conscious Commuter (Under S$40): If you primarily ride well-lit PCNs with occasional short, semi-lit road sections, a compact, USB-rechargeable light with 200 to 300 lumens and a silicone strap mount is highly cost-effective and sufficient.
- The Dedicated Night Rider (S$50 to S$120): If your routine involves regular night commuting on unlit roads, invest in a high-quality 500 to 800-lumen light with a rigid mount, a shaped beam cutoff, and an IPX6 waterproof rating.
- The Multi-Discipline Cyclist (S$120+): If you transition between fast road riding, dark commutes, and weekend trail riding, look for a premium, high-output light (1000+ lumens) with swappable mounts, or opt for a dual-light setup to ensure maximum safety and redundancy.
Frequently Asked Questions (FAQ)
Do I need a front bike light if I only ride on well-lit PCN paths?
Yes, a front bike light is absolutely necessary even on brightly illuminated paths. While the overhead lights allow you to see the ground, they do not guarantee that others can see you. A front light makes you instantly visible to pedestrians stepping onto the path, joggers approaching from behind, and other cyclists navigating tight corners.
Furthermore, displaying a front light is a legal requirement in many jurisdictions. For example, under Singapore’s Active Mobility Act, cyclists must display a functioning white light on the front of their bicycle during the hours of darkness (typically between 7:00 PM and 7:00 AM). Using a low-power steady or pulsing mode is the best way to comply with the law and keep everyone on the shared path safe.
How should I angle my front bike light to avoid blinding others?
To avoid blinding oncoming cyclists, pedestrians, and motorists, you must angle your front bike light downward. The brightest center point of the beam should hit the ground approximately 5 to 10 meters in front of your front wheel, depending on your riding speed. This ensures the light illuminates the immediate path where you need to spot obstacles, rather than projecting horizontally into the eyes of others.
Before heading out on a ride, you can easily test your light angle. Park your bicycle on a flat surface, turn the light on to your standard riding mode, and walk about 10 meters in front of the bike. Squat down to the eye level of an oncoming cyclist or pedestrian; if the light feels painfully bright or glaring, tilt the light housing slightly further downward until the glare is minimized while still keeping the ground ahead clearly illuminated.

Community discussion
Share your experience or ask a question. Comments are reviewed before publication.