
Choosing the right resistance level for a leg resistance band depends on your current fitness level, the specific exercise you are performing, and your training goals. Because your lower body muscles are significantly larger and stronger than your upper body muscles, they generally require moderate to heavy resistance to trigger adaptation. The ideal band should allow you to complete your target repetitions with controlled, perfect form while leaving only one to three challenging repetitions in reserve before your muscles reach temporary fatigue.
Selecting the wrong tension can either stall your progress or lead to injury. If the band is too light, your muscles will not experience enough stimulus to grow or strengthen. Conversely, a band that is too heavy will force your body to compensate by using other muscles, putting unnecessary stress on your joints. By understanding how these bands function and how to test them, you can optimize your lower-body workouts for maximum safety and efficiency.
Understanding How Leg Resistance Bands Work
To select the correct tension, you must first understand the physics of elastic resistance. Unlike free weights, which provide a constant gravitational load throughout a movement, a leg resistance band provides variable resistance. This means the tension is lowest at the start of the movement and increases progressively as the band stretches. Your muscles will experience the peak load at the point of maximum stretch, which typically coincides with the peak contraction of the exercise.
Products mentioned in this guide
![[SG Stock] CALLIVEN Thicken Resistance Band Set Exercise Bands for Legs Arms Natural Latex Gym Pull up](https://img.lazcdn.com/g/p/307e3dccf60d331b1f2464a0ca4fd3d1.jpg_400x400q80.jpg_.webp)



Prices are valid at publication and may change. Please refer to the product page for the latest price.
Several physical characteristics dictate the actual tension a band delivers during a workout:
- Material Thickness: Thicker bands require more force to stretch, resulting in higher resistance levels.
- Band Width: Wider flat bands distribute tension over a larger surface area, which can alter how heavy the resistance feels against your skin or clothing.
- Stretch Length: The further you stretch a band from its resting length, the higher the resistance becomes.
Lower body exercises naturally demand higher baseline tension than upper body movements. Your glutes, quadriceps, and hamstrings are designed for weight-bearing activities like walking, running, and jumping. Consequently, a light band that feels incredibly heavy during a shoulder press will likely feel completely unnoticeable during a squat or a hip thrust. To effectively challenge these large muscle groups, you must scale your band selection upward.
Match Resistance to Your Fitness Level and Goals
Your training experience and your specific fitness objectives should dictate whether you reach for a light, medium, or heavy leg resistance band.

Beginners
If you are new to resistance training, your primary focus should be on mastering movement patterns and building joint stability. Start with a light resistance band. This minimal tension allows you to focus on your mind-muscle connection and joint alignment without overloading your connective tissues. It also ensures you do not develop poor movement habits, such as letting your knees cave inward during squats.
Muscle Endurance
If your goal is to build muscular endurance and stamina, you should aim for higher repetition ranges, typically between 15 and 25 repetitions per set. For this style of training, a moderate resistance band is ideal. The tension should be light enough to allow you to maintain a continuous, fluid tempo throughout the high-rep set, yet heavy enough that you feel a deep muscular burn during the final five repetitions.
Strength and Muscle Growth
To stimulate muscle hypertrophy and build raw strength, you need to challenge your muscles with lower repetition ranges, usually between 8 and 12 repetitions. This requires a heavy or extra-heavy resistance band. The resistance must be high enough that completing the tenth or twelfth repetition requires significant physical effort, while still maintaining proper alignment and control.
Safe Progression
As your muscles adapt to the training stimulus, your current band will eventually feel too easy. To progress safely, avoid jumping immediately to a much thicker band. Instead, try micro-progressions first. You can increase the difficulty by slowing down the speed of your movements, pausing for two seconds at the point of peak contraction, or slightly increasing your stance width to pre-stretch the band before you begin the exercise. Once these adjustments no longer provide a sufficient challenge, transition to the next resistance level.
Choose the Right Band for Specific Leg Exercises
Different leg exercises target different muscle groups, meaning you cannot use the same resistance band for every movement in your routine.
Compound Movements
Exercises like squats, Romanian deadlifts, and hip thrusts are compound movements that recruit multiple large joint systems and massive muscle groups simultaneously. Because your glutes and quadriceps work together to produce high levels of force, you will need a heavy or extra-heavy band to feel a sufficient challenge. For these movements, placing a heavy loop band just above your knees forces your hip abductors to fire, keeping your knees tracking safely over your toes while your larger muscles drive the primary movement.
Isolation and Glute Activation
Isolation movements and activation drills, such as lateral band walks, clamshells, and donkey kicks, target smaller stabilizing muscles like the gluteus medius and minimus. These stabilizers are easily overpowered by larger muscles if the resistance is too high. If you use a band that is too heavy for a lateral walk, your body will compensate by tilting your pelvis or using your lower back to swing your leg outward. To keep the focus strictly on the target stabilizers, use a light to medium band that allows for a smooth, controlled, and full range of motion.
Biomechanical Factors
Your individual body proportions and setup also influence how much tension a band delivers:
- Stance Width: A wider stance pre-stretches the band, raising the starting tension before you even begin the movement.
- Limb Length: Taller individuals with longer limbs will stretch a band further than shorter individuals, experiencing higher peak tension from the exact same band.
- Anchor Points: When anchoring a band to a sturdy object for exercises like leg curls, the distance between you and the anchor point directly determines the baseline resistance.
Test and Adjust Your Resistance Level During Workouts
Before committing to a full workout session, you should perform a practical test to verify that your chosen band matches your target intensity.
Start by performing a short test set of three to five repetitions of your planned exercise. During these test repetitions, pay close attention to how the movement feels. You should be able to move through the entire planned range of motion smoothly, without any sudden jerks or loss of balance. If you cannot reach the full depth of a squat or fully open your hips during a clamshell, the band is too heavy.
To gauge if the resistance is correct for your working sets, use the concept of Reps in Reserve (RIR). This is a subjective measure of how many more repetitions you could physically complete with good form before reaching failure. For effective strength and muscle building, aim to finish your sets with an RIR of 1 to 3. If you finish a set of 10 repetitions and feel you could easily perform another 6 or 7 reps, your band is too light.
Watch out for clear signs that your resistance level needs adjustment:
- Signs the band is too light: You feel no tension at the starting position of the exercise; you can move through the repetitions incredibly fast without effort; or you do not feel any muscle engagement or warmth in the target area after completing a full set.
- Signs the band is too heavy: Your joints begin to ache; your form breaks down immediately; you must use momentum or body sway to complete a repetition; or you are completely unable to complete the minimum number of reps in your target range.
Safety, Form, and Equipment Checks Before You Start
Because resistance bands store kinetic energy, a band failure during a heavy leg workout can cause sudden snaps, leading to bruising, skin irritation, or loss of balance. Prioritizing safety checks before every workout is essential.
Always inspect your bands thoroughly before use. Look closely for micro-tears, small punctures, white stress marks, or areas where the material has become thin or lost its elasticity. In warm, humid climates like Singapore, latex bands can degrade more rapidly if they are stored in hot, non-air-conditioned spaces or exposed to direct sunlight. If you spot any signs of wear, discard the band immediately to prevent it from snapping mid-exercise.
During your exercises, maintain strict control over your movement tempo. Avoid letting the band snap your legs back to the starting position. Instead, use a controlled tempo, such as taking two seconds to stretch the band (the concentric phase) and three seconds to return to the starting position (the eccentric phase). This controlled eccentric phase not only keeps you safe but also significantly increases muscle stimulation.
Your workout environment and footwear also play a critical role in safety. When performing exercises where the band is anchored under your feet, wear flat-soled athletic shoes with good grip to prevent the band from slipping out. If you are working out at home on smooth surfaces like polished ceramic tiles or vinyl flooring, sweat can quickly make the ground slippery. Always use a high-grip exercise mat to ensure your feet remain firmly planted.
Finally, establish clear stop conditions for your workout. Cease the exercise immediately if you experience sharp joint pain, sudden discomfort in your lower back, or if you feel the band shifting or slipping from its anchor point. Equipment should enhance your training, but it can never replace proper form, body awareness, and sound physical judgment.
Frequently Asked Questions (FAQ)
Can I combine multiple resistance bands for heavier leg exercises?
Yes, you can stack multiple resistance bands together to increase the total tension for heavy leg exercises like squats or hip thrusts. When you stack bands, their resistance levels combine, allowing you to create custom tension levels that sit between your standard bands.
However, you must ensure that the stacked bands are of similar length and material. Combining a highly elastic latex band with a stiff fabric band can cause the latex band to stretch excessively and snap, as the two materials do not distribute the load evenly. Always align the bands perfectly so they stretch together along the same path.
Do fabric resistance bands provide better resistance for leg workouts than latex ones?
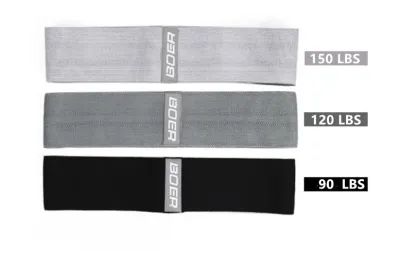
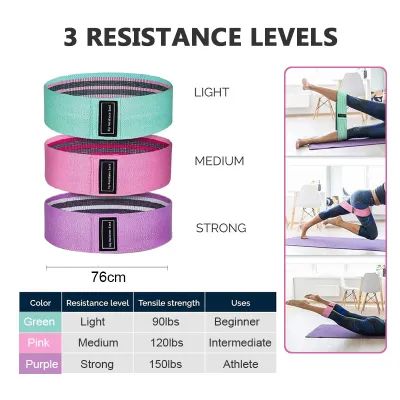
Fabric resistance bands are highly popular for lower-body workouts because they are wider, thicker, and slip-resistant. They do not roll up, pinch your skin, or slide down your thighs during dynamic movements like squats, hip thrusts, or lateral walks. They also tend to offer a higher baseline level of tension, making them excellent for glute activation.
However, fabric bands have a much more limited stretch capacity compared to latex bands. While a latex band can stretch to several times its original length, a fabric band will hit a hard stop once the woven fibers fully tighten. This makes latex bands more versatile for exercises that require a massive range of motion, while fabric bands are superior for short-range, high-tension hip and glute movements.

Community discussion
Share your experience or ask a question. Comments are reviewed before publication.