
Choosing the right vibration dampener for your tennis racket is a quick and affordable way to customize your playing experience. To make the correct choice, you need to match the dampener’s physical design to your racket’s string pattern, your personal preference for tactile feedback, and your playing style. While some players prefer a completely muted feel with minimal acoustic feedback, others want to retain a crisp response that helps them gauge the quality of their ball contact. By evaluating the physical differences between button, worm, and band dampeners, and understanding how they interact with your strings, you can select an accessory that stays secure during intense rallies and delivers the exact feel you want on the court.
Understanding How Vibration Dampeners Work
Many tennis players, especially beginners, purchase a vibration dampener expecting it to prevent injury or completely alter how the racket feels. To make an informed decision, it is essential to understand the physical limitations of these accessories. A vibration dampener is designed to target high-frequency vibrations that occur in the string bed immediately after ball contact. When the ball hits the strings, it creates a high-pitched “ping” sound and a rapid, localized vibration. The dampener absorbs this energy, converting the sharp sound into a duller, more solid “thud” and reducing the lingering buzz in the strings.
However, a dampener does not absorb low-frequency frame shock. Frame shock is the heavy impact force that travels down the racket shaft and into your hand, wrist, and elbow when you strike a ball. This shock is determined by the racket’s weight, stiffness, balance, and string tension, rather than the presence of a small silicone insert. Therefore, while a dampener significantly changes the acoustic feedback and tactile sensation of your string bed, it does not offer a mechanical solution for arm strain or joint pain.
Products mentioned in this guide

Prices are valid at publication and may change. Please refer to the product page for the latest price.
For players navigating arm comfort issues, relying solely on a dampener is not a substitute for proper stroke technique, physical conditioning, or professional medical advice. Instead, view the dampener as a tool for sensory customization. It allows you to fine-tune the auditory and tactile feedback of your racket, helping you focus on your game without distracting string resonance.
Comparing the Main Types of Vibration Dampeners
When browsing an online marketplace or a local sports shop, you will encounter three primary styles of dampeners. Each style offers a distinct balance of security, ease of installation, and sensory feedback.

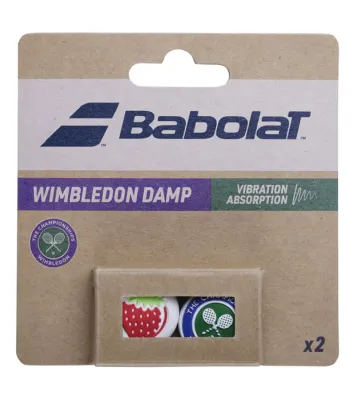
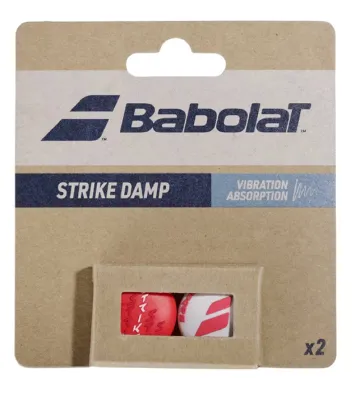
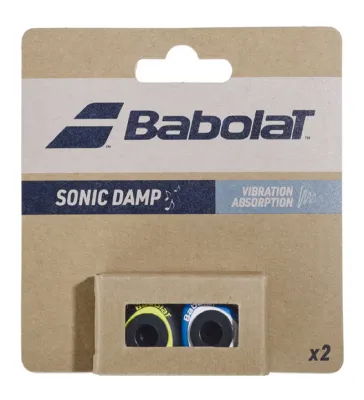
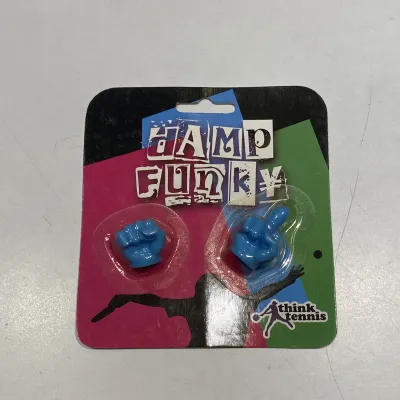
Button Dampeners Button dampeners are small, compact pieces of silicone or rubber that slide between the two center main strings, just below the lowest cross string. They are popular due to their simplicity, low weight, and wide variety of designs. Because they only contact two strings, they provide a light dampening effect, allowing you to enjoy a muted sound while retaining natural feedback from the string bed. The primary trade-off is security; during heavy topspin exchanges or off-center hits, the strings can stretch wide enough to let a button dampener slip out and fly across the court.
Worm Dampeners Worm dampeners are long, flexible, tube-like silicone accessories that weave through several main strings—typically four to six. They often feature small hooks or clips on both ends to lock onto the outer strings. Because they contact a larger surface area of the string bed, worm dampeners offer maximum vibration reduction, almost completely eliminating the “ping” sound. Additionally, because they are woven through multiple strings and secured at the ends, they are highly unlikely to fly off during play, making them excellent for heavy hitters.
Custom and Silicone Band Dampeners Silicone bands or custom ties are simple strips of elastic material that you knot or wrap around the center main strings. This style offers a middle ground in terms of dampening performance, as you can adjust the tightness of the knot to vary the feel. They are lightweight, highly visible, and very secure when tied correctly. However, they require more effort to install neatly and do not offer the quick-swap convenience of button dampeners.
Choosing between these types depends on your sensory preferences. If you prefer to feel the ball pocketing on the strings and want to maintain a crisp response, a button dampener is usually the best starting point. If you find string vibrations highly distracting and want a completely quiet, solid feel, a worm dampener is the more suitable choice.
Checking String Pattern Compatibility and Placement
Before purchasing a dampener, you must check the layout of your racket’s string bed. Tennis rackets generally feature different string patterns, with 16×19 (open) and 18×20 (dense) being the most common configurations.
An open 16×19 pattern has wider spacing between the strings, which easily accommodates almost any button dampener without distorting the string alignment. Conversely, a dense 18×20 pattern features much tighter spacing. If you attempt to force a wide or thick button dampener into a dense pattern, you may bend the main strings outward, altering string tension and affecting shot consistency. For dense patterns, look for slim button dampeners or opt for a flexible worm or band style that conforms easily to tight spaces.
In addition to physical compatibility, you must adhere to the official rules of tennis regarding placement. According to the International Tennis Federation (ITF), vibration dampeners must be installed outside the pattern of the cross strings. This means you can place the dampener below the lowest cross string or, less commonly, above the highest cross string. You cannot place a dampener directly in the middle of the hitting zone. Installing the dampener incorrectly not only violates tournament rules but also increases the risk of misrouting your shots when the ball contacts the plastic or silicone accessory. Always check your racket’s lower grommet area to ensure there is sufficient clearance between the frame and the lowest cross string to fit your chosen dampener comfortably.
Step-by-Step Guide to Installing Your Dampener
Installing your dampener correctly ensures it remains secure throughout your match and does not damage your strings. Follow these steps to install the two most common types of dampeners.
Preparing Your Racket Before starting, place your racket on a flat, clean surface. Inspect the lower portion of the string bed, specifically the area between the frame and the lowest cross string. Wipe away any dirt, moisture, or yellow tennis ball fuzz from the strings using a dry cloth. Symmetrical placement is key to maintaining the balance of your racket, so identify the two center main strings as your starting point.
Installing a Button Dampener
- Hold the racket firmly with one hand. Position the button dampener between the two center main strings, just below the lowest cross string.
- Gently push the two main strings apart with your thumbs to create a slightly wider gap. Avoid using sharp tools, which can nick or fray the string material.
- Slide the grooved edges of the button dampener onto the strings, ensuring the strings sit snugly within the recessed channels on both sides.
- Push the dampener upward until it rests flush against the lowest cross string. If your button dampener features an active locking clip, press it firmly until it engages.
Installing a Worm Dampener
- Locate the center of the worm dampener and place it against the two center main strings, below the lowest cross string.
- Weave one side of the flexible tube over and under the adjacent main strings, moving outward toward the side of the racket frame.
- Repeat the weaving process with the other half of the tube, moving in the opposite direction.
- Once woven through four to six strings, stretch the tube slightly and hook the plastic clips on each end securely around the outermost main strings, keeping the assembly parallel to the lowest cross string.
Verifying the Installation Once installed, lift the racket and tap the center of the string bed with your hand or a tennis ball. You should hear a clean, muted thud instead of a high-pitched ring. Visually inspect the dampener to confirm it is centered, level, and securely locked in place without bending the strings.
Evaluating Feel and Adjusting Your Setup
After installing your dampener, the best way to evaluate its performance is to take it onto the court for a practice session. Warm up by hitting a variety of shots to experience how the accessory alters your racket’s feedback.
Begin with groundstrokes from the baseline. Pay attention to the sensation in your hand when you hit the sweet spot versus when you hit off-center. A well-matched dampener should make clean hits feel solid and quiet, while still providing enough tactile feedback to let you know if you misjudged the ball. Next, hit several volleys and touch shots. If you feel completely disconnected from the ball—as if the racket is “dead” or numb—the dampener may be absorbing too much feedback. This is a common issue for advanced players who rely on subtle vibrations to gauge depth and spin.
If you experience a rattling sound during play, stop immediately and check the dampener. A rattle usually indicates that a button dampener has slipped slightly out of its grooves or that a worm dampener’s end clips have come undone. If the dampener repeatedly slips or feels too restrictive, do not hesitate to adjust its position, swap it for a different style, or remove it entirely. Many professional and recreational players choose to play without a dampener to enjoy the raw, crisp feedback of their strings. Ultimately, the right setup is the one that gives you the greatest confidence on the court.
Frequently Asked Questions (FAQ)
Do vibration dampeners prevent tennis elbow?
No, vibration dampeners do not prevent tennis elbow or other joint injuries. Dampeners only absorb high-frequency vibrations from the strings and alter the sound of ball contact. They do not reduce the heavy, low-frequency shock that travels through the racket frame into your arm upon impact. If you are experiencing persistent arm pain, you should consult a sports physiotherapist or medical professional. To improve arm comfort, focus on checking your racket’s grip size, reducing your string tension, using a heavier or more flexible racket, and refining your stroke technique.
Why does my button dampener keep flying off?
A button dampener usually flies off because of improper placement, off-center hits, or string pattern incompatibility. If the dampener is not pushed flush against the lowest cross string, or if it is installed in a very open string pattern that stretches easily, it can slip out during heavy topspin shots. Additionally, hitting the ball near the very bottom of the racket frame can directly strike the dampener and dislodge it. To resolve this, ensure the strings sit deeply in the dampener’s side grooves. If the problem persists, consider switching to a worm dampener, which clips securely to multiple strings.
Can I use multiple dampeners on one racket?
Yes, official tennis rules allow you to use multiple vibration dampeners, provided they are all placed outside the pattern of the cross strings (typically at the very bottom of the string bed). However, adding multiple dampeners is rarely beneficial. It does not significantly increase vibration reduction beyond what a single worm dampener can achieve, and it adds unnecessary weight to the head of your racket. This extra weight can alter the racket’s balance and swing weight, making it feel sluggish. It is best to test a single, properly fitted dampener before considering additional accessories.

Community discussion
Share your experience or ask a question. Comments are reviewed before publication.