
Using a figure 8 resistance band for upper body workouts requires a conscious focus on wrist alignment to prevent joint strain. Unlike traditional straight bands, the dual-loop design of a figure 8 band creates a rapid, inward-pulling tension that can easily force your wrists into awkward angles if your grip is incorrect. By mastering a neutral wrist position and adjusting your hand placement, you can safely target your chest, back, shoulders, and arms without overloading your delicate wrist joints.
To get the most out of this versatile tool, you must understand how its unique shape alters the resistance profile compared to other fitness equipment. This guide details the mechanics of wrist strain, essential grip adjustments, step-by-step exercise forms, and equipment maintenance tips to keep your workouts safe and effective.
Understanding Wrist Mechanics and Band Tension
Traditional straight tube bands offer a linear resistance that increases gradually as you stretch the rubber. In contrast, a figure 8 resistance band features a fixed center point that divides the band into two distinct loops. This design causes the tension to ramp up much more quickly over a shorter range of motion. Because the loops pull toward each other, they exert a lateral force that directly challenges your grip and wrist stability.
Products mentioned in this guide
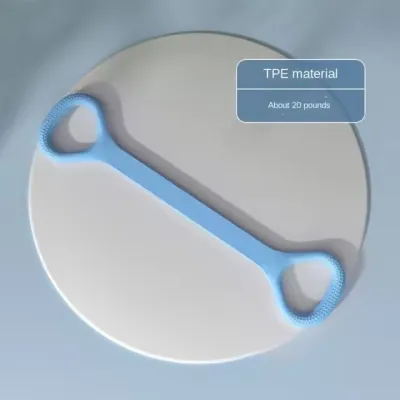


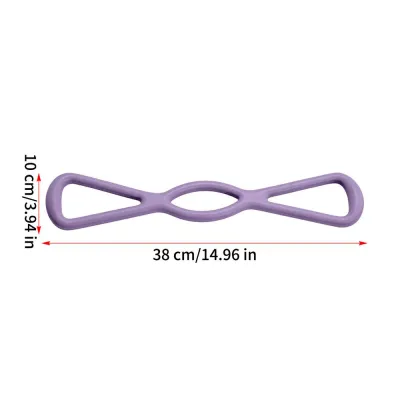
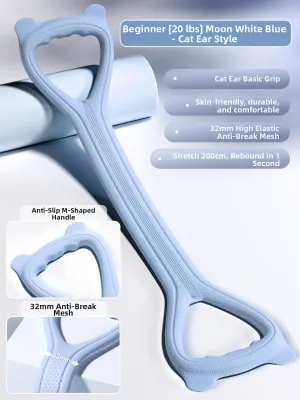

Prices are valid at publication and may change. Please refer to the product page for the latest price.
To protect your joints, you must maintain a neutral wrist position throughout every movement. A neutral wrist means your hand is aligned with your forearm, forming a straight line from your knuckles down to your elbow. When the band’s tension forces your wrist to bend backward (extension) or forward (flexion), it compresses the small bones, tendons, and nerves in the wrist joint. This misalignment reduces your mechanical advantage and increases the risk of repetitive strain injuries.
It is crucial to distinguish between normal muscle fatigue and joint stress during your workout. Normal fatigue presents as a dull, warm burning sensation in the target muscles, such as your upper back or shoulders. Joint stress, however, typically feels like a sharp pinch, a localized ache, or a throbbing sensation directly inside the wrist joint or along the thumb side of the hand. If you feel joint discomfort, it is an immediate sign that your wrist alignment has collapsed under the load.
Essential Grip Techniques to Protect Your Wrists
To distribute the band’s force evenly across your hand, avoid gripping the handles solely with your fingers. Instead, thread your hand deeply into the loop or handle so the resistance rests against the meaty base of your palm, near the thumb. This placement aligns the pulling force directly with the radius and ulna bones of your forearm, minimizing the leverage that forces the wrist to bend.

Your grip width and hand rotation must adapt to the specific movement pattern you are performing. For pushing exercises, a neutral grip with palms facing each other often provides the most stable alignment for the wrist joint. For pulling movements, rotating your hands so your palms face downward or inward can help distribute the tension across your upper back rather than concentrating it in your forearms and wrists. Experiment with slight adjustments to find an angle where your wrists feel supported and unyielding.
If you find that the rubber material causes uncomfortable friction or slips during workouts, gym accessories can offer a practical solution. High-quality gym gloves can improve your grip security, preventing the band from sliding and forcing you to over-grip. However, if you struggle with structural joint stability, dedicated wrist wraps can provide external support to help maintain a neutral alignment. Keep in mind that accessories should only assist your form, not serve as a substitute for active wrist control and proper resistance selection.
Step-by-Step Upper Body Exercises with Safe Form
Before starting any exercise, establish a stable stance with your feet shoulder-width apart and your core fully engaged. Always perform movements with a slow, controlled tempo, taking roughly two seconds to stretch the band and two seconds to return to the starting position. Rushing through repetitions often leads to jerky movements that place sudden, unpredictable shock loads on your wrist joints.
During both the concentric phase (stretching the band) and the eccentric phase (returning to the start), perform continuous visual and physical checks on your wrist alignment. Your knuckles should never drift backward or collapse inward. If you notice your wrists beginning to wobble or bend, pause the movement and reset your posture.
Proper breathing and core engagement are essential for maintaining overall stability and preventing compensatory movements. Inhale deeply before you begin the movement, and exhale during the exertion phase. Keeping your core tight prevents your lower back from arching, which in turn helps keep your shoulders and wrists in their optimal, biomechanically strong positions.
Chest Presses and Fly Variations
To perform a chest press, position the figure 8 band behind your upper back, holding one loop or handle in each hand. Ensure the band rests securely across your shoulder blades and does not slide up toward your neck. Hold the handles so the band exits between your thumb and index finger, which helps stabilize the grip.
As you press forward, keep your wrists stacked directly over your elbows. Do not allow the resistance to pull your hands outward or bend your wrists backward at the peak of the movement. Your wrists, elbows, and shoulders should move in a single, coordinated plane, ensuring the chest muscles do the work while the wrists remain locked in a neutral position.
Back Rows and Pull-Aparts
For back rows, anchor the center of the figure 8 band around a secure post or under your feet, holding a loop in each hand. When performing pull-aparts, hold the band directly in front of your chest with your hands spaced shoulder-width apart. Focus on pulling your shoulder blades together to initiate the movement.
To protect your wrists during pulling exercises, avoid using a tight “hook grip” where you curl your fingers and flex your wrists inward. Instead, think of your hands simply as hooks that connect the band to your elbows. Drive the movement by pulling your elbows backward, keeping your wrists straight and relaxed to prevent your forearms from taking over the load.
Shoulder Presses and Lateral Raises
To execute an overhead shoulder press, stand on the bottom loop of the band and hold the top loop at shoulder height. Your palms should face forward or slightly inward. Press upward in a controlled arc, keeping your knuckles pointing directly toward the ceiling throughout the entire range of motion.
During lateral raises, control the band’s natural tendency to snap back quickly as you lower your arms. Letting the band pull your arms down rapidly places a sudden deceleration force on your wrist joints, which can lead to micro-trauma over time. Maintain constant muscular tension and lower your arms slowly to keep your wrists safe.
Common Form Mistakes and When to Stop
One of the most common form errors is rolling the wrists inward or outward at the peak of a muscle contraction. This mistake usually happens when the resistance is too heavy, causing the body to recruit smaller forearm muscles to complete the movement. Another frequent error is using momentum or body sway to stretch the band, which strips the target muscles of tension and subjects the wrist joints to sudden, uncontrolled forces.
Safety must always take priority over completing a set. You must stop your workout immediately if you experience any of the following warning signs:
- Sharp, sudden, or shooting pain in the wrists, hands, or elbows.
- Numbness, tingling, or a "pins and needles" sensation in your fingers.
- Visible fraying, cracking, or peeling on the surface of your figure 8 band.
If you experience persistent wrist discomfort that does not subside after a rest period, do not attempt to push through the pain. Cease using the resistance band and consult a physical therapist or a qualified fitness professional. They can evaluate your movement patterns, check for underlying joint issues, and help you rebuild your strength safely.
Inspecting Your Equipment and Adjusting Resistance
Before every workout, conduct a thorough visual and tactile inspection of your figure 8 resistance band. Stretch the band slightly under a bright light to check for micro-tears, small punctures, discoloration, or dry rot. Pay close attention to the connection points where the rubber meets the foam handles or plastic center rings, as these areas experience the highest stress.
In warm, humid climates, such as in Singapore, latex and rubber fitness equipment can degrade more rapidly due to moisture and ambient heat. Store your bands in a cool, dry place away from direct sunlight, and avoid leaving them in damp gym bags or balconies. If you notice any stickiness, brittle textures, or fine cracks, discard the band immediately to prevent it from snapping during an exercise.
Always match the band’s resistance level to your current physical capability. If you must bend your wrists, arch your back, or shrug your shoulders to complete a repetition, the resistance is too high. Switch to a lighter band that allows you to maintain a perfect neutral wrist position, ensuring your training remains safe, targeted, and effective.
Frequently Asked Questions (FAQ)
Can I use a figure 8 band if I have a history of carpal tunnel syndrome?
If you have a history of carpal tunnel syndrome, you should exercise extreme caution when using a figure 8 resistance band. The rapid tension ramp-up and the gripping force required can increase pressure on the median nerve in your wrist. Avoid exercises that require high-tension gripping or those that force your wrist into flexion. It is highly recommended to seek professional clearance from a medical practitioner or physical therapist before incorporating resistance bands into your routine.
Do I need to wear gloves when using a figure 8 resistance band?
Wearing gloves is not strictly mandatory, but it can be highly beneficial if you experience hand discomfort or slipping. Gym gloves protect your skin from friction, prevent blisters, and help you maintain a secure hold on the handles when your hands sweat. However, keep in mind that gloves only improve surface grip; they do not provide structural support to your wrist joints. To protect your joints, you must still actively focus on maintaining a neutral wrist alignment and choose an appropriate resistance level.

Community discussion
Share your experience or ask a question. Comments are reviewed before publication.