
Using a resistance band for assisted pull-ups is an effective way to build back and arm strength while maintaining proper form. By looping a heavy-duty elastic band over a secure pull-up bar and placing your foot or knee inside, you offset a portion of your body weight, allowing you to perform the full range of motion with proper alignment. This method targets the latissimus dorsi, rhomboids, traps, and biceps while reinforcing the exact movement pattern you need for a strict pull-up.
To get the most out of this exercise, you must focus on selecting the correct band tension, securing the band safely to prevent slips, and executing each repetition with controlled mechanics. Rather than relying on momentum or letting the band snap you upward, a successful assisted pull-up requires active shoulder engagement, a tight core, and a slow, deliberate descent. This approach not only builds the necessary strength but also protects your joints from sudden, uncontrolled forces.
Selecting the Right Band Thickness for Your Strength Level
Resistance bands are typically flat, continuous loops made of layered latex, color-coded by width and thickness. The physical dimensions of the band directly dictate the level of tension and assistance they provide. When shopping for bands, you will find that they range from very thin, light-tension bands to thick, heavy-duty bands designed for maximum support.
Products mentioned in this guide

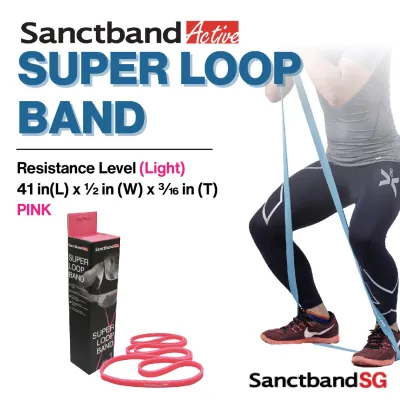
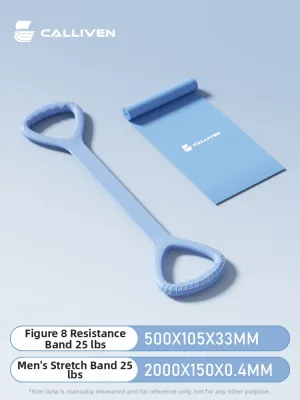
Prices are valid at publication and may change. Please refer to the product page for the latest price.
To choose the correct band, start by checking the manufacturer’s weight assistance chart or resistance level indicators printed on the band or packaging. Most reputable brands provide a chart that cross-references your current body weight with the number of unassisted pull-ups you can perform to recommend a specific band width. This guide serves as a reliable starting point for selecting a band that matches your current physical capabilities.
The general rule of thumb is that thicker, wider bands provide more upward assistance, making the pull-up easier, while thinner bands provide less assistance, requiring your muscles to do more work. A thick band stores more elastic potential energy when stretched, which helps push your body upward from the bottom of the movement where you are weakest. As you build strength, you will gradually transition to thinner bands that offer less help.
Consider the benefit of having two or three different bands to adjust the difficulty as your strength improves or as you fatigue during a workout. During a high-volume training session, your muscles will naturally tire, and your form may begin to break down. Having multiple bands allows you to perform drop sets—switching to a thicker band to complete your planned repetitions with good form once your muscles fatigue on a thinner one.
Selecting the right band also depends on your specific workout goals for the day. If your goal is to build muscle hypertrophy, you want a band that allows you to complete eight to twelve controlled repetitions per set. If you are focusing on building maximum strength, a thinner band that limits you to three to five high-effort repetitions with strict form is more appropriate.
Securing the Band and Establishing Your Grip
To set up safely, stand on a stable box or bench positioned directly beneath your pull-up bar. Drape the resistance band over the center of the bar so that it hangs down equally on both sides. Take one end of the loop and thread it completely through the opposite end, pulling it downward to form a secure girth hitch. Slide this knot to the exact center of the bar and pull it tight, ensuring there are no twists or folds in the latex that could cause uneven wear or sudden slippage.

Once the band is anchored, grip the bar firmly and place one foot into the hanging loop, pushing the band down until your leg is fully extended. To prevent the band from slipping off your shoe, position the loop securely under the midfoot or arch of your sole, rather than near the toes or heel. Keep your other leg crossed either in front of or behind the banded leg to maintain a compact, stable lower body and prevent the band from swinging.
Alternatively, you can place both feet inside the loop to offer a more stable base and prevent the band from pulling your legs to one side. This dual-foot method distributes your weight evenly across the band, reducing the tendency to swing forward or backward during the exercise. However, it requires careful coordination when entering and exiting the loop, making a sturdy step platform essential for safety.
Your hand placement on the bar must align closely with the vertical line of the band’s upward pull. Place your hands slightly wider than shoulder-width apart using an overhand grip, with your knuckles facing upward and thumbs wrapped securely around the bar. This grip width ensures that when you pull yourself up, your elbows can drive straight down, keeping your body aligned with the band and minimizing lateral swinging.
Before lifting your feet off the platform, let your body hang passively for a split second to verify that the band is pulling straight up through your center of gravity. If you feel yourself tilting or drifting to one side, step back onto the platform and adjust the position of the girth hitch on the bar or your hand placement. Proper alignment is crucial for ensuring that the muscles on both sides of your back are worked evenly.
Performing the Pull-Up with Controlled Mechanics
A common mistake is initiating the movement by immediately flexing the elbows and pulling with the arms. Instead, start the pull-up from a dead hang by actively depressing and retracting your shoulder blades, a movement often called a scapular pull-up. Imagine pulling your shoulders away from your ears and squeezing your shoulder blades down into your back pockets before your arms begin to bend.
Once your shoulders are packed, transition smoothly into the main pulling phase by driving your elbows down toward the floor and backward. Focus on bringing your chest up toward the bar rather than simply trying to get your chin over it. This mental cue shifts the primary workload onto the large latissimus dorsi muscles of your back, ensuring your biceps do not fatigue prematurely.
Throughout the entire ascent, keep your core tightly braced and your glutes squeezed to maintain a stable torso. Aim for a slight hollow body position, where your legs are slightly in front of your torso, forming a gentle, active curve. This full-body tension prevents your lower back from arching excessively and stops you from swinging or using momentum to cheat the movement, ensuring that your muscles do the actual work.
The descent, or eccentric phase, is where significant strength gains are made, so do not simply let go or allow the elastic tension of the band to snap your body back down. Instead, resist the band’s pull and lower yourself slowly over a count of three to four seconds until your arms are fully extended. This controlled lowering maximizes muscle engagement and protects your joints from sudden, violent forces at the bottom.
As you reach the bottom of the descent, maintain active tension in your shoulders and core rather than letting your joints go completely slack. Keeping this slight tension at the bottom prepares your muscles for the next repetition and prevents the band from jerking your shoulders abruptly. This continuous control is the key to building the structural integrity needed for unassisted pulling.
Avoiding Common Form Errors and Recognizing Stop Conditions
Relaxing completely at the bottom of an assisted pull-up is a frequent error that can lead to shoulder strain. When you lose muscle tension at the bottom, the sudden transition of your body weight back onto your passive joints, combined with the upward pull of the band, can pinch or strain the rotator cuff. Always keep your shoulder blades slightly engaged even at the lowest point of the exercise.
Another risk of losing tension at the bottom is that the band can lose its grip on your shoe. If your leg bends or your foot tilts upward, the highly stretched band can slip off and snap violently upward, posing a risk of injury to your face or body. Keep your foot flexed and your leg straight or locked in position to maintain a secure anchor point for the latex loop.
Resistance bands are subject to high levels of stress and can degrade over time, making regular safety checks essential. Before every single training session, run your fingers along the entire length of the band to check for micro-tears, small cuts, peeling edges, or white stress marks where the latex has been overstretched. If you spot any of these warning signs, discard the band immediately to prevent it from snapping under tension.
Knowing when to stop a set is crucial for long-term safety and effective training. If you feel your grip slipping, your lower back arching excessively, or your shoulders shrugging up toward your ears to force a rep, your set is complete. Pushing past technical failure leads to poor movement patterns, reduces the effectiveness of the exercise, and increases the risk of acute muscle strains.
If you experience sharp, pinching, or radiating pain in your shoulders, elbows, or wrists during the exercise, stop immediately. Do not attempt to push through joint pain, as this often indicates poor mechanics or tissue irritation. If the discomfort persists after a few days of rest and light stretching, consult a qualified medical professional or physical therapist to assess your joint mechanics before resuming overhead pulling movements.
Scaling Down Assistance to Reach Unassisted Pull-Ups
To transition from assisted to unassisted pull-ups, you must gradually reduce the amount of help the band provides. Once you can comfortably complete three sets of ten to twelve repetitions with strict form using a specific band, it is time to step down to the next thinnest band. This reduction in width forces your back and arms to support a larger percentage of your body weight, driving strength adaptations.
Alongside lighter band work, incorporating negative pull-ups is an excellent way to build raw eccentric strength and grip endurance. Stand on a box, jump or step up so your chin is over the bar, and then lower yourself down as slowly as possible without any band assistance. Aiming for a five-to-ten-second descent builds the specific pulling strength and shoulder stability required for the full movement.
Keep a detailed training log of your pull-up sessions to track your progress systematically. Record the specific band color or width used, the exact number of sets and repetitions completed, and notes on how controlled your descents were. Tracking these variables ensures you are making consistent progress and prevents you from staying on a heavy assistance band longer than necessary.
Frequently Asked Questions (FAQ)
Is it safe to use a resistance band on a door-mounted pull-up bar?
Using a resistance band on a door-mounted pull-up bar requires extreme caution. While these bars are designed to support a person’s static body weight, adding a resistance band introduces significant dynamic downward tension. When you stretch a heavy band to the bottom of a pull-up, the total force exerted on the bar can exceed your actual body weight, potentially overloading the bar’s mounting brackets or friction pads.
Before attaching a band, carefully inspect your doorway bar to ensure it is securely locked, bolted, or wedged into the frame according to the manufacturer’s instructions. Avoid using telescopic bars that rely solely on doorway friction, as the downward pull of a stretched band can cause them to slide or rotate out of place. Always test the setup with a gentle tug before placing your full weight into the band loop.

Community discussion
Share your experience or ask a question. Comments are reviewed before publication.