
Wrapping your hands properly is the single most important preparation step before putting on boxing gloves. While gloves are designed to absorb external shock, hand wraps secure the internal structure of your hand, binding the small bones and joints together to distribute impact forces safely. Without this structural support, the repetitive force of striking a heavy bag, pads, or an opponent can easily lead to joint displacement, fractures, or severe wrist sprains.
Why Proper Hand Wrapping Matters
The human hand is a complex network of 27 small bones, delicate ligaments, and tendons that are not naturally designed to withstand repeated high-velocity impacts. When you land a punch, the kinetic energy travels back through your knuckles, down the metacarpal bones, and into the wrist joint. Boxing gloves provide a layer of foam to cushion the surface impact, but they do not prevent the individual bones in your hand from shifting or bending under pressure.
This is where the bandage, or hand wrap, becomes essential. By tightly but flexibly binding the hand, the wrap acts as a supportive splint that keeps the knuckles aligned and prevents the wrist from bending excessively in any direction.
Products mentioned in this guide
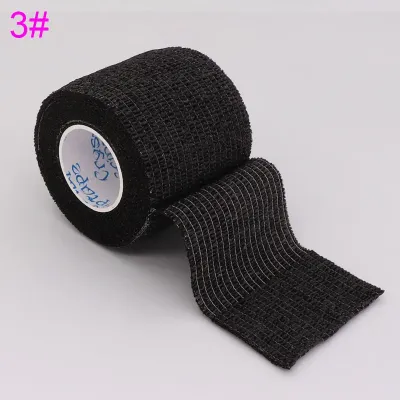
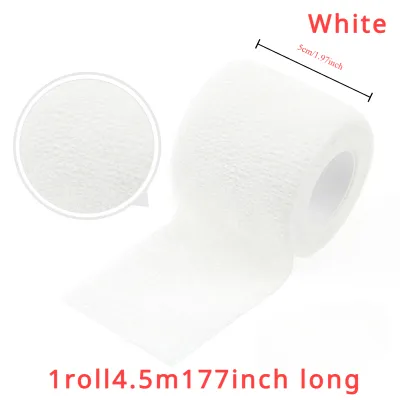
Prices are valid at publication and may change. Please refer to the product page for the latest price.
Training without wraps increases the risk of acute injuries like a boxer’s fracture—a break in the neck of the fifth metacarpal bone—as well as chronic conditions like tendonitis and wrist instability. For anyone engaging in combat sports, wrapping is not an optional accessory; it is a fundamental safety requirement.
Choosing the Right Boxing Bandage
Selecting the correct wrap depends on your hand size, training intensity, and personal preference for feel and stretch. Most manufacturers offer wraps in two primary lengths: short wraps (around 120 inches) and long wraps (around 180 inches). For most adults and anyone training on heavy bags, the 180-inch length is highly recommended because it provides enough material to thoroughly protect the wrist, knuckles, and individual fingers.

The material of the wrap also plays a significant role. Traditional cotton wraps are thick, rigid, and highly durable, offering maximum structural support but requiring precise wrapping to avoid bunching.
Elasticated wraps, often referred to as Mexican-style wraps, blend cotton with synthetic fibers like nylon or spandex to provide a slight stretch. This elasticity allows the wrap to conform closely to the contours of your hand, maintaining a secure fit even as your muscles expand.
When purchasing wraps, inspect the closure mechanism and design details. A wide, high-quality hook-and-loop fastener ensures the wrap stays locked in place. Additionally, look for a reinforced thumb loop that is securely stitched, as this loop serves as the anchor point for the entire wrapping process.
Preparation and Starting Position
Before you begin wrapping, ensure your hands are clean and completely dry. Moisture trapped beneath a tight wrap can cause skin chafing, blisters, and create an ideal environment for bacterial growth inside your gloves. If you have just finished a warm-up, wipe your hands thoroughly with a clean towel.
Next, prepare the bandage by unrolling it completely. Locate the thumb loop and identify which side of the wrap needs to face down against your skin; many wraps feature a “this side down” print near the loop to help you start correctly. If your wrap does not have this label, look at the Velcro end to ensure that when you finish wrapping, the hook-and-loop fastener will face the correct way to close.
To begin, hold your hand in a neutral, active posture. Spread your fingers slightly apart—often called the “starfish” position—and keep your wrist straight. Wrapping your hand with closed fingers or a bent wrist will result in a wrap that is too tight when you open your hand, or too loose when you make a fist.
Step-by-Step Hand Wrapping Technique
The wrapping process follows a logical path designed to secure the wrist, anchor the thumb, cushion the knuckles, and bind the hand into a solid unit. Throughout this sequence, the most important rule is to keep the bandage completely flat against your skin. Any twists or folds in the fabric will create localized pressure points that can cause pain, bruising, or skin irritation once your hand is compressed inside a tight boxing glove.
Securing the Wrist and Thumb
Begin by slipping your thumb through the starter loop, ensuring the correct side of the fabric is resting against the back of your hand. Pull the wrap across the back of your wrist and wrap it around the wrist joint three to four times. This creates a stable, rigid foundation that prevents your wrist from bending backward or sideways upon impact.
From the wrist, bring the wrap diagonally across the back of your hand to the base of your thumb. Wrap around the thumb joint once, pulling the fabric gently to secure the joint without restricting its natural alignment. Avoid pulling too tightly here, as constricting the thumb can cut off circulation. Bring the wrap back down across the palm to the wrist to lock the thumb anchor in place.
Padding the Knuckles
Next, run the wrap diagonally up from the wrist across the back of your hand to the outside of your pinky knuckle. Wrap the fabric across the front of your knuckles three to four times, creating a thick, cushioned pad over your striking surface. Ensure your fingers remain slightly splayed during this step so the knuckle pad can expand naturally when you make a fist.
To secure this padding and stabilize the individual hand bones, transition into an “X” pattern between your fingers. Bring the wrap down to the wrist, then up between your pinky and ring finger, across the palm, and back down to the wrist. Repeat this process for the middle and index finger gaps. This weaving technique pulls the metacarpal bones together, preventing them from splaying outward when you land a punch.
Locking the Wrap in Place
Once the fingers are secured, bring the wrap back up to the knuckles for one final pass to smooth down the finger weaves. From there, guide the remaining length of the bandage diagonally back down to your wrist. This final section of the wrap is used to reinforce the wrist joint, which bears the brunt of the rotational forces during punching.
Secure the hook-and-loop fastener firmly around your wrist. The Velcro should sit completely flat against the fabric without any overhanging edges that could scratch your skin or damage the inner lining of your boxing gloves. If your wraps do not have a Velcro closure, tuck the loose end deeply and securely beneath the existing wrist layers to prevent it from unraveling mid-training.
Verifying the Fit and Comfort
Once you finish wrapping, verify the fit before putting on your gloves. The most reliable method is the “fist test.” With your hand relaxed, the wrap should feel snug but comfortable, allowing you to fully extend your fingers. When you clench your hand into a tight fist, the wrap should tighten up instantly, transforming your hand into a rigid, solid unit.
Pay close attention to physical signs of an over-tightened wrap. If you experience numbness, tingling, cold fingertips, or skin discoloration, the wrap is restricting blood circulation. Immediately unwrap your hand and reapply the bandage with lighter tension.
Conversely, a wrap that is too loose will quickly bunch up, slide down your wrist, or shift away from your knuckles inside the glove. If you feel the fabric sliding or notice a lack of structural support, take the time to re-wrap. A loose wrap offers virtually no protection and can increase the risk of friction blisters.
Common Mistakes and Troubleshooting
One of the most frequent mistakes beginners make is wrapping the wrist too tightly while ignoring the hand, or vice versa. A wrap must distribute tension evenly. Focusing all tension on the wrist risks cutting off blood flow to the fingers, while focusing only on the knuckles leaves your wrist vulnerable to hyperextension.
Another common issue is allowing the bandage to twist. A twisted wrap reduces the fabric’s surface area, losing valuable padding and creating thick ridges that press painfully into your skin under glove pressure. If you notice a twist, back up a step, flatten the fabric, and proceed.
Leaving the thumb completely unwrapped is another critical error. The thumb is highly susceptible to being caught on an opponent’s glove or a heavy bag, leading to painful sprains. Always ensure the thumb is anchored to the wrist. If your Velcro closure fails to stick, check for accumulated lint in the hooks, or adjust the angle of your final wrist wrap to ensure the fastener aligns perfectly.
Washing and Maintaining Your Bandages
Proper maintenance of your hand wraps is essential for hygiene and to preserve fabric elasticity. Always check the manufacturer’s care label for specific instructions. Because wraps absorb sweat, oils, and bacteria, they should be washed regularly—ideally after every intense session, especially in warm, humid climates like Singapore where bacteria multiply rapidly.
To prevent your wraps from tangling in the washing machine, place them inside a mesh laundry bag. Use a gentle cycle with mild detergent, and avoid fabric softeners, which break down elastic fibers over time. Always air dry your wraps completely; hot dryers can shrink cotton wraps and ruin the elasticity of blended fabrics.
Once dry, roll them up tightly starting from the Velcro end. Storing them rolled keeps them organized, crease-free, and easy to apply during your next session. Never store damp wraps in a closed gym bag, as this leads to mold and persistent odors.
Frequently Asked Questions (FAQ)
Can I use athletic tape instead of a cloth bandage?
Athletic tape is highly rigid and is typically used by professional fighters or advanced competitors to create a custom, immovable splint under their gloves. However, applying athletic tape correctly requires specialized training to avoid cutting off circulation, and it is a single-use material that must be cut off after every session. For daily training, reusable cloth bandages are much more practical, cost-effective, and forgiving for beginners to apply safely.
How often should I wash my hand wraps?
You should wash your hand wraps after every training session to maintain proper hygiene and prevent the buildup of odor-causing bacteria. If you train multiple times a week, it is highly recommended to own several pairs of wraps so you always have a clean, dry set ready. Allowing sweat-soaked wraps to dry without washing them causes the fabric to stiffen, which can irritate your skin and degrade the elastic fibers prematurely.

Community discussion
Share your experience or ask a question. Comments are reviewed before publication.