
Camping in Singapore offers a unique tropical escape, but the sudden onset of monsoon downpours can quickly turn an outdoor adventure into a soggy ordeal. If you are considering a Naturalhike tent for your next trip to East Coast Park or Pulau Ubin, the short answer is that many of their models can handle heavy rain, provided you select a model with the correct specifications, pitch it with precision, and maintain its protective coatings. However, not all tents from this brand are built for the same weather extremes. To ensure you stay dry when the skies open, you must understand how to evaluate their materials, structural designs, and limits against intense tropical weather.
Understanding Singapore's Monsoon Rain Demands on Camping Gear
Singapore experiences two main monsoon seasons—the Northeast Monsoon and the Southwest Monsoon—which bring intense, high-volume downpours accompanied by strong wind gusts. Unlike a gentle temperate drizzle, tropical rain often falls vertically and horizontally at once, putting immense pressure on every square centimeter of your shelter. The sheer volume of water can quickly overwhelm thin fabrics, while wind-driven rain tests the physical seals of your tent’s zippers and seams.
Beyond the immediate downpour, the sustained high humidity of a tropical climate presents a secondary challenge. When the air is saturated with moisture, damp fabrics struggle to dry, and condensation builds up rapidly on the inside of the tent. This constant wetness can cause certain nylon fabrics to sag, reducing the tension of your pitch and allowing the wet rainfly to cling to the inner mesh. Over time, prolonged exposure to moisture and heat can also accelerate the degradation of polyurethane coatings, making proper gear selection and care essential.
Products mentioned in this guide
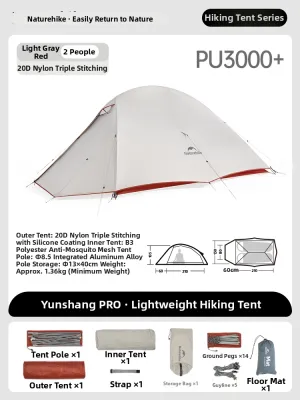
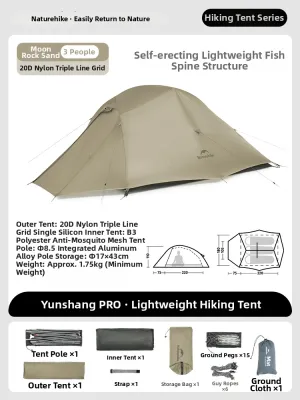
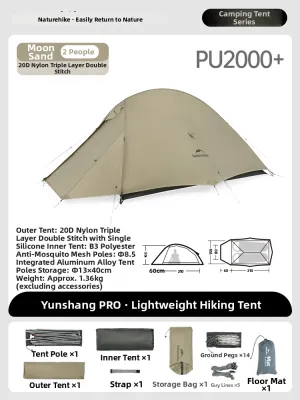
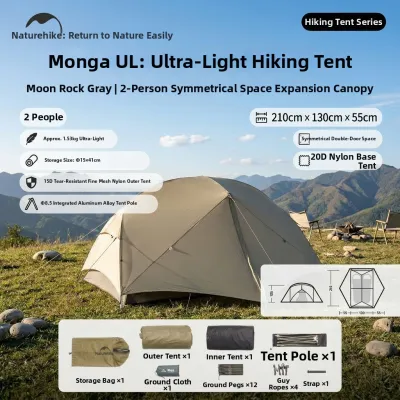
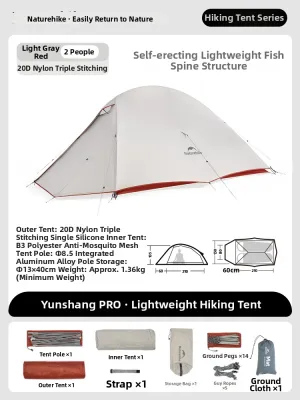
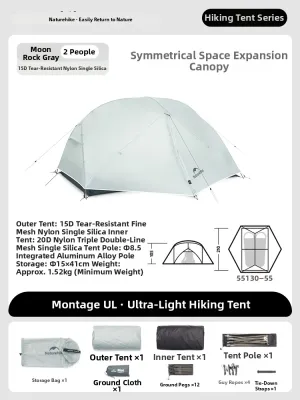
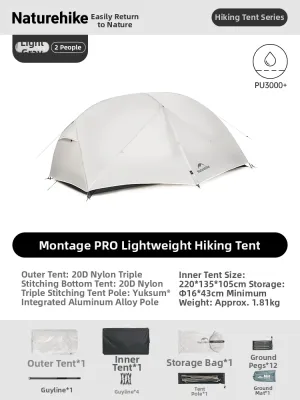
Prices are valid at publication and may change. Please refer to the product page for the latest price.
The primary failure points in standard camping shelters during these storms are usually not the fabric itself, but the construction details. Water typically forces its way through unsealed seams, poorly protected zippers, or low-lying floor seams where water pools on the ground. If your tent lacks a high bathtub floor or adequate rainfly coverage, splashback from the hard ground can easily bounce under the fly and penetrate the inner mesh, leaving you and your sleeping gear damp.
Key Waterproofing Specifications to Check on Your Naturalhike Tent
When shopping for or inspecting a Naturalhike tent, you should never rely on general brand reputation alone. Instead, look closely at the technical specifications provided on the product tag, packaging, or the manufacturer’s official manual. These specifications give you a direct indication of how much water pressure the materials can withstand before moisture begins to seep through.

The first metric to locate is the hydrostatic head rating, which is typically expressed in millimeters (for example, 2000mm or 3000mm). This rating indicates the height of a water column that the fabric can support before water penetrates. Additionally, you must evaluate the fabric denier, which measures the weight and thickness of the individual threads used in the weave. Finally, look for explicit confirmation that the tent features factory-taped seams, which are critical for sealing the tiny needle holes created during the stitching process.
Evaluating Hydrostatic Head and Fabric Denier
Hydrostatic head (HH) is the standard measurement for fabric waterproofness. For Singapore’s heavy monsoon rain, a rainfly rating of at least 2000mm is generally considered the baseline for reliable protection, while a floor rating of 3000mm or higher is recommended to withstand the pressure of your body weight pressing down on wet ground. If you choose an ultra-lightweight model with a lower rating, you run a higher risk of water misting through the fabric during a sustained downpour.
Fabric denier, indicated by a number followed by ‘D’ (such as 15D, 20D, or 150D), directly affects both weight and durability. While lower denier fabrics (like 15D or 20D nylon) make a tent incredibly light and easy to carry, they are more prone to stretching when wet and require careful handling to prevent punctures from twigs or sharp stones on the campsite floor. Heavier fabrics, such as 150D polyester oxford often used in tent floors, offer superior puncture resistance and handle water pooling much better, though they add significant weight to your pack.
Inspecting Seam Construction and Rainfly Coverage
Even the highest-rated waterproof fabric will fail if the seams are not properly sealed. Before heading out, lay your tent flat and inspect the interior seams of the rainfly and the floor. Look for a clear, flexible polyurethane tape applied over the stitched lines; it should be completely flat, without any lifting, bubbling, or peeling at the edges. Pay close attention to high-stress areas, such as the corners of the floor and the attachment points for guylines, as these are the most common spots for tape to fail.
Another critical factor is the physical coverage of the rainfly. A partial rainfly that leaves the lower sections of the inner tent exposed is highly vulnerable to wind-driven rain and splashback. For tropical storms, you need a full-coverage rainfly that extends almost completely to the ground. This design ensures that water shedding off the fly is directed far away from the breathable inner mesh and the tent floor’s seams.
Structural Features That Prevent Water Ingress During Downpours
While fabric specifications are vital, the physical shape and geometry of your tent play an equally important role in shedding water. A tent with steep wall angles, such as a dome or a tunnel design, allows heavy rain to run off quickly rather than pooling on flat sections of the roof. This rapid runoff reduces the time water spends in contact with the fabric, minimizing the chance of seepage. Furthermore, an aerodynamic, low-profile structure helps the tent resist strong monsoon winds, preventing the poles from flexing excessively and causing the wet rainfly to touch the inner tent.
The design of the tent floor is another crucial line of defense against ground water. Look for a “bathtub” floor design, where the waterproof floor material extends several centimeters up the sides of the tent before meeting the wall fabric. This elevated boundary ensures that minor pooling or shallow streams of water running across the campsite cannot easily seep through the lower seams. If the seam connecting the floor to the walls sits directly on the ground, it is only a matter of time before water finds a way inside.
Additionally, evaluate the design and size of the tent’s vestibules. A well-designed vestibule provides a covered transition zone where you can store wet shoes, muddy packs, and damp outer layers without bringing them into the dry sleeping area. The vestibule zippers should be protected by storm flaps—strips of waterproof fabric that fold over the zipper track—to prevent wind from driving rain directly through the zipper teeth.
Campsite Selection and Setup Adjustments for Tropical Storms
Even the most advanced waterproof tent can fail if it is pitched in a poorly chosen location. When camping during the monsoon season, your first priority should be selecting elevated ground with natural drainage. Avoid pitching your tent in depressions, dry creek beds, or at the base of slopes where water naturally pools during a sudden downpour. Look for slightly sloped areas or sandy soils that allow water to drain away quickly, reducing the risk of your tent becoming surrounded by a miniature lake.
Once you have selected a site, the quality of your pitch is paramount. You must use all available guylines to tension the rainfly fully, pulling it taut and away from the inner tent body. If the rainfly sags and makes contact with the inner mesh, water will transfer directly into your living space through capillary action. Keep the fabric taut by adjusting the tensioners, and check them periodically, as some fabrics naturally stretch and loosen when they become thoroughly wet.
Using a ground cloth or footprint is highly recommended to protect your tent floor from abrasions and damp ground, but it must be used correctly. The footprint should be slightly smaller than the actual floor dimensions of your tent. If any part of the footprint extends beyond the edges of the rainfly, it will act as a funnel, catching rainwater and directing it straight underneath your tent floor, where it will pool and eventually seep through.
Maintenance and Drying Protocols for High-Humidity Environments
To preserve the waterproof capabilities of your tent over multiple seasons, proper post-trip maintenance is essential, especially in Singapore’s warm, humid climate. After returning from a rainy camping trip, never leave your tent packed away in its storage bag while wet. The combination of moisture, heat, and lack of airflow creates the perfect breeding ground for mold and mildew, which can permanently damage the polyurethane coatings and cause the seam tape to peel away.
When cleaning your tent, use a soft sponge and clean, cold water to gently wipe away mud, sand, and organic debris. Avoid using harsh household detergents, dish soaps, or washing machines, as these can strip away the durable water repellent (DWR) coating on the exterior of the fabric. If you must use soap, choose a specialized tech wash designed specifically for outdoor gear. Once clean, hang the tent to dry completely in a shaded, well-ventilated area out of direct sunlight, as prolonged exposure to ultraviolet rays can degrade the synthetic fibers.
Over time and with frequent use, you may notice that water no longer beads up on the surface of the rainfly, or that minor leaks develop along the seams. This is a natural part of gear wear and tear. You can easily restore the tent’s performance by applying an aftermarket DWR spray to the exterior fabric and using a liquid seam sealer on any peeling sections of the interior seam tape. Always follow the manufacturer’s instructions for application and curing times to ensure a proper bond.
When to Upgrade or Supplement Your Shelter System
Even with meticulous care, every tent eventually reaches the end of its functional lifespan. If you notice that the interior polyurethane coating has become sticky, is flaking off like dandruff, or emits a strong, sweet, vinegar-like odor, the waterproofing has permanently degraded, and the tent is no longer reliable for wet-weather use. Similarly, if the seam tape is peeling off extensively across the entire tent, it may be more practical to upgrade your shelter rather than attempting to re-tape every single seam.
If you frequently camp during the monsoon season but want to continue using your lightweight Naturalhike tent, consider supplementing your setup with a heavy-duty overhead tarp. Investing S$30 to S$80 in a high-quality tarp to pitch over your entire campsite provides an invaluable secondary barrier against torrential rain. This setup not only keeps your tent dry but also creates a spacious, dry outdoor living area where you can cook, move around, and store gear without being confined to the inside of your tent.
For those who plan to camp regularly in extreme, sustained wet weather with high winds, transitioning to a dedicated, heavy-duty 3-season or 4-season shelter may be the best long-term decision. These tents typically feature thicker fabrics, stronger pole structures, and more robust waterproofing systems designed specifically to withstand prolonged exposure to harsh elements, giving you peace of mind when the tropical storm warnings are active.
Frequently Asked Questions (FAQ)
Can I use a standard summer tent for monsoon camping in Singapore?
Using a standard summer tent designed primarily for fair weather and maximum ventilation is highly risky during Singapore’s monsoon season. These tents often feature large mesh panels and minimalist rainflies that do not offer full coverage, leaving them vulnerable to wind-driven rain and heavy splashback. Without a high hydrostatic head rating and robust seam sealing, a basic summer tent is highly likely to leak, making it unsuitable for severe tropical downpours.
How do I test my tent's waterproofing before a trip?
To test your tent’s waterproofing safely, set it up fully in a backyard, on a spacious balcony, or in a clean outdoor area. Use a garden hose with a gentle spray nozzle to simulate a steady rain shower, directing the water over the roof and sides of the rainfly for several minutes. Afterward, inspect the interior carefully for any signs of dampness, water droplets, or pooling, paying close attention to the seams, zippers, and corners. Avoid using high-pressure pressure washers or scrubbing the fabric, as this can damage the delicate waterproof coatings.

Community discussion
Share your experience or ask a question. Comments are reviewed before publication.