
To maximize safety on unlit sections of the Park Connector Network (PCN) at night, cyclists should select high-quality micro-prismatic or glass bead bicycle stickers decals and apply them strategically on the frame, forks, and moving parts. This approach ensures 360-degree passive visibility to motorists and pedestrians when active lights are insufficient or out of sight. While active front and rear lights are essential, they project light in specific, narrow directions. High-grade reflective decals provide critical passive visibility, catching the ambient light from streetlamps, oncoming cyclists, and crossing motorists at intersections. This ensures you remain visible from angles that active lights often miss, especially when navigating the winding, tree-canopied paths of the PCN.
Understanding Visibility Needs on Unlit PCN Sections
Singapore’s Park Connector Network offers an incredible resource for night cycling, but its lighting conditions vary. While some stretches are brightly illuminated, other segments wind through dense nature parks, canal banks, or coastal paths where ambient light is minimal. In these dark zones, a cyclist can easily blend into the shadows, becoming virtually invisible to pedestrians, runners, and other path users.
The primary challenge on the PCN is lateral and diagonal visibility. Many PCN routes intersect with minor roads, driveway entrances, and pedestrian crossings. When you cross these junctions, your active front and rear lights point perpendicular to oncoming traffic, leaving your side profile completely dark. Passive reflection addresses this vulnerability.
Products mentioned in this guide
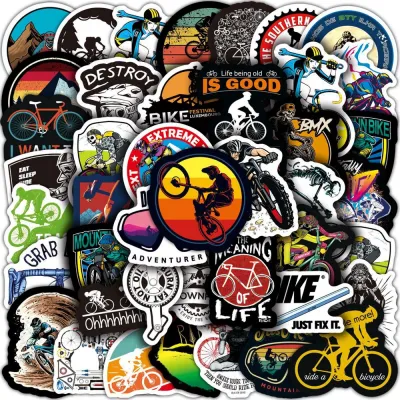
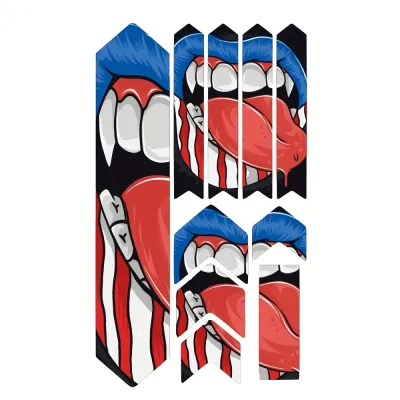
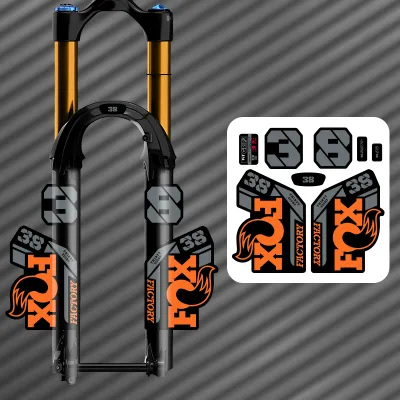
Prices are valid at publication and may change. Please refer to the product page for the latest price.
Unlike active lights that rely on battery power, reflective decals operate on retroreflection. They do not emit light; instead, they bounce light from external sources—such as car headlights or the headlamps of other path users—directly back to the source. This means their effectiveness depends heavily on the angle and intensity of the incoming light. By understanding these sightline dynamics, you can choose and position your decals to ensure you are seen from every possible angle.
Types of Reflective Bicycle Stickers Decals
Choosing the right bicycle stickers decals requires looking closely at the underlying technology and material specifications. Not all reflective stickers are created equal, and understanding how different materials handle light will help you select the most durable and visible options for your night rides.

Prismatic vs. Glass Bead Reflective Materials
Reflective decals generally fall into two categories based on their optical structure: glass bead and micro-prismatic. Glass bead technology uses microscopic glass spheres embedded in a vinyl backing to scatter light. While glass bead decals are highly flexible and easy to apply to curved surfaces, they tend to scatter light in a wider, less concentrated cone. This makes them highly visible at close range but less intense from a distance.
In contrast, micro-prismatic decals utilize tiny, precision-engineered three-sided prisms to bounce light back. This structure returns light in a highly concentrated, tight beam directly to the source, resulting in a significantly brighter reflection. Because of this high efficiency, prismatic decals are excellent for long-distance visibility. However, the prismatic layer makes the material thicker and stiffer. When selecting prismatic decals, check the manufacturer’s specifications for flexibility, as some heavy-duty sheets may resist conforming to tight frame curves and are better suited for flat tubes or wide forks.
High-Visibility Colors and Shapes
The color of your bicycle stickers decals plays a dual role in your safety, affecting how visible you are during the day and how brightly you reflect light at night. White or silver decals typically offer the highest retroreflective performance because they do not absorb light wavelengths. Fluorescent yellow and green are also excellent choices, as they provide exceptional daytime conspicuity under overcast skies or shaded PCN canopy while maintaining high reflectivity after dark.
For rear-facing areas of your bike, red decals are the standard choice. Using red on the back of your frame or seat stays immediately communicates your direction of travel to trailing cyclists and motorists, aligning with universal traffic safety conventions.
Beyond color, the shape and pattern of your decals matter. Instead of random, scattered stickers, look for continuous strips or geometric shapes. Applying long, clean lines of reflective tape helps other path users instantly recognize the distinct silhouette of a bicycle, allowing them to react faster than they would to a single, ambiguous point of light.
Strategic Placement for 360-Degree Visibility
To get the most out of your reflective decals, placement must be deliberate. Simply applying stickers anywhere on your bike will not guarantee safety; you need to target the specific zones that face oncoming traffic and lateral path users.
Frame, Fork, and Rear Stays Positioning
Your bike’s main frame offers the largest surface area for static reflective coverage. To address lateral visibility at road crossings and junctions, apply continuous reflective strips along the sides of the top tube and down tube. This creates a large, bright horizontal profile that catches the headlights of vehicles approaching from the side.
For frontal and rear angles, focus on the fork legs and the seat stays. Placing high-intensity reflective decals on the front forks ensures that vehicles turning into your path can spot you early. Similarly, applying red or white reflective strips along the rear seat stays provides a clear visual marker for anyone approaching you from behind.
When applying decals to these areas, be careful to avoid covering critical components. Keep stickers clear of frame serial numbers, cable routing guides, and structural inspection points. Additionally, ensure the decals do not interfere with brake calipers or any moving cables that could rub against the reflective surface and wear it down prematurely.
Wheels, Pedals, and Moving Components
One of the most effective ways to capture attention in the dark is through biomotion—the visual recognition of human movement. The human brain is highly sensitive to the specific patterns of a pedaling cyclist. By placing reflective decals on moving parts, you create a dynamic, flashing effect that is instantly recognizable.
Applying reflective rim strips or specialized spoke reflectors is a highly effective strategy. As your wheels spin, these decals create a continuous, glowing circle of light that is impossible to miss from the side. Ensure that any rim-applied decals are designed specifically for disc-brake wheels, or apply them strictly to the non-braking portion of rim-brake wheels to avoid catastrophic brake failure.
You can also apply small, durable reflective decals to your pedal bodies, crank arms, or the heels of your cycling shoes. The up-and-down motion of your feet creates a distinct, rhythmic visual cue that immediately signals “cyclist” to anyone behind or ahead of you. Because these areas are subject to constant movement, dirt, and road spray, look for decals with heavy-duty, weather-resistant adhesives that can withstand centrifugal forces and vibration.
Application and Maintenance for Long-Lasting Reflectivity
The tropical climate of Singapore—characterized by high humidity, intense heat, and sudden heavy downpours—presents a challenging environment for adhesive decals. Proper application and regular maintenance are essential to ensure your reflective stickers do not peel, fade, or lose their reflectivity over time.
Before applying any decals, thorough surface preparation is critical. Begin by washing your bike frame with soapy water to remove general dirt and road grime. Once dry, clean the specific application areas with isopropyl alcohol or a mild, paint-safe degreaser to remove any residual oils, chain lube, or wax. Any leftover residue will prevent the adhesive from bonding fully, leading to premature peeling at the edges.
When applying the decals, work slowly from one end to the other to prevent trapping air bubbles. For curved tubes, you can use a flexible plastic squeegee or a soft cloth to press the decal firmly into place, smoothing out any wrinkles. If you are working with stiffer micro-prismatic materials, applying gentle warmth with a hairdryer can make the vinyl more pliable, helping it conform to the frame’s contours. Once applied, let the adhesive cure in a dry, shaded area for at least 24 hours before taking your bike out into the humid air or wet weather.
To maintain long-lasting reflectivity, incorporate decal checks into your regular bike maintenance routine. Clean the reflective surfaces gently using a soft microfiber cloth and mild bicycle wash; avoid using abrasive brushes or harsh chemical solvents that can scratch the reflective micro-structures or degrade the adhesive. Inspect the edges of the decals periodically for signs of lifting or peeling. If a decal begins to lift, it is best to replace it promptly, as dirt will quickly collect under the adhesive and destroy its bonding capability.
Frequently Asked Questions (FAQ)
Can reflective stickers replace mandatory front and rear bike lights?
No, reflective bicycle stickers decals cannot replace active front and rear lights. Under local regulations, cyclists riding at night must equip their bicycles with a functioning front white light and a rear red light or reflector. Reflective decals are passive safety devices; they do not emit light on their own and only work when illuminated by an external source, such as a car’s headlights. If you are riding on a completely pitch-black section of the PCN with no ambient light or oncoming traffic, your decals will remain dark. They are designed to supplement, not replace, your active lighting system by providing 360-degree visibility and a secondary safety backup.
How do I remove old reflective decals without damaging the bike paint?
Removing old or worn-out reflective decals requires patience to protect your bike’s clear coat and paint. Start by using a hairdryer on a low-heat setting to warm the decal for a few seconds. The gentle heat softens the hardened adhesive, making the vinyl much easier to peel. Slowly pull the decal back at a sharp angle, rather than pulling straight up, to minimize stress on the paint. If any sticky residue remains on the frame, apply a small amount of a mild, paint-safe adhesive remover or isopropyl alcohol to a microfiber cloth and gently rub the area. Avoid using metal scrapers, harsh industrial solvents, or acetone, as these can permanently damage your bicycle’s paint and clear coat.

Community discussion
Share your experience or ask a question. Comments are reviewed before publication.