
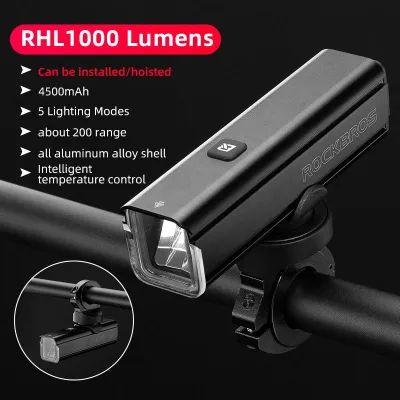
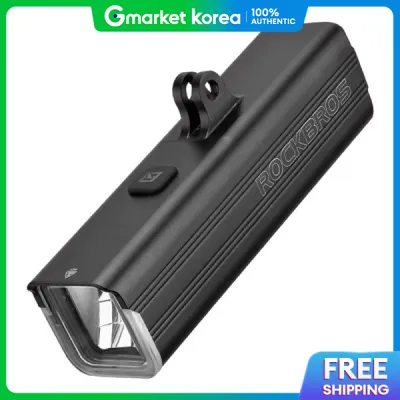
Selecting the right front bike light is crucial for safe cycling, especially when navigating mixed-use paths or unlit trails. The ROCKBROS RHL1000 is a popular choice among cyclists looking for a high-output headlight. To determine if this model fits your riding habits, it is essential to understand its key technical specifications—such as brightness, battery capacity, weatherproofing, and mounting options—and how they translate to real-world performance.
Brightness and Beam Pattern: Navigating Dark Trails and PCNs
When evaluating a high-output light like the ROCKBROS RHL1000, brightness is often the primary specification. However, riders must differentiate between peak lumens (the maximum burst of light) and rated lumens (sustained output). To ensure accurate expectations, verify the official ANSI FL1 rating on the packaging rather than relying solely on the model number.
The shape of the beam is just as important as its intensity. A wide flood beam is highly beneficial on Singapore’s Park Connector Network (PCN), where pedestrians and cyclists share the path, as it enhances peripheral vision. Conversely, a focused spot beam is better for darker, unpaved trails where you need to spot obstacles far ahead.
Products mentioned in this guide
Prices are valid at publication and may change. Please refer to the product page for the latest price.
Because this light mounts on handlebars, managing the vertical spread of light is essential. An anti-glare cut-off feature is a critical safety specification to look for. This design shapes the beam to direct illumination downward onto the pavement, preventing you from blinding oncoming pedestrians and cyclists in shared recreational spaces.
Battery Life and Charging: Matching Runtime to Your Route
A bike light is only as reliable as its power source. Battery capacity is measured in milliampere-hours (mAh), but actual runtime depends heavily on the brightness mode you select. Running the light at its maximum lumen setting will drain the battery rapidly, often reducing runtime to a fraction of what is achievable on lower, energy-saving modes.

Modern cycling lights increasingly utilize USB-C charging ports, which offer faster power delivery and allow you to use standard cables. When planning your routes, a built-in battery level indicator is an invaluable feature. This visual cue helps you monitor remaining power in real time, allowing you to dim the light to a lower setting if you need to stretch the battery life to reach your destination.
It is also important to recognize that environmental factors and wear affect battery performance over time. High ambient temperatures can accelerate battery degradation, while natural aging gradually reduces the overall capacity. To plan your rides safely, check the manufacturer’s discharge curves in the user manual to understand how the light’s output behaves over several hours of continuous use.
Weather Resistance and Build: Riding in Singapore's Climate
Riding in Singapore means preparing for sudden, heavy tropical downpours. To ensure your light survives these conditions, you must look closely at its Ingress Protection (IP) rating. An IPX rating indicates how well the device resists water entry. Cyclists should check the exact IPX rating printed on the device label; for instance, a rating of IPX6 is designed to handle high-pressure water sprays, while IPX7 can withstand temporary immersion.
Even with a high IPX rating, the physical integrity of the seals is what keeps water out of the delicate internal electronics. The charging port cover and the power button are the most common failure points where moisture and high humidity can seep in. Regularly inspecting these rubber seals to ensure they are fully seated and free of debris is a simple but vital maintenance step to prevent water damage during a sudden storm.
The material of the light housing also plays a dual role in weather resistance and performance. Many high-output lights use aluminum alloy housings because metal is highly effective at dissipating the heat generated by high-lumen LEDs. While aluminum adds a bit of weight compared to lightweight polymer plastics, it prevents the light from overheating and automatically stepping down its brightness.
Mounting and Compatibility: Securing the Light to Your Bike
A powerful bike light is of little use if it cannot be securely attached to your handlebars. Before purchasing, you should measure your handlebar’s diameter at the mounting point—typically ranging from 22.2 mm to 31.8 mm or 35 mm on modern bicycles. Check the specifications of the included mount to ensure its adjustable range matches your handlebars, and use any included rubber spacers to achieve a snug fit without scratching or damaging your bike’s frame.
The type of mounting mechanism you choose should align with your daily cycling routine. Quick-release mounts allow you to slide the light off in seconds, which is highly convenient for commuters who need to remove the light when parking in public spaces to prevent theft. On the other hand, tool-required bolt-on mounts offer a more permanent, theft-resistant installation, though they make charging the light directly on the bike more of a chore if you cannot bring the bicycle indoors.
Regardless of the mounting style, a vibration-resistant grip is essential for maintaining a stable beam. Riding over speed bumps, tactile paving, or rough gravel paths can cause a loose mount to slip, pointing your light directly at the ground or up into the sky. Ensuring the mount features a textured rubber lining or a secure locking lever will keep the beam focused exactly where you need it, ensuring a safe and predictable ride.
Frequently Asked Questions (FAQ)
Can I use this light as a power bank for my phone?
Some modern bike lights feature a reverse-charging function, but you must check the product manual for the specific model to verify if it supports power bank output and what device types are compatible. If your light does support this feature, keep in mind that charging a smartphone will rapidly deplete the light’s internal battery, leaving you with significantly less runtime for illumination. Additionally, transferring power can generate excess heat, so it is best reserved for emergency situations rather than routine charging.
How do I clean the lens without damaging the coating?
To maintain optimal light output and preserve the beam pattern, the lens must be kept clean and free of road grime. Use a soft, clean microfiber cloth dampened with mild soapy water to gently wipe away dirt. Avoid using harsh chemical solvents, glass cleaners, or abrasive materials, as these can permanently degrade the plastic lens or strip away specialized anti-glare coatings. Always consult the manufacturer’s care instructions in the user manual before applying any cleaning agents.

Community discussion
Share your experience or ask a question. Comments are reviewed before publication.