
Finding the right balance between maintaining an active cycling routine and preserving the limited floor space of a typical Singapore home can be challenging. A bike trainer offers an excellent indoor workout, but its physical footprint can quickly overwhelm a living room or bedroom. Choosing the right setup requires understanding how different trainer designs occupy space, how to measure your home safely, and how to store the equipment out of sight when your workout is complete.
Comparing Bike Trainer Types and Floor Space
Wheel-on trainers clamp onto the rear axle of your bicycle, keeping the rear wheel intact. They typically feature a wide, A-frame metal base to ensure stability while riding. While the base itself can take up a footprint of roughly 60 centimeters by 60 centimeters, many models allow the frame to fold flat when not in use. However, during operation, the total length of your setup includes the entire length of your bicycle, which can easily exceed 1.7 meters.
Direct-drive trainers require you to remove the rear wheel and mount the bicycle frame directly onto a cassette attached to the trainer. Direct-drive units are generally heavier and have a more substantial physical presence. Some designs feature wide, stabilizing legs that fold inward, reducing the storage footprint significantly. During use, they occupy slightly less total length than a wheel-on setup because the rear wheel is removed, but they are wider at the base to handle high-torque efforts.
Products mentioned in this guide
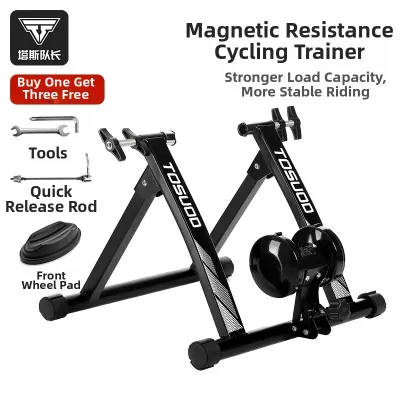
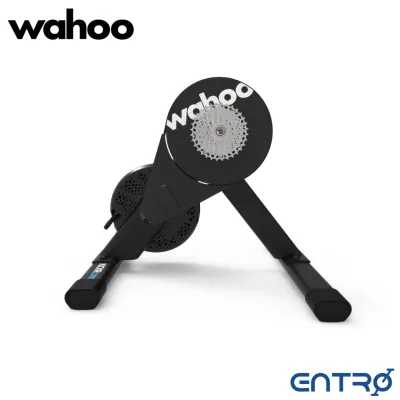
Prices are valid at publication and may change. Please refer to the product page for the latest price.
Rollers consist of three drums on a rectangular frame where the bicycle sits freely. They require no mounting hardware but demand excellent balance. Rollers have a long, narrow footprint, often around 1.4 meters long by 50 centimeters wide. While some rollers fold in half for storage, their operational footprint cannot be adjusted, and they require a clear zone on both sides to prevent falls.
Remember that the bicycle itself dictates the final space requirements. Handlebars on mountain bikes can span up to 780 millimeters, while road bike drop bars are narrower, usually between 400 millimeters and 440 millimeters. The wheelbase of your specific frame size will also dictate the exact length of floor space you must clear. Always verify the exact physical dimensions provided by the trainer manufacturer rather than relying on general category estimates.
Measuring Your Space for Safe Operation
Safe indoor training requires more than just matching the physical dimensions of the trainer and bicycle. You must account for an operational clearance zone. This includes at least 50 centimeters of open space on at least one side of the bicycle to allow for safe mounting and dismounting. Additionally, ensure there is sufficient lateral clearance for your knees and hips, as well as the natural side-to-side sway that occurs during high-intensity pedaling.

Indoor cycling generates significant body heat and sweat. You will need space to position a high-velocity floor fan in front of your bike to facilitate evaporative cooling. Ensure the setup is positioned at a safe distance from walls, curtains, and fragile furniture to prevent sweat damage and accidental contact. If your home has low ceilings or overhead ceiling fans, verify that your head clearance is safe when you are standing up on the pedals.
Consider how you will transport the equipment. A direct-drive trainer can weigh upwards of 15 to 25 kilograms. Measure the width of your hallways, doorways, and tight corners to ensure you can safely carry this heavy, awkward load from your training area to your designated storage spot without scraping walls or straining your back.
Evaluating Foldable and Compact Features
When space is at a premium, the ease of folding and unfolding your trainer determines how often you will actually use it. Look for trainers equipped with quick-release folding legs that lock securely into place with a distinct click or pin mechanism. Some high-end direct-drive models feature legs that fold completely flush against the main body, reducing the width to a fraction of its operational size.
Integrated carrying handles are highly beneficial for moving heavy trainers. Some compact designs also feature removable parts, such as a detachable front wheel riser block or a removable cassette assembly, which can help the unit fit into shallower storage spaces.
Be aware of the trade-offs that come with ultra-compact or lightweight designs. Lightweight frames may slide on smooth tile floors during intense efforts or lack the stability needed for out-of-saddle climbing simulations. Furthermore, smaller flywheels on compact trainers may offer a less realistic road feel and can sometimes produce more high-pitched noise. Always check the manufacturer’s specified maximum weight limit and stability ratings to ensure the trainer can safely support your body weight and riding style.
Storing Your Equipment in a Small Apartment
Storing your trainer vertically is an excellent way to save floor space, but it must be done with caution. Some trainers are engineered with flat rear surfaces specifically designed to stand upright in a closet or utility room. Never store a trainer vertically unless the user manual explicitly states it is safe to do so; fluid-resistance trainers, for example, can leak internal silicone fluid if stored at the wrong angle, and heavy flywheels can create a tipping hazard if not properly balanced.
Utilize dedicated storage areas such as a household shelter, utility closet, or the space beneath a raised bed frame. If you must store the trainer in plain sight, consider placing it inside a multi-purpose storage bench or covering it with a heavy-duty, breathable protective cover to keep dust out of the precision bearings and electronics.
When storing the trainer, ensure it is placed on a stable, level surface where it cannot be easily knocked over by children or pets. Use a small piece of rubber matting underneath the stored unit to prevent its metal feet from scratching delicate vinyl, laminate, or parquet flooring.
Frequently Asked Questions (FAQ)
Do I need a special mat for a bike trainer in an HDB flat?
Yes, a dedicated trainer mat is highly recommended for apartment living. It performs two essential functions: protecting your flooring from corrosive sweat and grease, and dampening the vibrations generated by the trainer’s flywheel. In high-density housing, these vibrations can easily travel through concrete floors and disturb neighbors below. Look for a mat made of high-density foam or rubber that is easy to wipe clean and has non-slip properties to keep your trainer stable.
Can I leave my bike mounted on the trainer permanently?
While leaving your bike permanently mounted saves setup time, it may not be ideal for your living space or your equipment. For wheel-on trainers, leaving the tension roller pressed against the rear tire can cause flat spots and premature tire wear. For direct-drive setups, ensure the clamping mechanism is adjusted correctly to avoid unnecessary stress on the frame dropouts. Always consult both your bicycle and trainer manufacturer guidelines to verify if long-term mounting is recommended and to ensure you do not void any warranties.

Community discussion
Share your experience or ask a question. Comments are reviewed before publication.